Create Dynamic Testimonials in Breakdance (with CPT)
Learn how to easily add dynamic testimonials to Breakdance with this quick guide. Boost your site's trust factor and attract more visitors in just a few steps.
Christy Cañete
Updated August 7, 2023

Reading Time: 7 minutes
Creating a dynamic testimonials section in your website can boost your credibility and win over potential customers.
Think about it: showcasing client experiences for a product e-store, displaying student feedback for an online course, or sharing client stories for a consultancy. Each provides a proof of your output as a business or professional. But you don't want to copy and paste a section over and over again. The proper way is to create these testimonials dynamically.
In this guide, I'll walk you through integrating dynamic testimonials in Breakdance with a couple of plugins. I promise, it should only take you a few minutes to set up.
So, let’s get started!
How to Create Dynamic Testimonials in Breakdance
In this guide, let’s try to build a custom post type to display testimonials on a page. Follow the steps below:
1) Install CPT and ACF
First off, we’ll need additional plugins to quickly create custom post types.
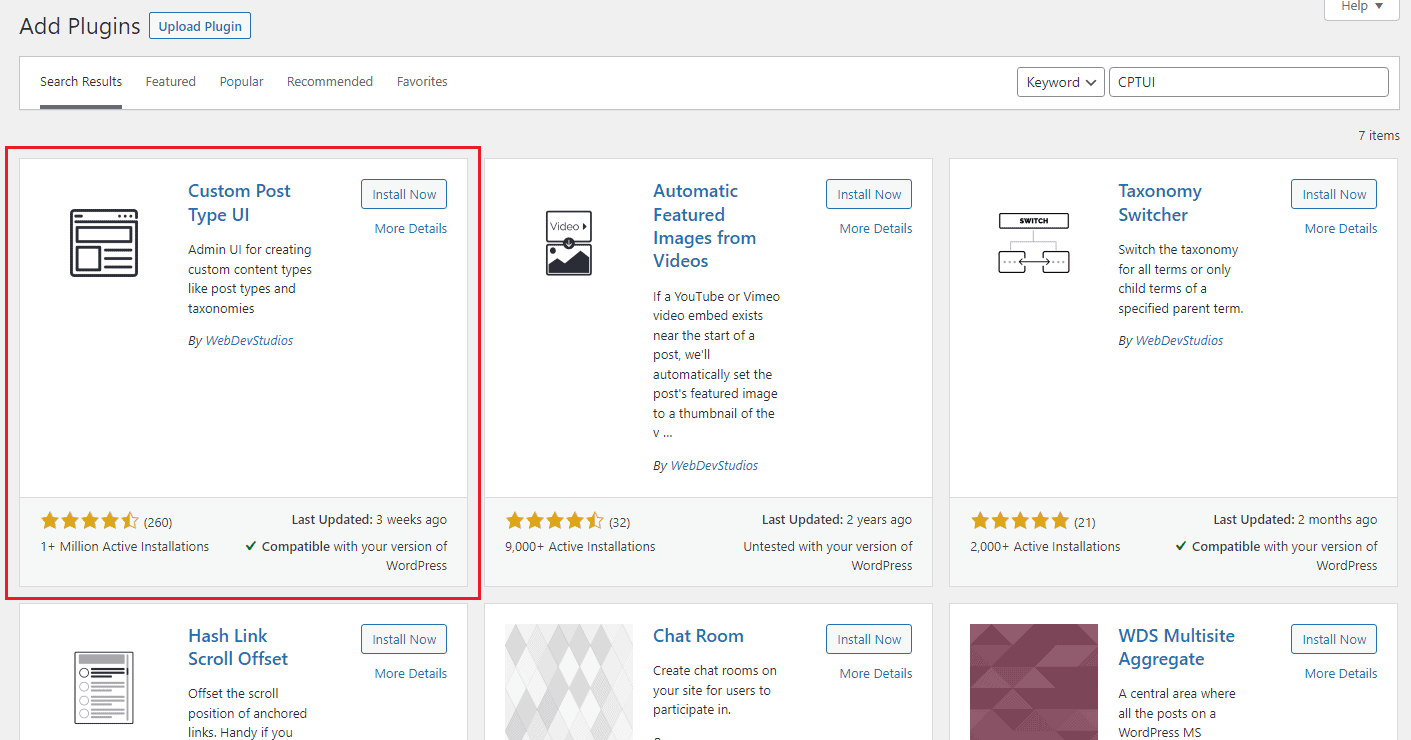
CPT or Custom Post Type UI is a WordPress plugin that allows you to create and manage custom post types and taxonomies for your website.
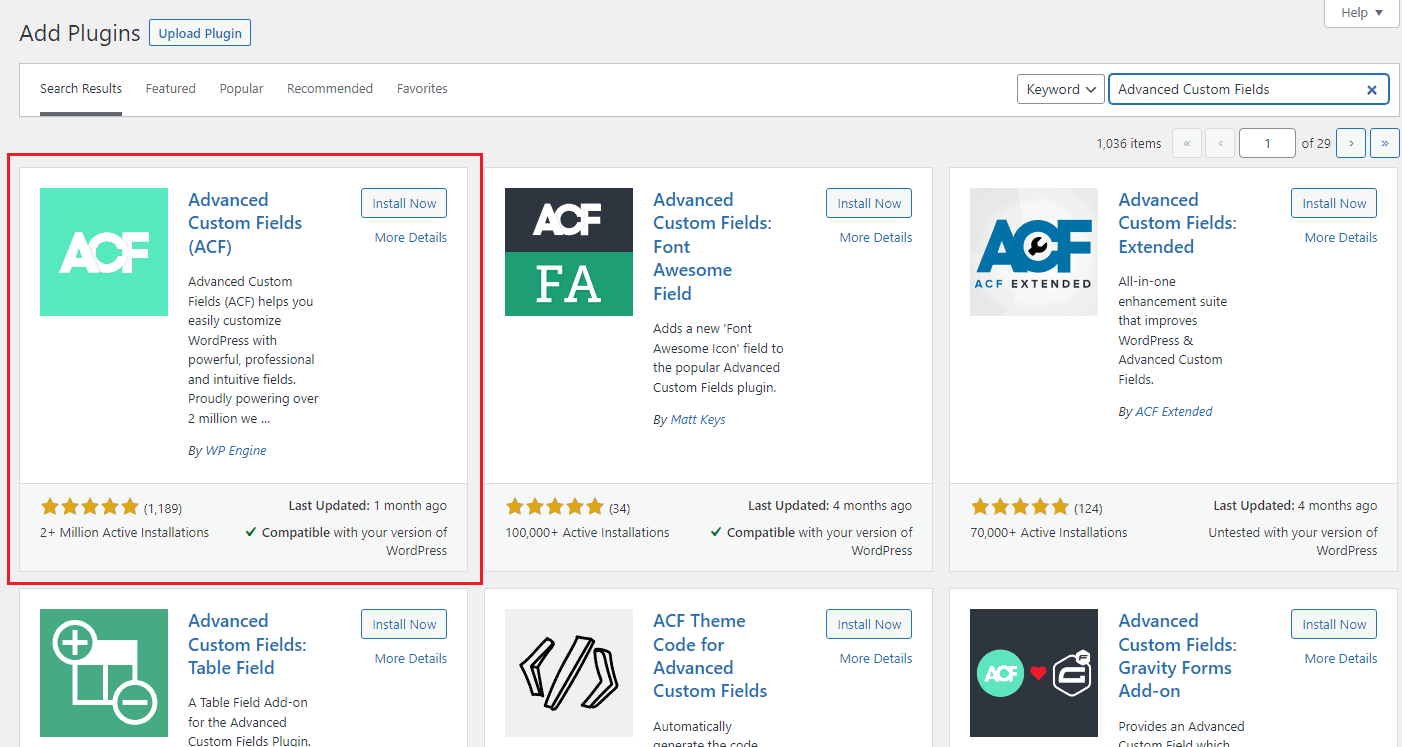
ACF or Advanced Custom Fields is another type of WordPress plugin that allows you to add custom fields for your post types. This plugin will help you later on in displaying custom field values in your Breakdance template.
So, let’s install and activate these two plugins. Navigate to Plugins > Add New and search for CPTUI and Advanced Custom Fields.
2) Create a New Post Type
Once the plugins are activated, go ahead and add a new post type.
Go to CPT UI on the left side of your dashboard. Enter your post type slug, plural label, singular label. Then, click ‘Add Post type.’
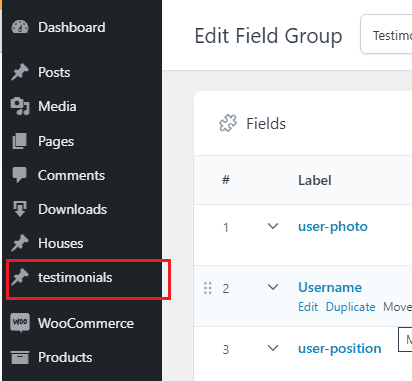
In our example, we’ll name our new post type ‘testimonial.’
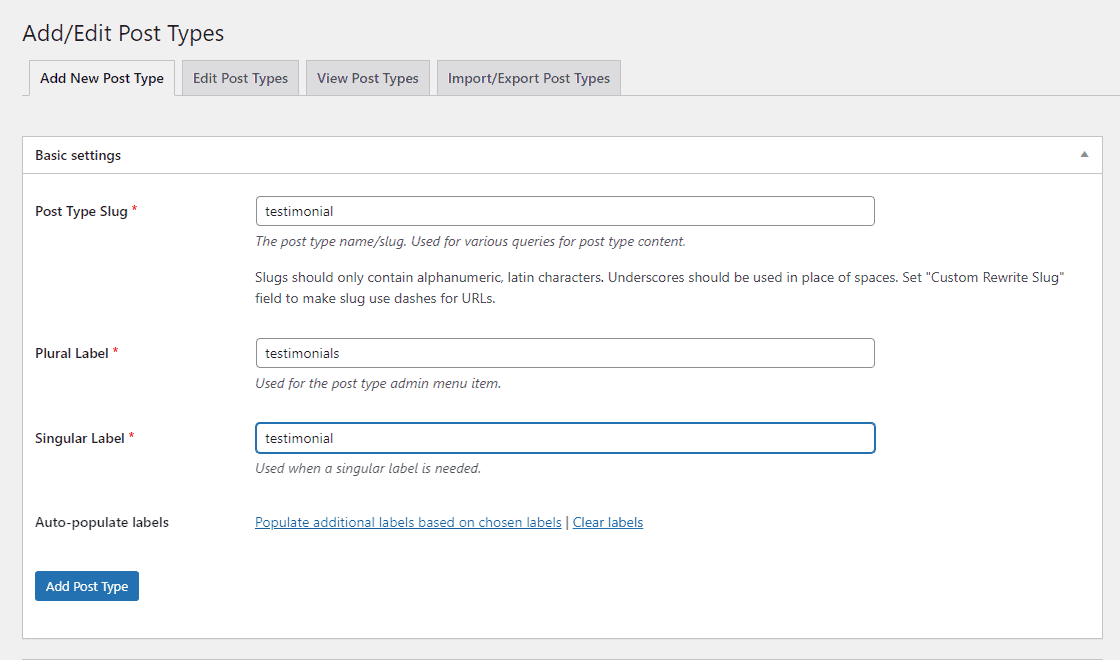
Once you’re done, a ‘testimonials’ post type should appear on the left-hand side of your dashboard.
3) Create New Fields
Next, we need to add custom fields for our testimonial post type. These custom fields will contain the attributes of our post type.
On the left side of your dashboard, head over to ACF. Click ‘Add New.’
Enter a field group title, field type, field label, and field name. To add another field group, hit ‘+ Add Field.’ Adjust the order by dragging.
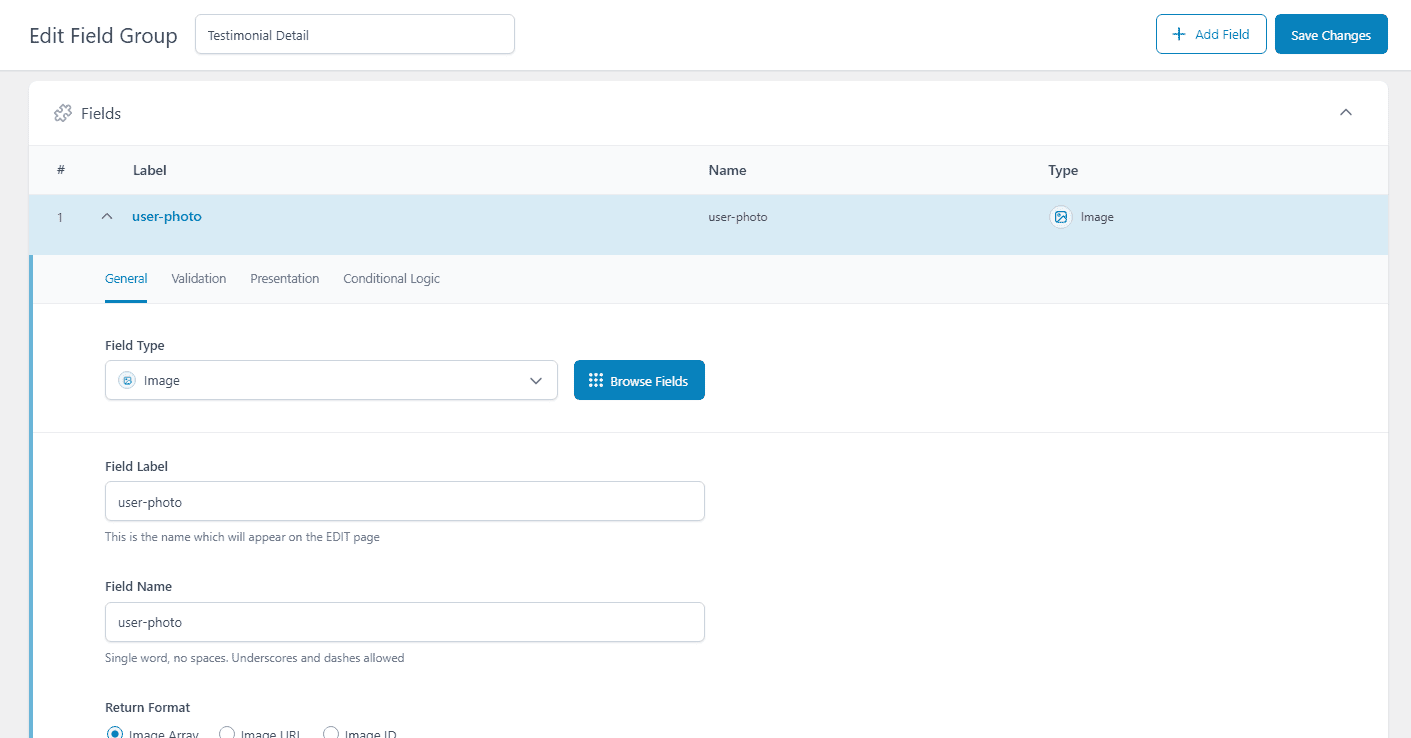
For our testimonial page, I wanted to display the user’s photo, name, company position, testimony title, testimony details, star rating, and date. So, let’s create a field for each. Make sure to choose the appropriate field type for each user data.
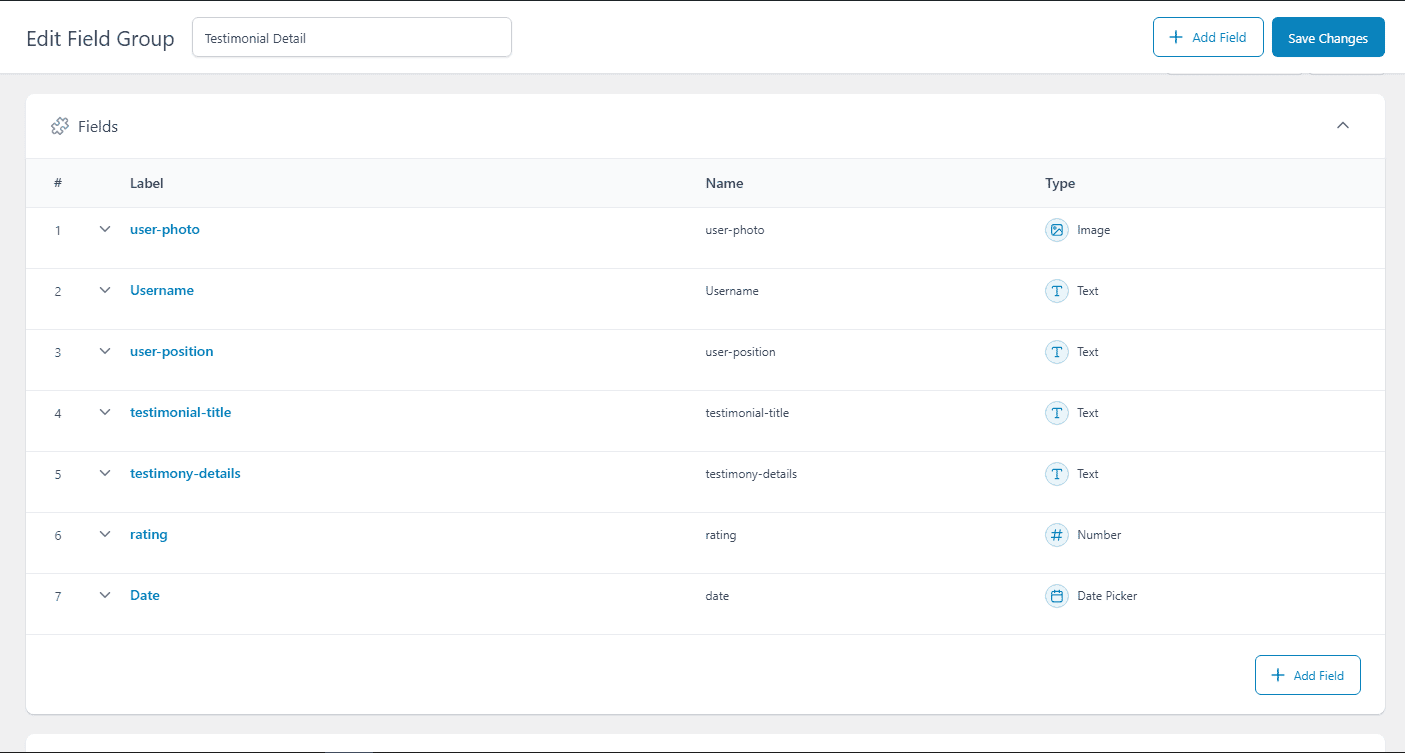
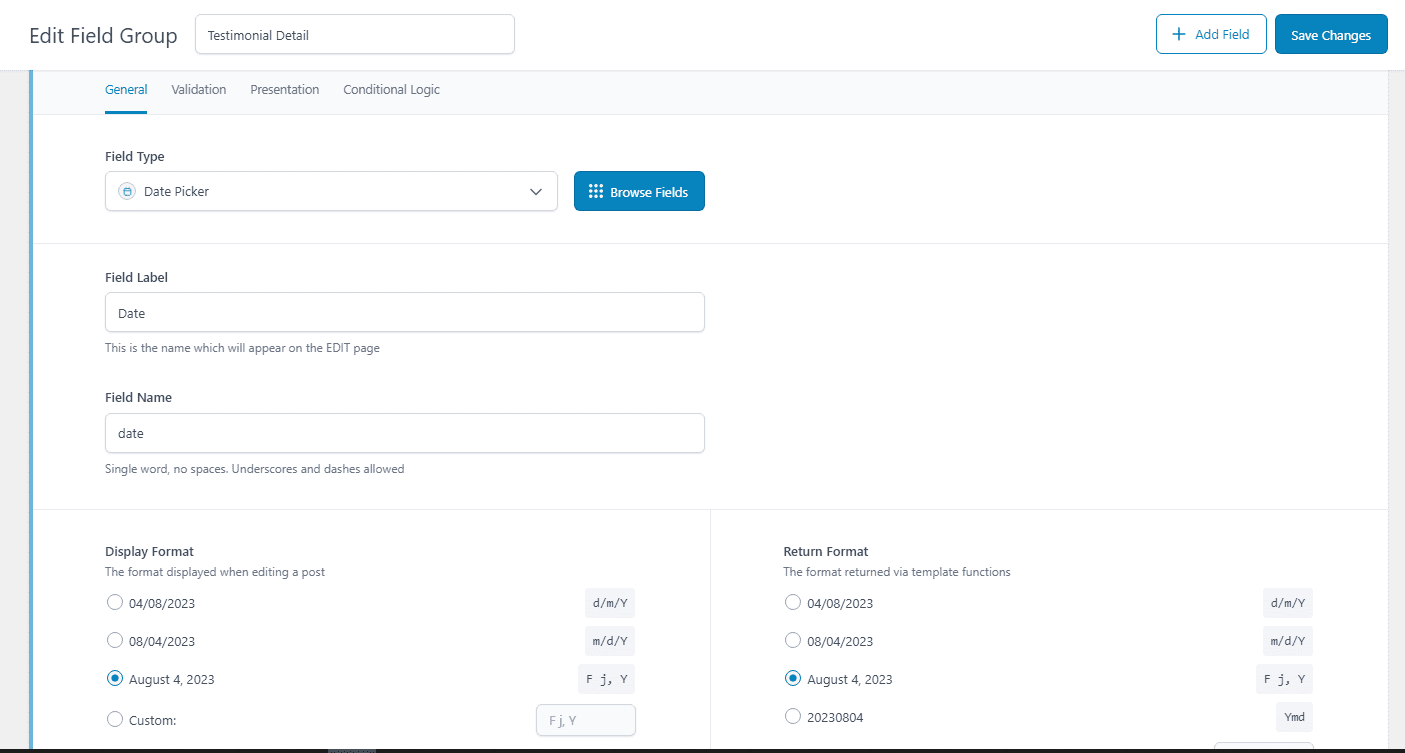
For the user photo, use an image field type. For the star rating, use ‘Number.’ For the date, use ‘Date Picker.’ Don’t forget to set the date’s display and return format.
The rest of the fields can have a text type.
Once you’re done adding new fields, make sure to set the rules within the Settings section. Post type should be equal to 'testimonial,' as shown.
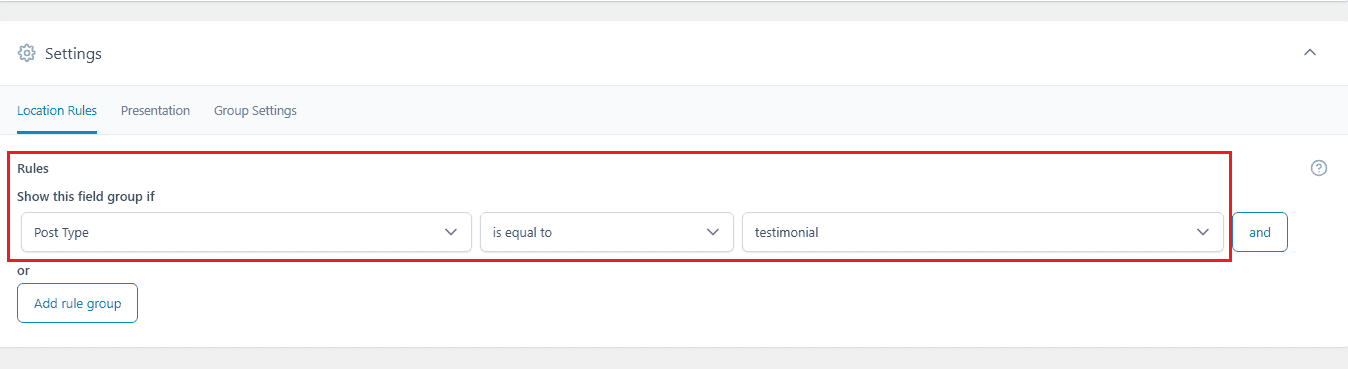
Then, click ‘Save Changes.’
4) Add a New Testimonial
Let’s now add new testimonials for our site. On the left side of your dashboard, click the testimonials > Add New. This should open a blank page on your editor.
Go ahead and enter the title of the page. Here, we can use the user’s name as the title. Keep in mind that you don’t need to edit this on Breakdance.
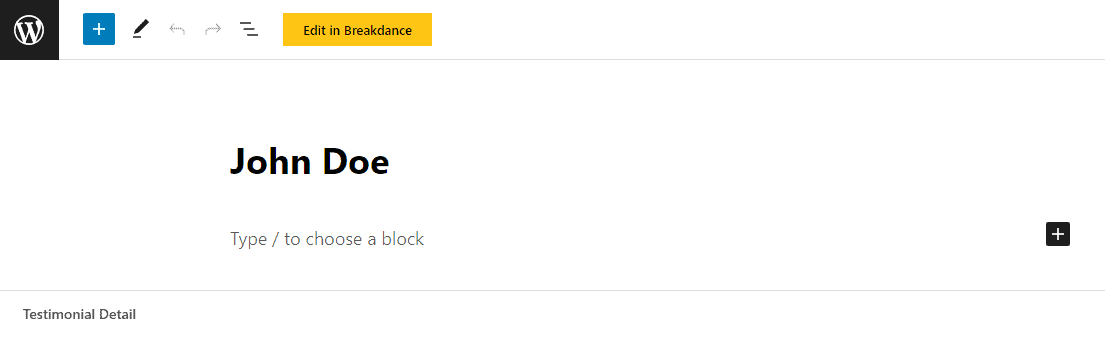
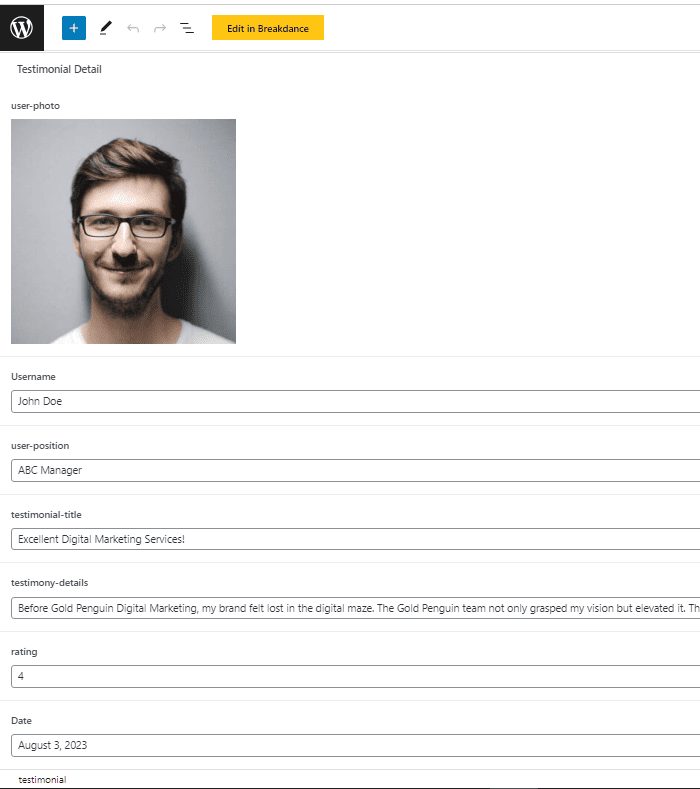
Then, below the editor, you’ll see all the custom fields you’ve previously created. Let’s upload the user’s photo and enter some dummy data, as shown.
Once you’re satisfied, click ‘Publish.’
Follow the same process to add more user testimonies.
5) Create a Testimonial Template in Breakdance
Navigate to Breakdance > Templates. Click ‘Add Template’ and choose ‘Add Custom Template.’
Then, enter the template title ‘Testimonials’ and set the location to Single/ testimonials. Click ‘Add Template.’

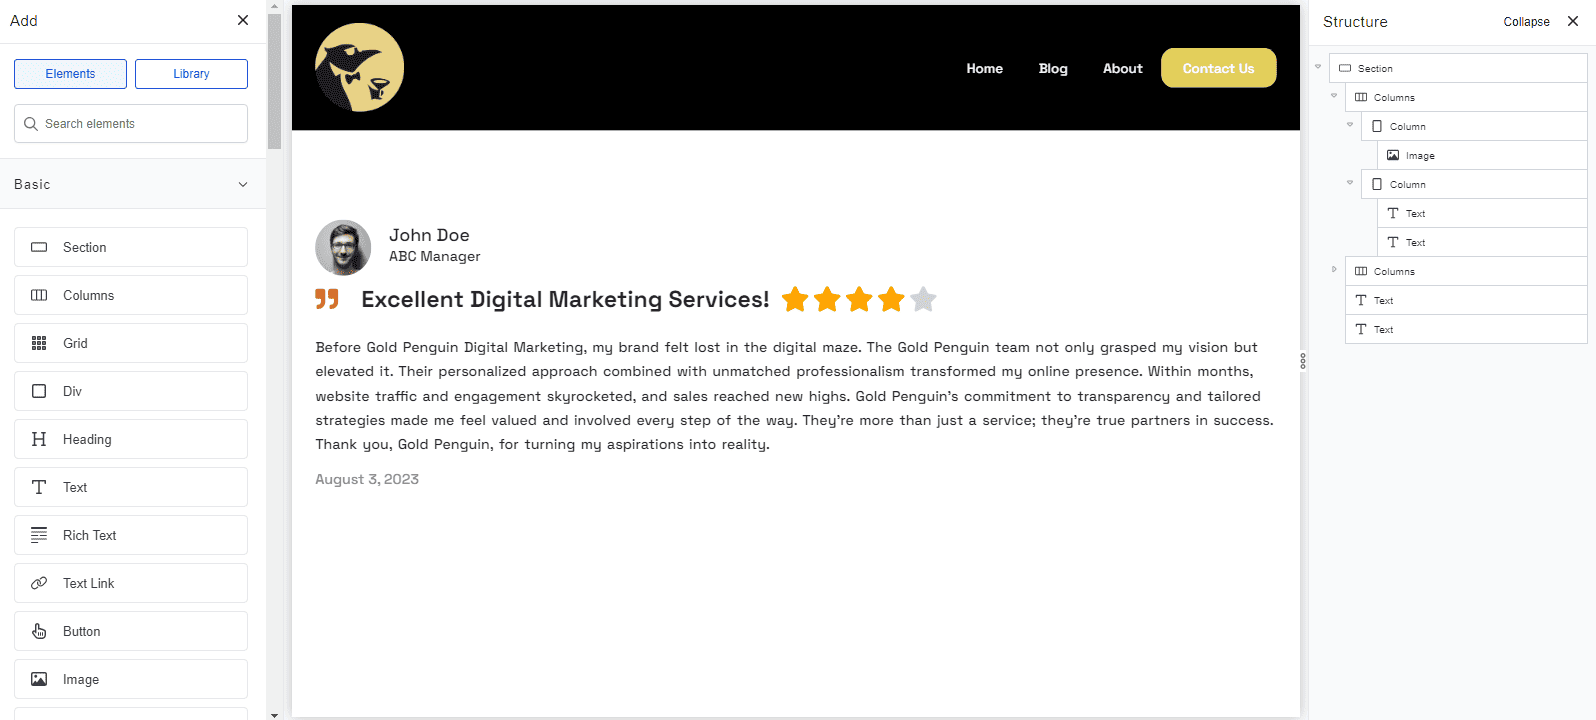
Edit your new testimonial template in Breakdance. Style it as you want.
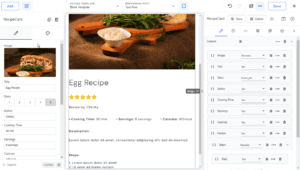
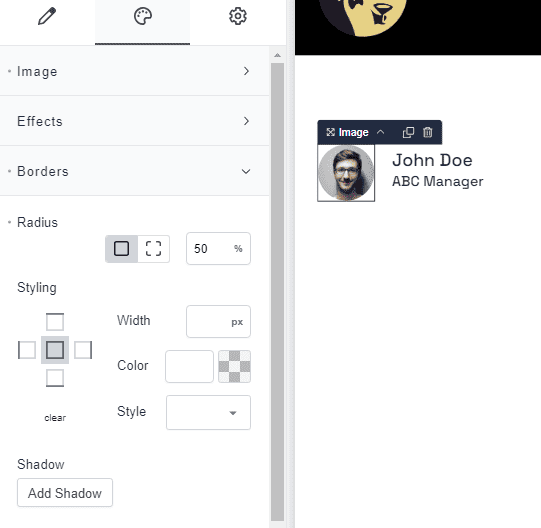
Here, I created a column to display the user’s photo, name, and title. I also edited the font size, image size, and spacing. To style the element, simply click it and adjust its attributes shown on the left side of the editor.
Here, we want to display the user info dynamically. Click the element and tap the little icon beside the label, as shown.

Within the ACF section, choose a ‘Testimonial detail’ you want to display. In this case, we want to dynamically fetch the user’s photo.

Then, I changed the user’s photo to circle by setting the radius to 50%.
Now, do the same for the rest of the user’s info.

You can add more elements and dynamically fetch the rest of the user’s details. Add texts, icons, star rating, and date. Search them up on the left side menu and click to add. Adjust the size, layout, and color as desired.
You should achieve a similar output like this:
Once you’re satisfied, click ‘Save.’
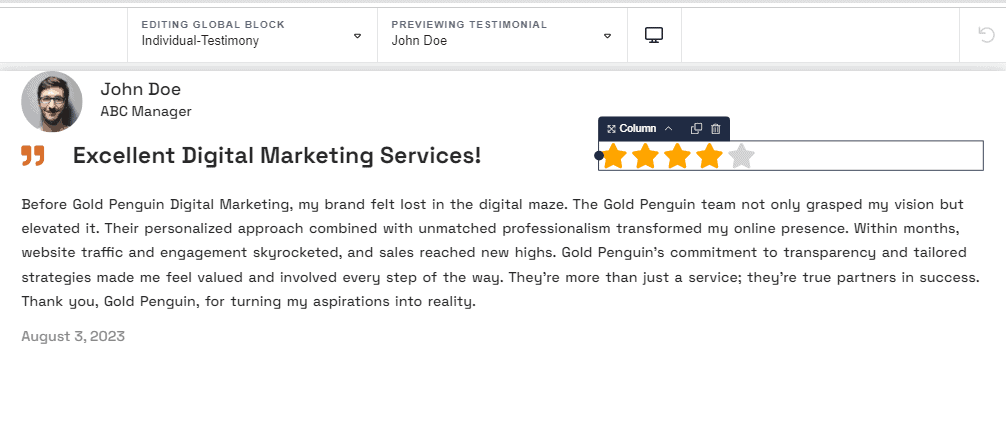
6) Create a Testimonial Global Block
The purpose of a global block is to replicate a content and use them anywhere on our site. In our case, we’ll create a testimonial global block so we can repeatedly use them anywhere on our page. So, let’s go ahead and create one.
Navigate to Breakdance > Global Blocks. Then, tap ‘Add Global Block’ and enter a block title. Let’s name it ‘Individual-Testimony.’
Edit your global block in Breakdance. Here, you can create a custom layout or just copy the Breakdance template you’ve previously created. Save the changes.
You should now have a global block that looks similar below.
7) Display Your Testimonials on Breakdance Page
Now you have the global block for your testimonials, you can add it anywhere on your existing page.
For this example, let’s try to create a new Breakdance page to display all our testimonials. Here, I added a new section and heading ‘What our clients say about us.’ But feel free to add any title you want.
Then, on the left-hand side, search for the ‘Post Loop Builder’ element. From the ‘Global Block’ dropdown menu, choose the global block you’ve just created. In this guide, our global block is ‘Individual-Testimony.’

On the side menu, go to Query > Custom > Edit Query. Set your ‘Source’ to ‘Post Types’ and ‘Include’ to the name of your custom post type.
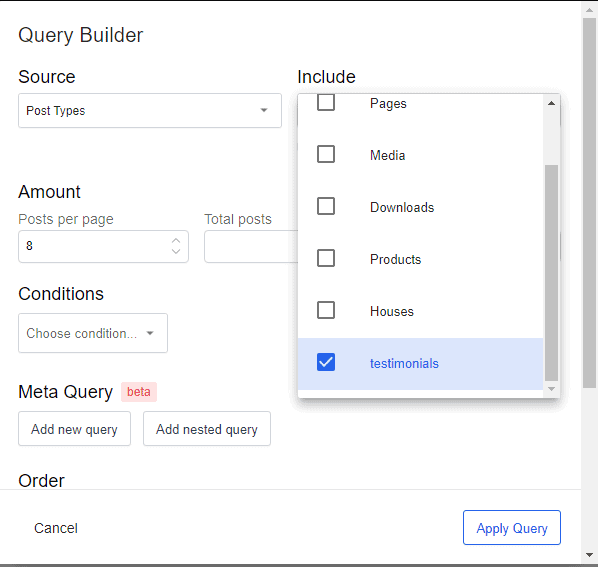
In this example, we picked ‘testimonials.’Edit the other fields as desired. Then, finish with ‘Apply Query.’
8) Edit the Style and Layout
Finally, tweak the appearance of your testimonials section by adjusting the layout or adding a background color as you like. Once you’re satisfied, click ‘Save.’
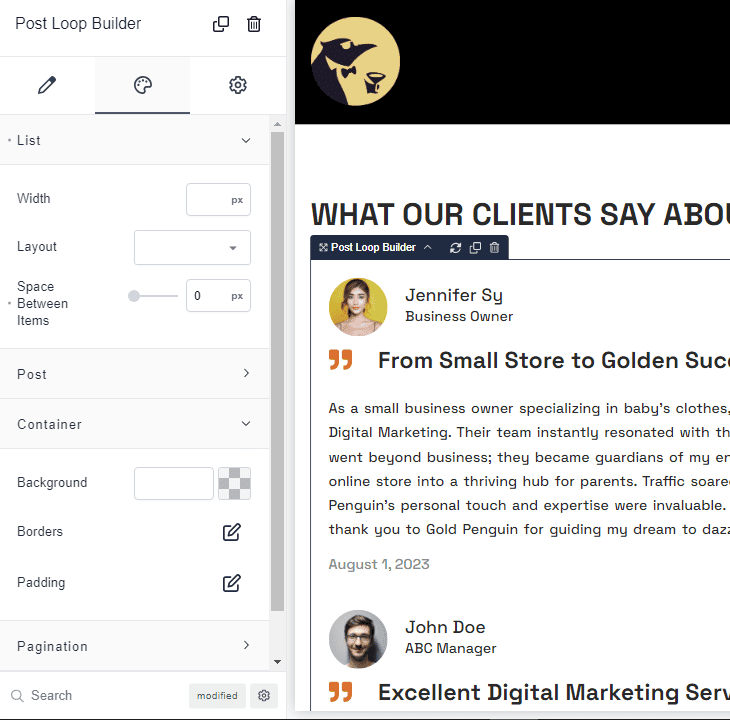
Here’s what our testimonials page looks like on our front-end:

What’s Next?
That’s a wrap!
Now that you’ve learned how to add testimonials in Breakdance, go ahead and explore other plugins to enhance your site’s user experience.
If you’re a business, try adding a Google map into your page. Or use extensions like Elements Hive to add some cool animations on your page. Keep tweaking while you learn the other powerful features of Breakdance.
Got any questions? Leave your comments below, and I'll try my best to answer you as thoroughly as I can.
Want to Learn Even More?
If you enjoyed this article, subscribe to our free newsletter where we share tips & tricks on how to use tech & AI to grow and optimize your business, career, and life.