How to Setup DMARC with Gmail for Cold Email Marketing
DMARC is an important security protocol that helps protect email recipients from spam, phishing, and other types of fraudulent or malicious email activity by verifying the authenticity of the sender's domain. It helps to ensure that only legitimate emails from a specific domain are delivered to recipients, improving the overall security and integrity of the email ecosystem.
Jonathan Garces
Updated January 4, 2023

Setting up DMARC for cold email
Reading Time: 4 minutes
Are you on the hunt for new clients for your business and have stumbled upon the term DMARC in the process of cold email prospecting? If so, you're probably wondering exactly what it is and how it can impact your efforts to reach potential customers.
DMARC helps mail administrators prevent hackers and other attackers from spoofing their organization and domain name, which means help verify your email. By using DMARC, you can help reduce the chances that your email will get caught in a spam filter. DMARC (Domain-based Message Authentication, Reporting, and Conformance) is a protocol that helps protect email senders and recipients from spam, phishing, and other types of email fraud. It enables domain owners to define in their DNS records a policy that outlines the methods used to validate email messages sent from their domain. Once established, email receivers can use it to decide whether to accept or reject a message.
So, what does this mean for you as a business owner looking to begin cold email outreach? Essentially, if you want to ensure that your emails are getting delivered to your recipients' inboxes and not getting flagged as spam or even getting completely blocked, it's important to make sure that your emails are DMARC-compliant.
While the process of setting up and maintaining DMARC can seem intimidating at first, the benefits of improved email deliverability and protection against fraud make it well worth the effort. It's also extremely easy to set up. If you’re using Gmail for your cold emailing needs, here are the steps to properly set up DMARC for an email account:
What is Cold Email Marketing?
Cold emailing is the process of sending emails to people you don’t know in order to introduce them to your product or services. It’s one method of digital marketing used by small businesses and startups to reach new customers without spending any money on ads.
The main advantages of cold emailing are that it’s relatively easy to do and it doesn’t cost anything. However, the success rate of cold email campaigns can be low, so it’s important to make sure your emails stand out.
One way to improve the chances that your cold email will be successful is to set up DMARC for for your gmail account (managed with Google Workspace).
What is DMARC?
DMARC stands for Domain-based Message Authentication, Reporting & Conformance. It’s a protocol that helps to prevent email spoofing, which is when someone uses your domain name to send fraudulent emails.
When you set up DMARC for Gmail, it will help to ensure that only emails sent from authorized addresses using your domain name will be delivered to recipients. This makes it more difficult for hackers and scammers to impersonate you or your business in emails, and helps to protect your reputation.
How does DMARC help the user?
Someone might be able to pass as your organization. They would be able to use your name, photo, same email, literally everything. DMARC says to the email server one needs to reach certain requirements in order to pass as you. This is why DMARC is super important because you need to be validated. DMARC is always spoken about alongside two other email authentication methods known as DKIM and SPF. In this article we won’t go too much into them as they’re already set up for you if you’re using Google Workspace (which we recommend).
How to Setup DMARC for Gmail
First you need to head over to where you have your DNS settings.
- Add a TXT record name
- In that TXT record, the host will be ” _dmarc”
- Make sure your type is TXT
- Set your data field to the text below
"v=DMARC1; p=none; rua=mailto:dmarc-reports@example.com"
(replace “example” with your real domain)
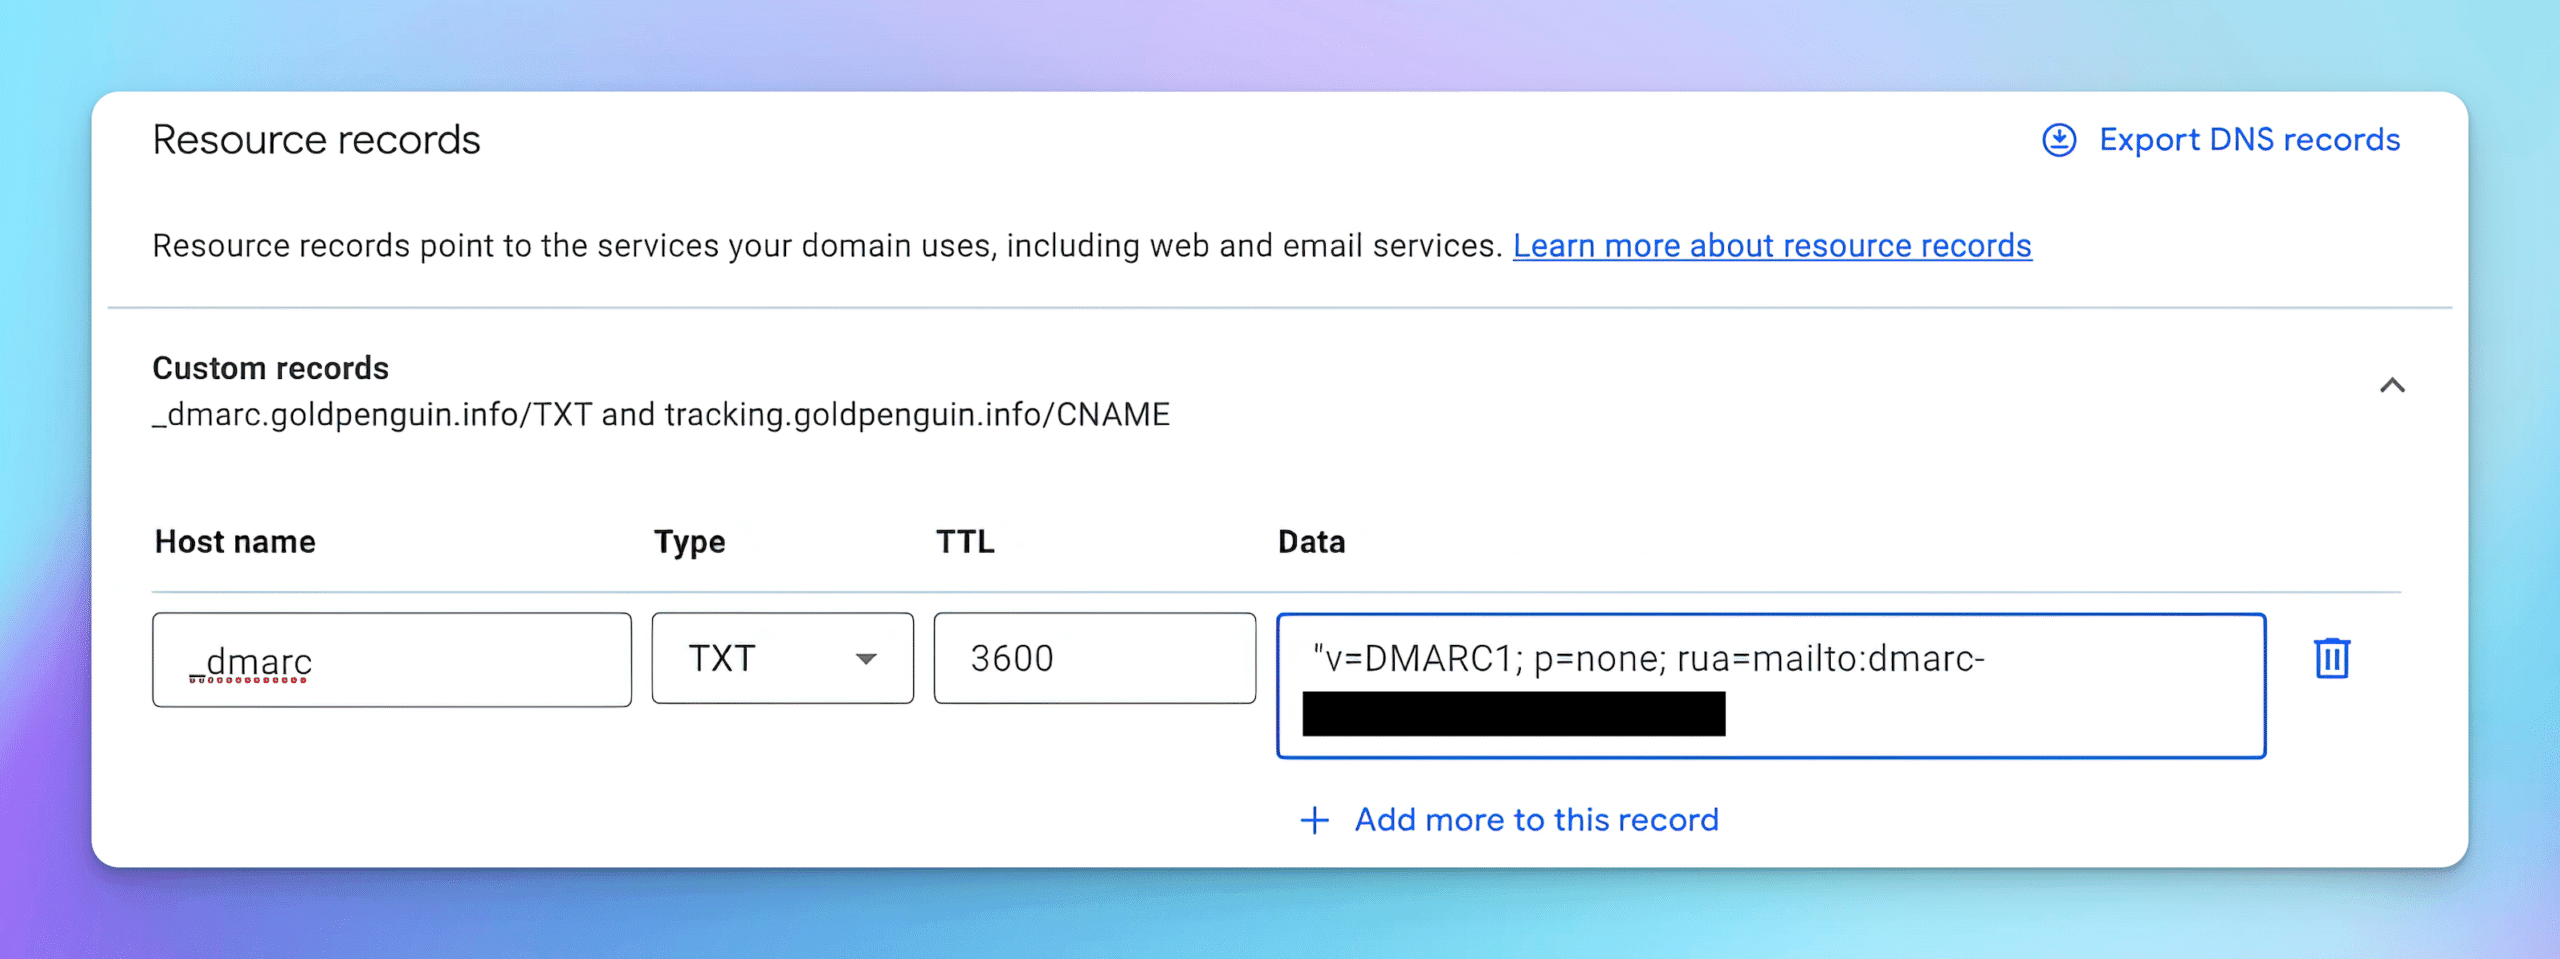
Once you have that, click save and you should have DMARC installed.
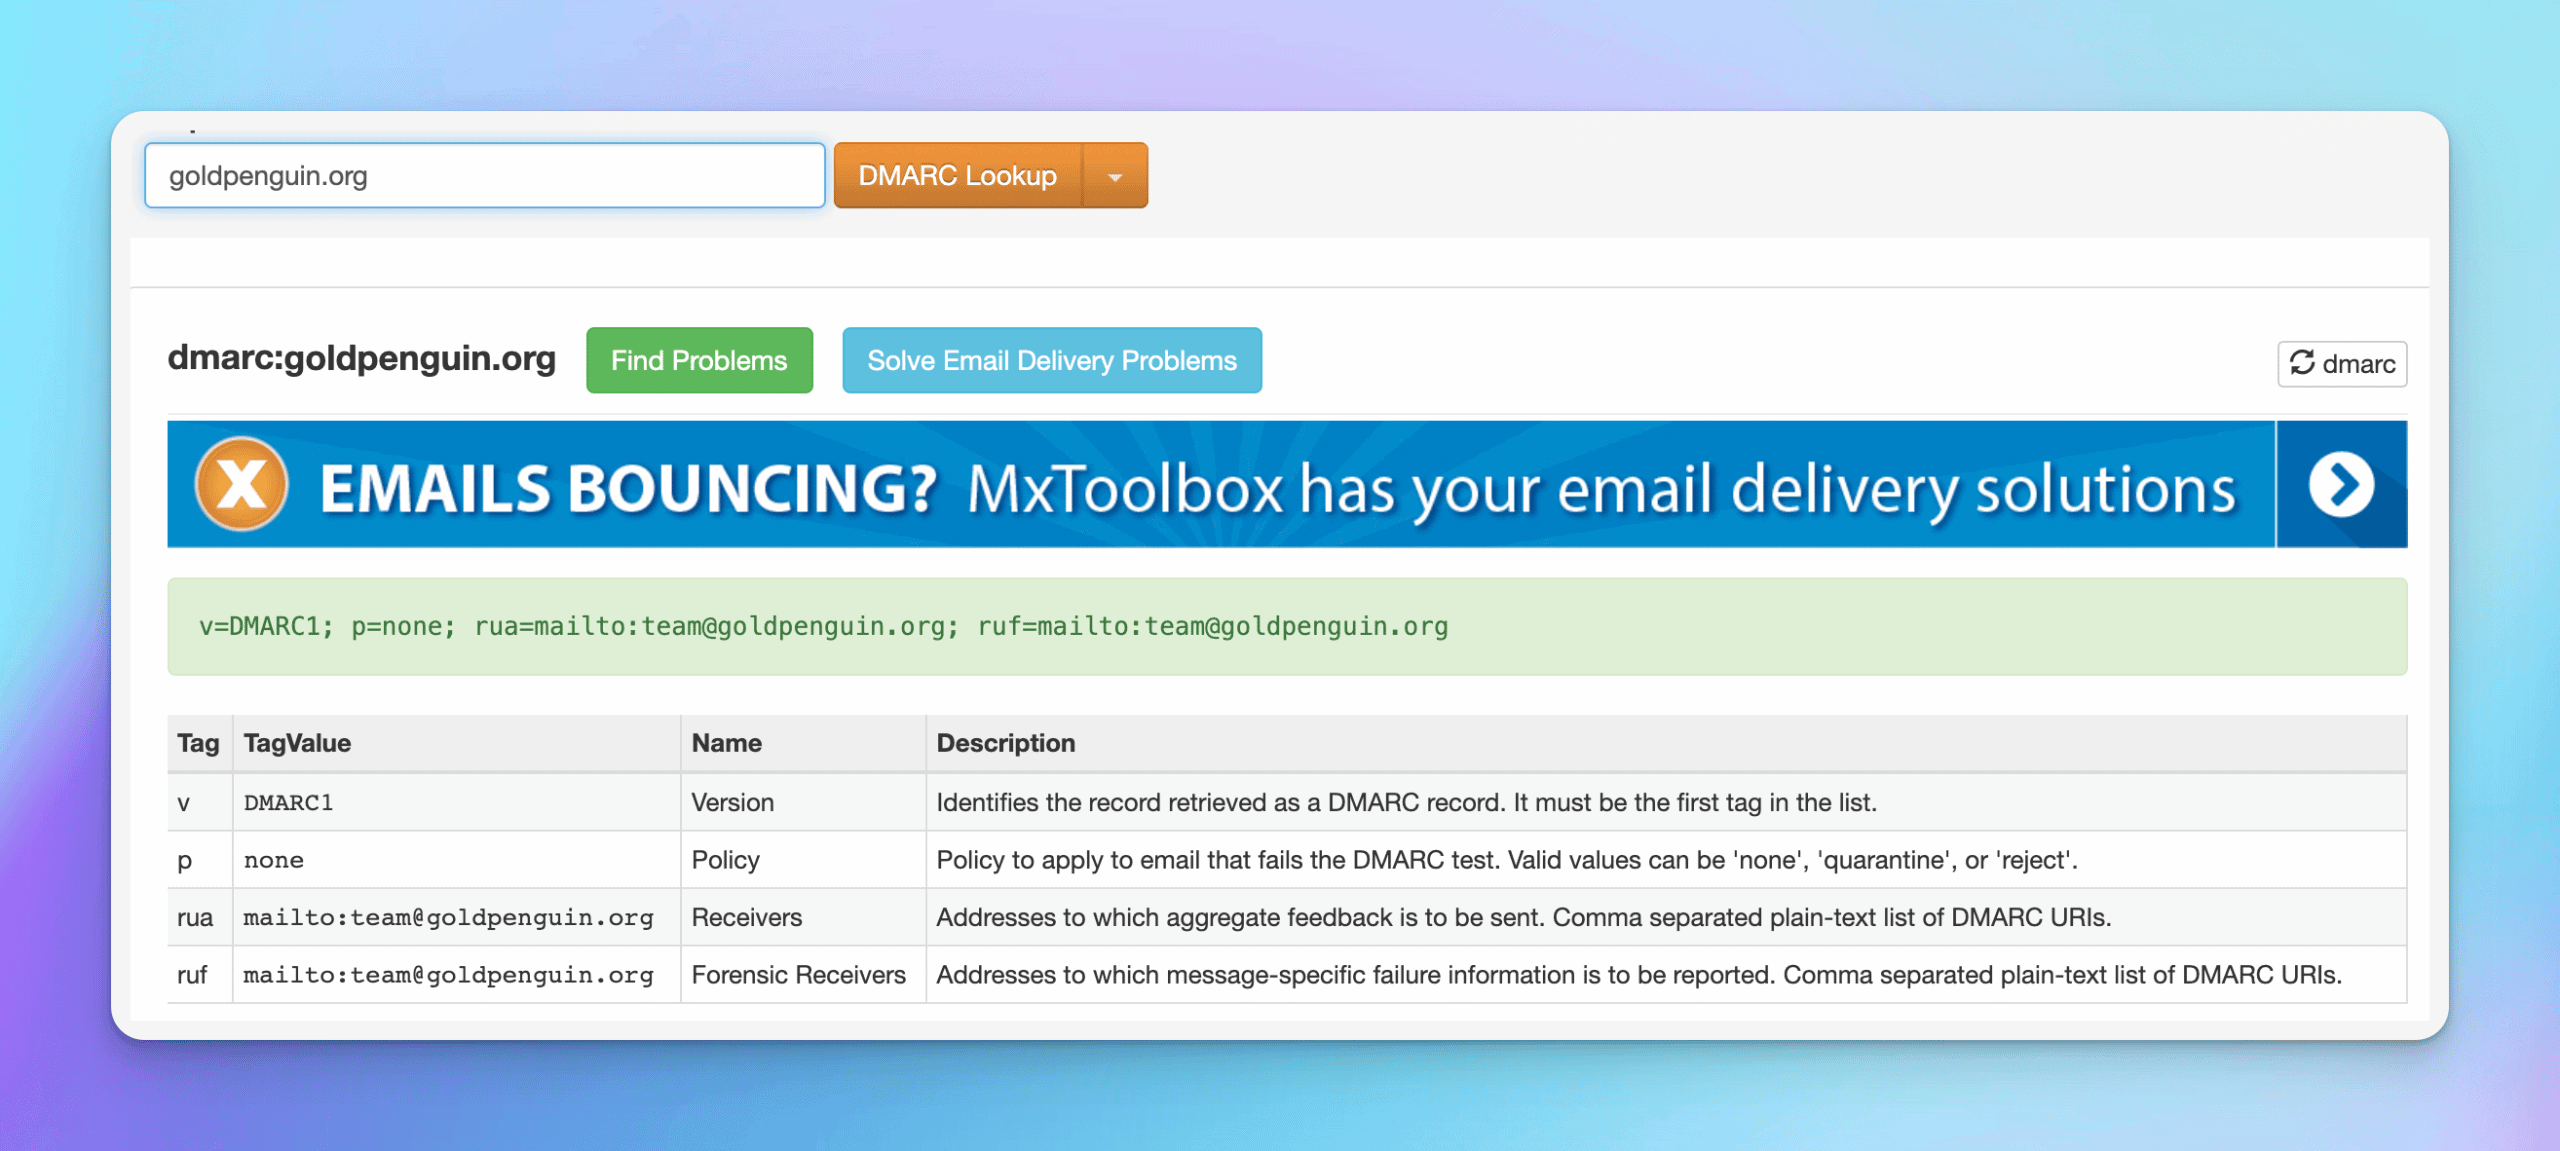
How to Check to see if you have DMARC properly setup
Simply go to MXtoolbox and input your domain in the search box. It might take 24-48 hours after saving your changes for your domain and DMARC record to be fully updated. If everything went perfectly you should see something similar to the image below.
Want to Learn Even More?
If you enjoyed this article, subscribe to our free newsletter where we share tips & tricks on how to use tech & AI to grow and optimize your business, career, and life.

