Add Animated Particlejs Backgrounds in Breakdance Builder
Adding a particle background could enhance your website & attract more visitors. In Breakdance it's fairly easy to add & customize!
Justin Gluska
Updated March 31, 2023
Reading Time: 6 minutes
Background particles can be a beautiful addition to any WordPress page that can really help set the tone and atmosphere of your site. If you're trying to add a javascript particles library to your WordPress site built with Breakdance, there are a few different ways you can go about it. You can use a plugin, or you can add the library without one (requiring a little bit more work).
Adding particles without a plugin will give you more control over how they look and behave on your site, but it might be slightly more complicated to set up. If you use a plugin, there are a few different options available. We'll walk you through both methods so you can choose what's best for your website!
Insert Particles using a WordPress Plugin (limited)
I've discovered a fairly new WordPress plugin called Particle Background WP that makes it super easy to add a particle background to any page or post on your site. The only caveat is the limitations it imposes on the type of particles you can use and how you can style them.
To get started, download and install the plugin from WordPress.org. Then, head to Settings > Particle Background to configure your particle settings. You can customize a few options, add some text, and enable a quick option to add to the front page or blog page of your website.
If you don't want to automatically add it, you can copy the shortcode that is generated and add it to any post or page where you want the background to show up. (using a shortcode element)
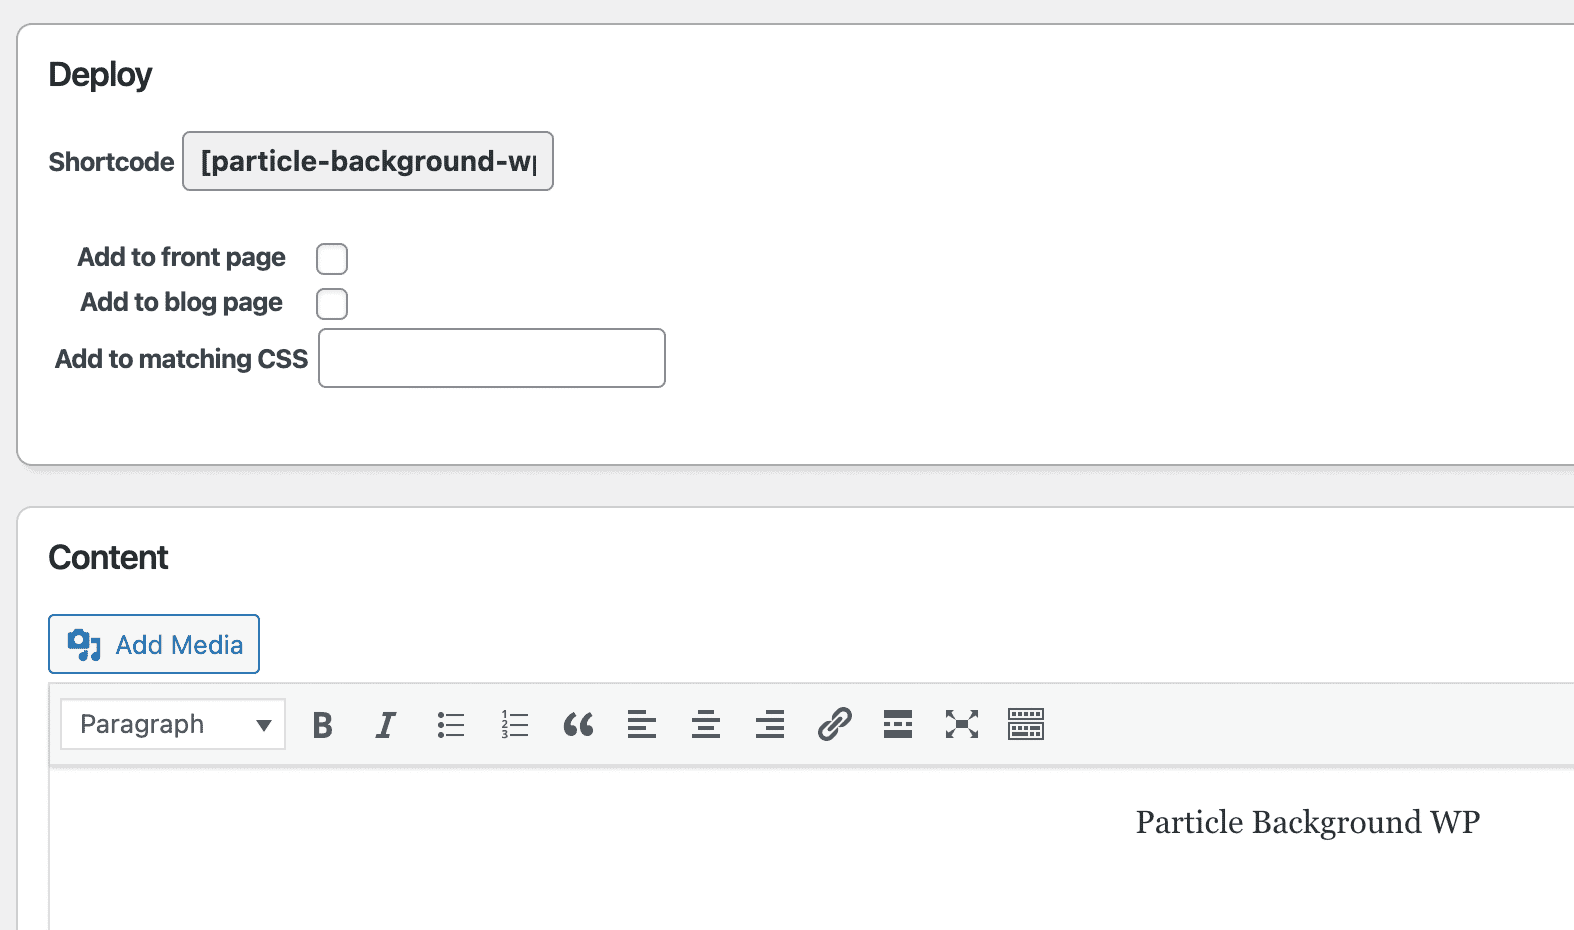
The shortcode is simply called: [particle-background-wp]
If you're looking for further complete customization, or simply don't want to use a third-party plugin, you can add the particles to your WordPress website manually.
Insert Particles Manually (full customization)
If you want to spend a couple more minutes but have full access to how your particles look, we recommend adding them manually.
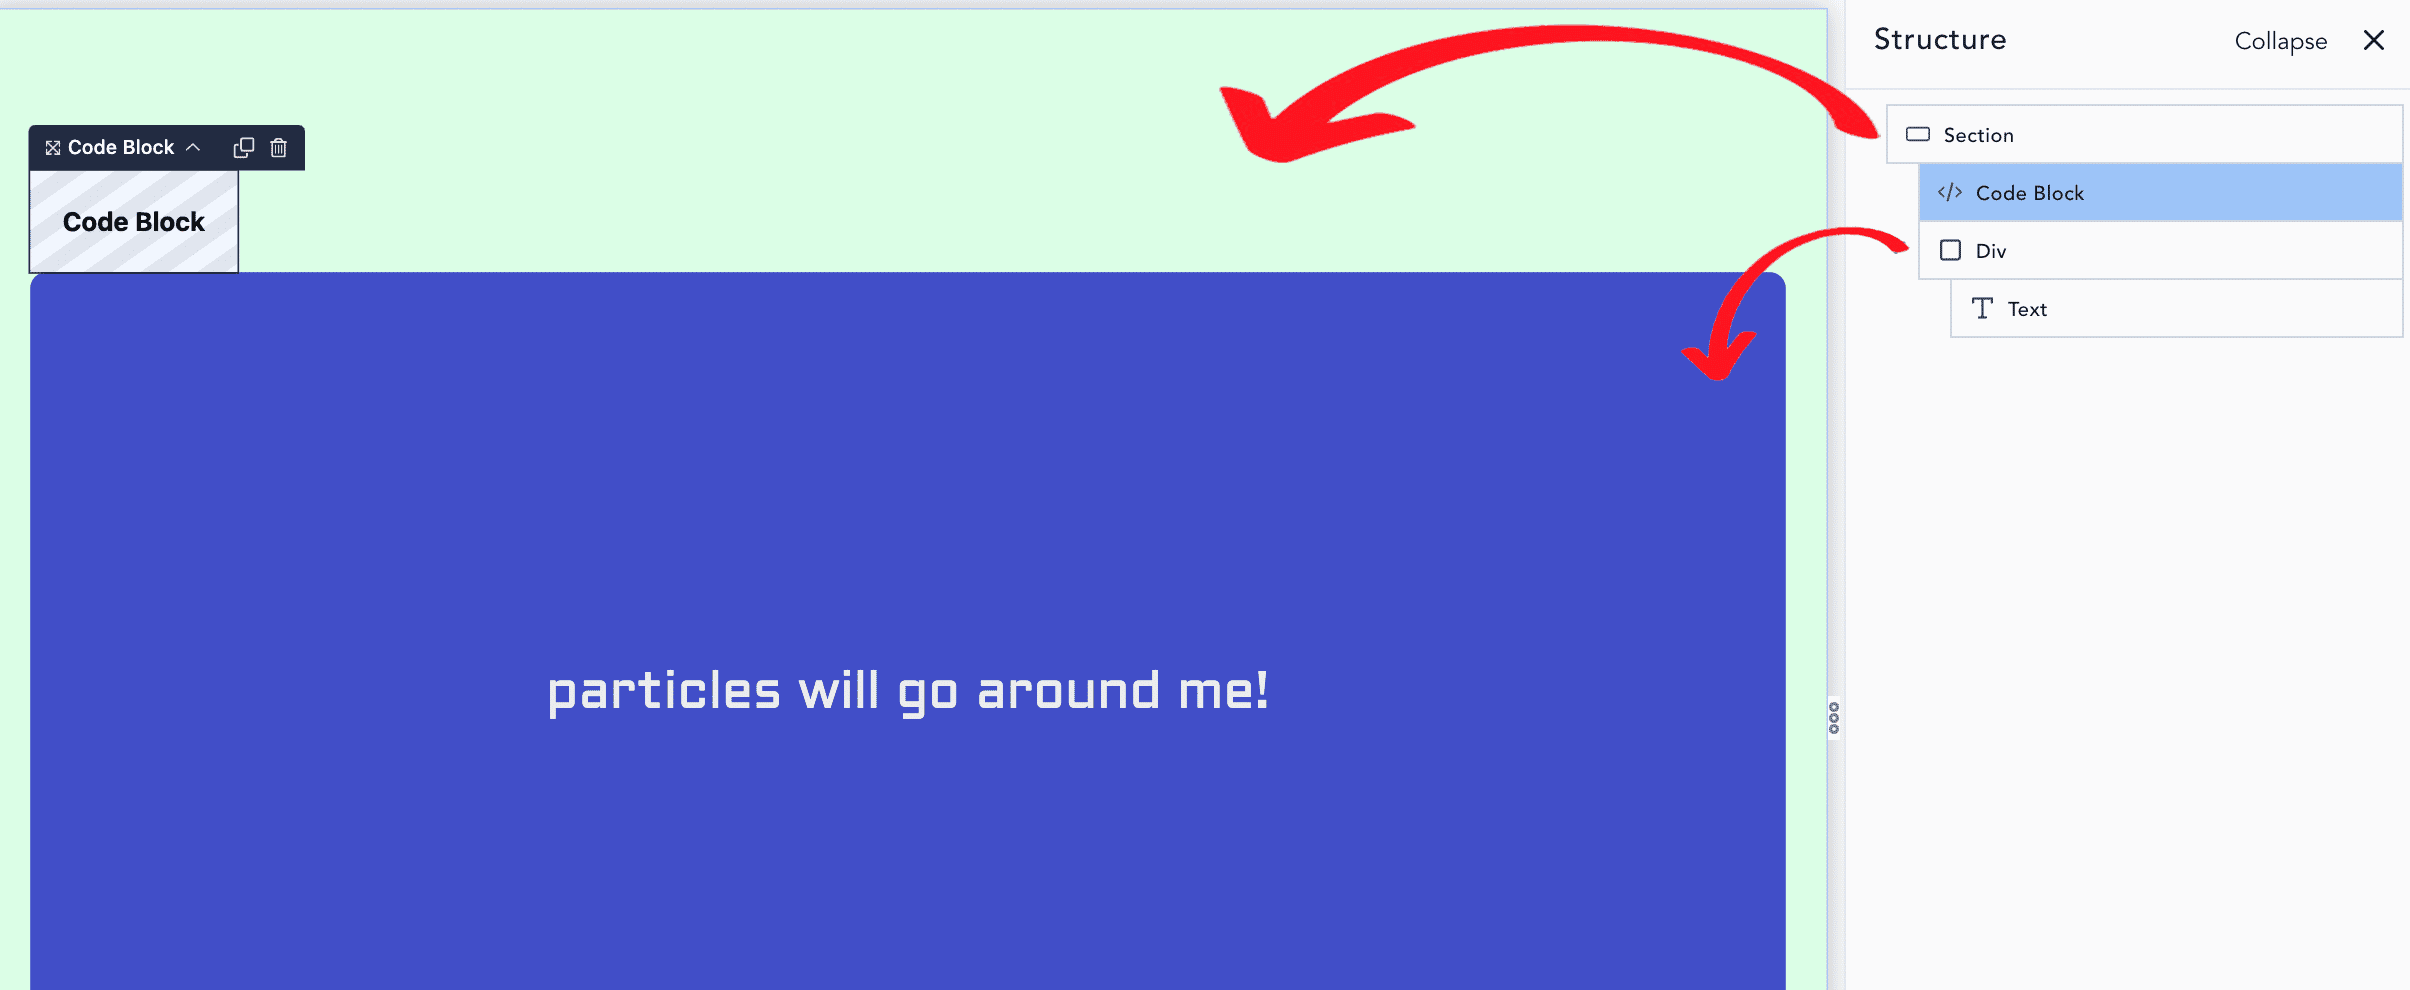
When you add particles without a plugin, you'll need to include the javascript library somewhere like a code block. Besides the code block, you'll need to create a section with a unique ID and add that section to the page you want your particles to show up on.
Alright, let's start!
To begin, add a section and a div to your page. We're going to add the particles to the div inside of the section, just to make it easier to visualize. You can do this however you want. Once you create a section and div, add an empty code block element to your page as well.
Now that all the required elements are on your page, we'll be adding some php code and javascript code inside of the code block
The following php code will load the script that includes all of the particle functions
<script src="http://cdn.jsdelivr.net/particles.js/2.0.0/particles.min.js"></script>
The javascript code will contain the actual particle settings we'll be using in this tutorial. We'll go over customizing them in a bit
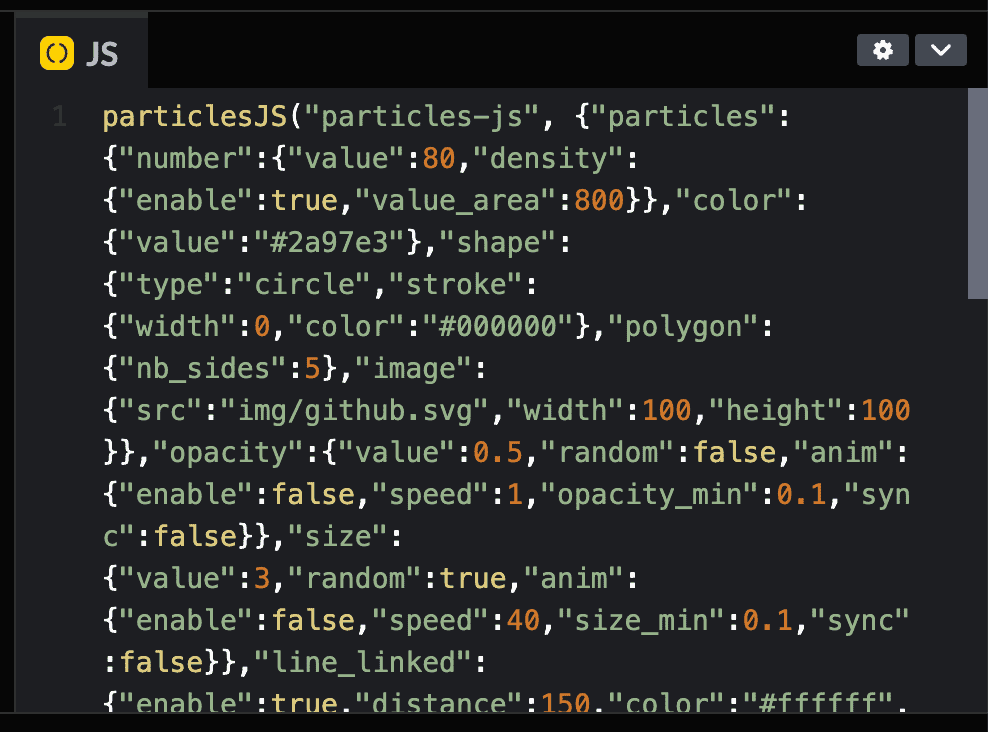
particlesJS("pretty", {
"particles": {
"number": {
"value": 80,
"density": {
"enable": true,
"value_area": 800
}
},
"color": {
"value": "#ffffff"
},
"shape": {
"type": "circle",
"stroke": {
"width": 0,
"color": "#000000"
},
"polygon": {
"nb_sides": 5
},
"image": {
"src": "img/github.svg",
"width": 100,
"height": 100
}
},
"opacity": {
"value": 0.5,
"random": false,
"anim": {
"enable": false,
"speed": 1,
"opacity_min": 0.1,
"sync": false
}
},
"size": {
"value": 3,
"random": true,
"anim": {
"enable": false,
"speed": 40,
"size_min": 0.1,
"sync": false
}
},
"line_linked": {
"enable": true,
"distance": 150,
"color": "#ffffff",
"opacity": 0.4,
"width": 1
},
"move": {
"enable": true,
"speed": 6,
"direction": "none",
"random": false,
"straight": false,
"out_mode": "out",
"bounce": false,
"attract": {
"enable": false,
"rotateX": 600,
"rotateY": 1200
}
}
},
"interactivity": {
"detect_on": "canvas",
"events": {
"onhover": {
"enable": true,
"mode": "repulse"
},
"onclick": {
"enable": true,
"mode": "push"
},
"resize": true
},
"modes": {
"grab": {
"distance": 400,
"line_linked": {
"opacity": 1
}
},
"bubble": {
"distance": 400,
"size": 40,
"duration": 2,
"opacity": 8,
"speed": 3
},
"repulse": {
"distance": 200,
"duration": 0.4
},
"push": {
"particles_nb": 4
},
"remove": {
"particles_nb": 2
}
}
},
"retina_detect": true
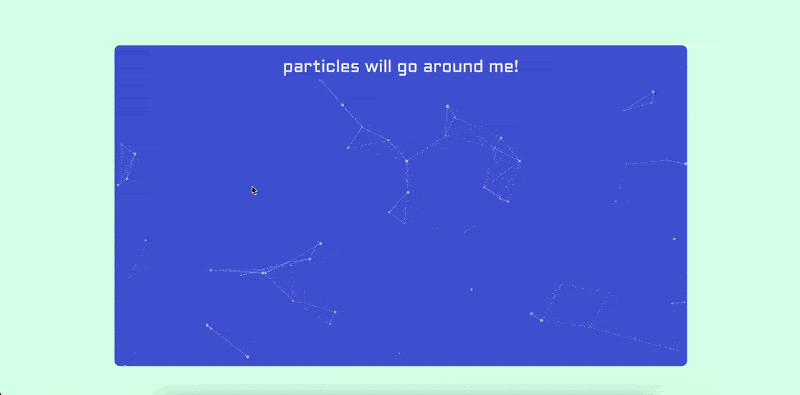
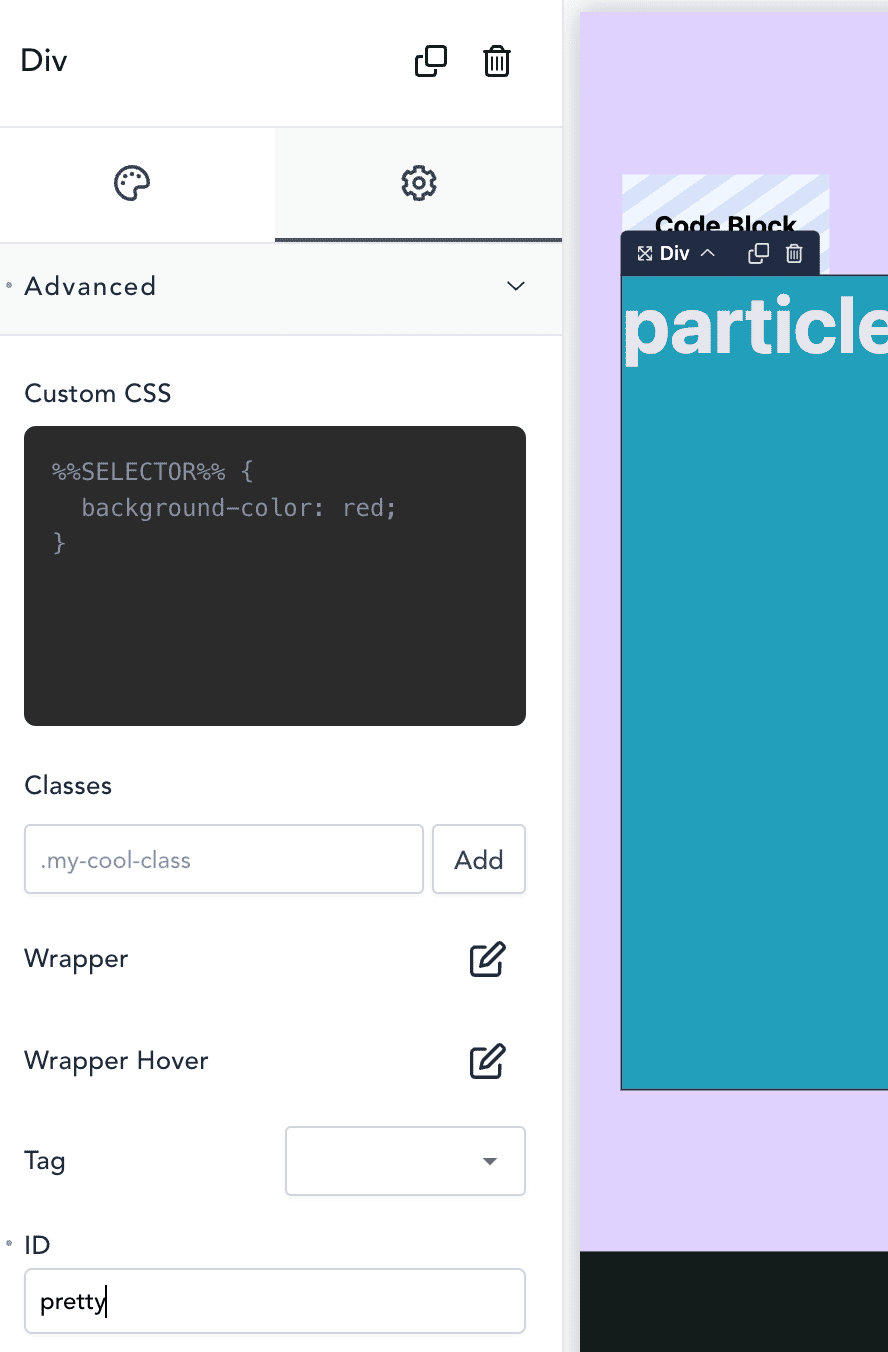
});Once the proper code is added you'll have a working particle integration. Now how do we connect this to an element? If you take a look back at the javascript code you can see the first argument in the code is called pretty. This is the name of the ID you'll set in your div.
Head over to your div, go into the setting gear (or advanced), and scroll down until you see ID. Enter the same name from the first argument, in this case, we've called it pretty. No need to add a hashtag either. You can go ahead and refresh your page and if you did everything correctly, you'll see particles in the background of your div. Now that we have a working example, let's talk about how to change things up!
Customizing JavaScript Particles
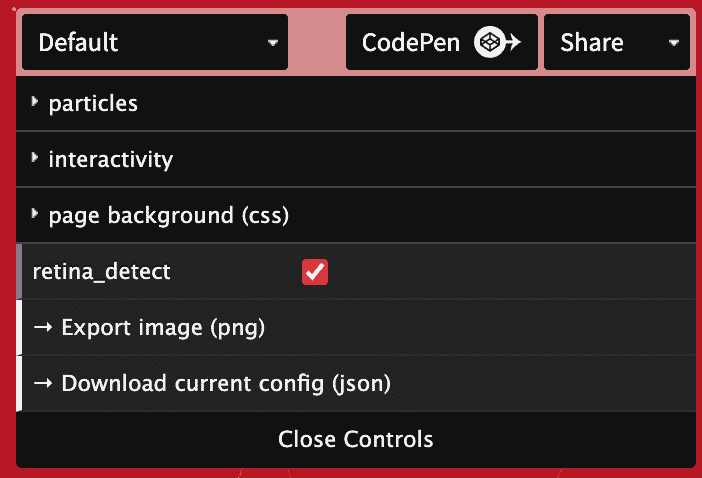
If you want to change how your particles look and behave, I'll direct you right to the customizer page. Here, you can tweak things like color, shape, and size. These options should update directly on the sample page so you can see what it would look like before you load it back into Breakdance. When you are finished customizing your particles, open your sample with their CodePen link. You can directly copy and paste this JavaScript into your code block (just make sure to change the ID name to match the element you want the particles displayed on!)
Conclusion
After a few minutes of setup, you can add some gorgeous particles to any element in your Breakdance Builder WordPress Website. If you want full customization over how they look and behave, we recommend adding them without a plugin. If you want a quick and easy solution, there are some plugins available.
Have any questions about adding a javascript particle library to Breakdance Builder? Leave a comment below! If you enjoyed reading, subscribe to our monthly newsletter below for more tips and tricks on how to design and grow your digital brand.
Want to Learn Even More?
If you enjoyed this article, subscribe to our free newsletter where we share tips & tricks on how to use tech & AI to grow and optimize your business, career, and life.