Create A Page Footer Using Breakdance Builder
Breakdance makes it super easy to add and customize complex footers to your website. Using this guide, you'll have some beautiful looking footers in just a few minutes
Christy Cañete
Updated July 24, 2023
footer in breakdance builder
Reading Time: 8 minutes
A footer helps your visitors find key details and navigate to your website with ease. While they might often go unnoticed, a website is never complete without a footer.
If you’re just dipping your toes into web design, then this guide is for you. Here. I’ll show you step by step on how to create a professional-looking footer using Breakdance.
An effective footer should help enhance the navigation of your site. Some of the essential elements to include are:
- Contact information: Adding your contact details makes it easier for visitors to get in touch with you.
- Social media links: Social media platforms encourage users to engage with your brand.
- Policies and terms of service: Instill trust and transparency to your visitors by adding these elements to your footer.
- Newsletter signup: Offer your site visitors to sign up to your newsletter for content updates or promotions.
- Copyright notice: Adding this will prove your ownership of all the content in your site.
- FAQs: Address your visitors’ concerns by providing them links to answers.
- Quick links: Depending on how you structure your website, quick links could include your home page, about us page, blog page, and so on.
In this tutorial, I’ve made three different types of footers tailored for different businesses.
Follow these general steps whenever you need to create a new footer in your page.
- Navigate to your WordPress dashboard.
- Select Breakdance > Footers. Click 'Add Footer'.
- Provide a name for your footer template. Set it to ‘Everywhere’ and give it a higher priority number. Then, click ‘Save.’

- To edit, click ‘Edit in Breakdance’ beneath your footer name. This will open up the editor.
A footer on your portfolio website wraps up your page by providing essential info. This includes a copyright text and your contact details.
Follow these steps to design a simple footer for your portfolio site.
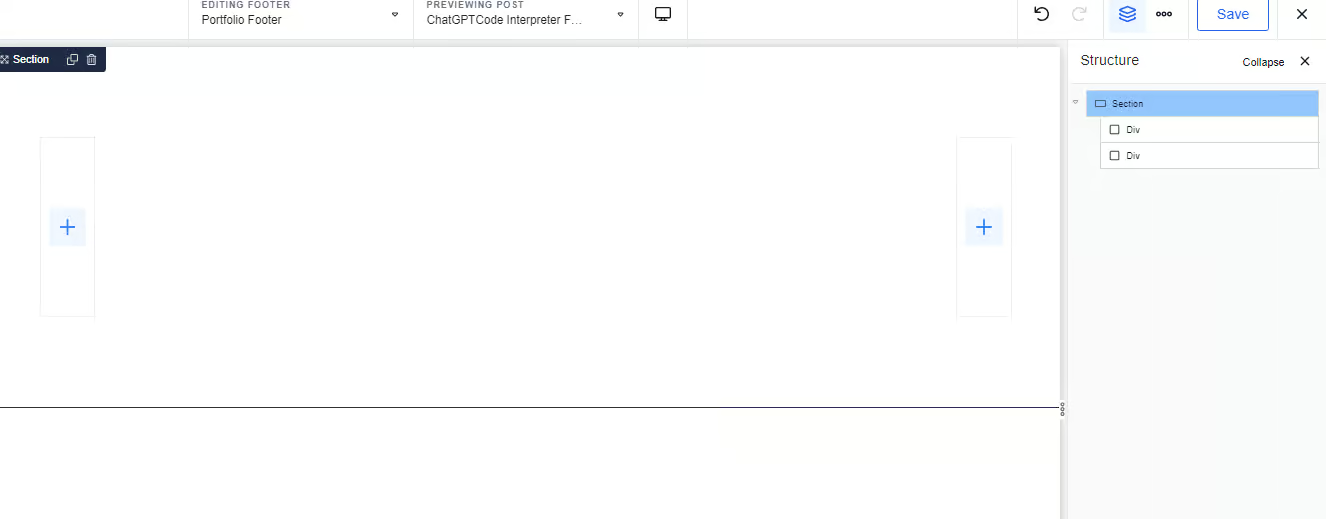
1. On your Breakdance editor, add a section.
2. There are many ways to add content to your page footer. In this example, let’s add two divs. The first div will contain the copyright notice. The second div will be reserved for the menu builder.
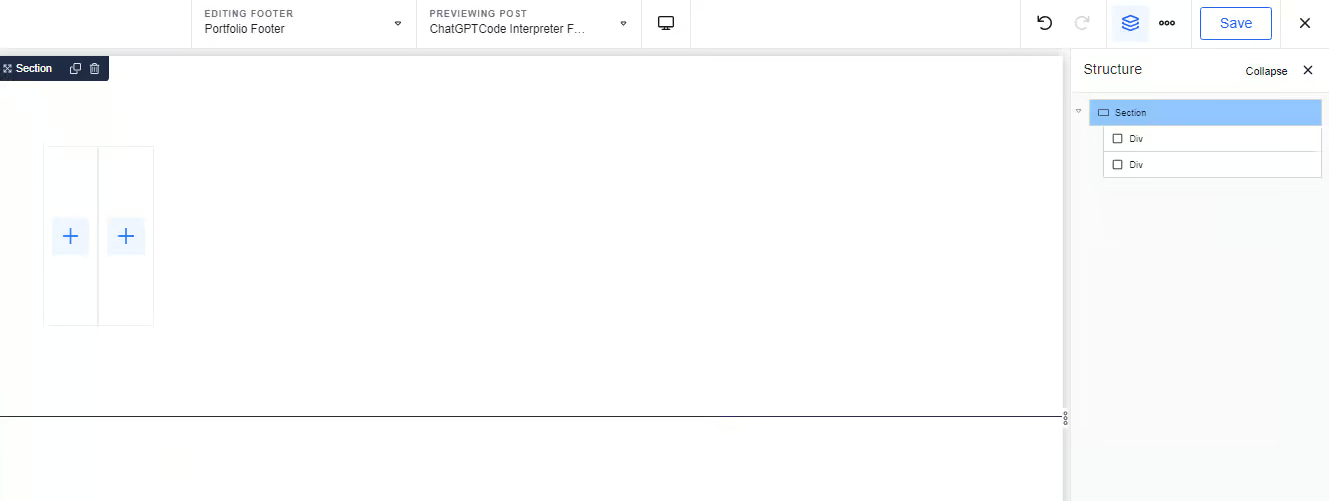
3. Click the parent section and adjust the horizontal alignment. Under the ‘Horizontal’ tab, set ‘Align’ to ‘Space Between’ and ‘Vertical Align’ to ‘Middle.’ This will make your elements horizontally align and not vertically stacked up on each other.
4. Click the first div and add a copyright text. A typical text can be ‘© 2023 <website-name>. All rights reserved.’ But feel free to edit as you wish.
5. On the second div, you may contain your contact details, social media links, or links to other pages on your site.

6. Style the elements in your footer. Change the background color, font size, icon colors, size, and spacing. To do so, just click the element you want to style. Then choose an attribute you want to change on the left-hand side of the editor.
7. Add links to your copyright text, social media icons, and ‘Contact Me’ button.

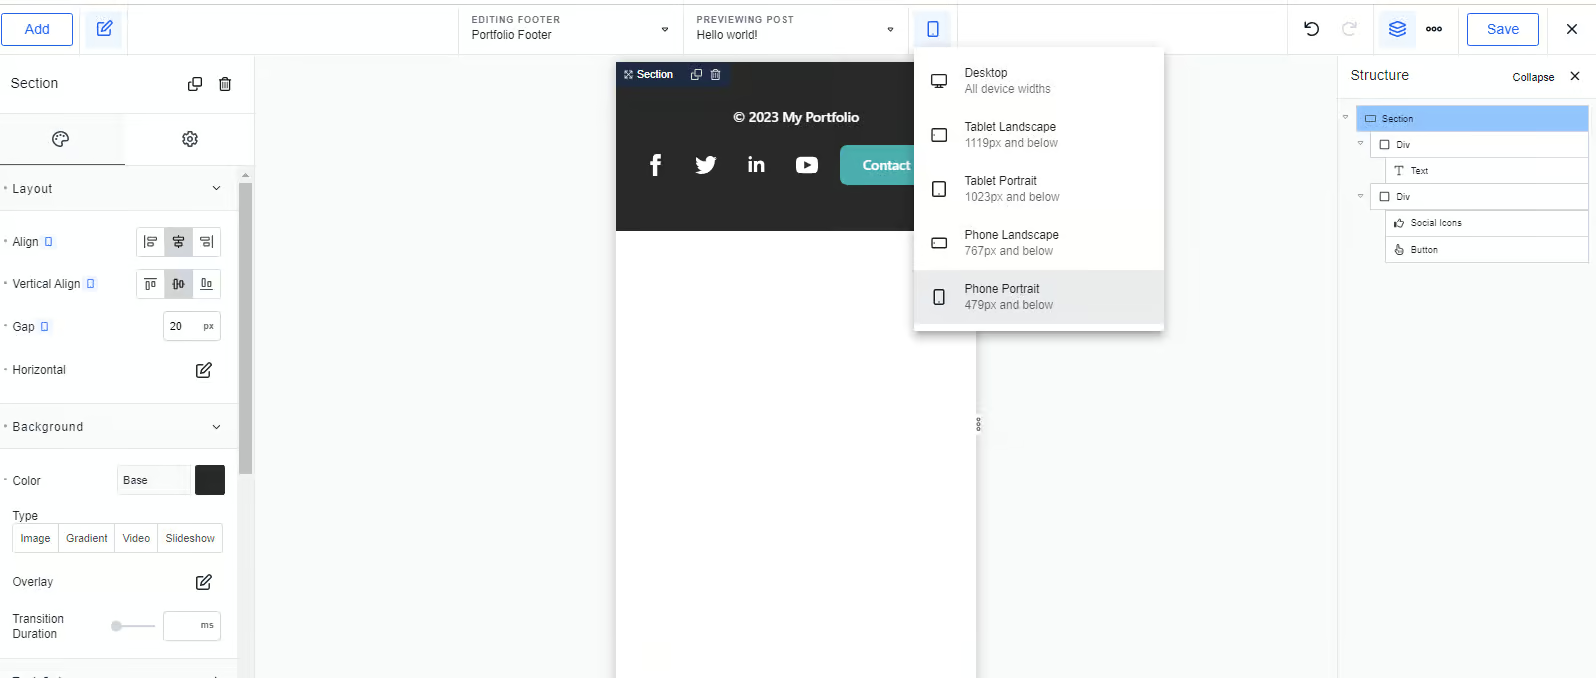
8. Make your page footer look great on any device. You can view it on different screen sizes by clicking the screen icon on top of the editor. Then, adjust the width, size and gaps to ensure all elements are placed beautifully on the page.
9. The final page footer should now look like this.
E-commerce websites generally place their contact details, policies, and FAQs in the footer section. It also provides some quick links for shoppers, such as links to their shopping cart and account.
These are the steps to design a professional-looking footer for your e-commerce website.
1. Let’s start by adding a section.
2. Within the parent section, add a four-column element. These columns are reserved for the footer’s navigation links.

3. On the first column, add ‘Image’ for your company’s logo. I also recommend adding a catchy tagline or short company description just below the logo.
Click the first column and go to Layout > Align. Click the center symbol.
4. Let’s add some quick links on the second column. Go ahead and add a ‘Heading’ and a ‘Div.’ Then, edit the heading title to ‘Quick Links.’ Within the div, add some quick links, such as Register, Login, and Shop.

Note: If you don’t like underlined texts on your link, you can remove this by going to Style tab > Typography > Preset. Then choose ‘Footer Links 16px No Decoration.’
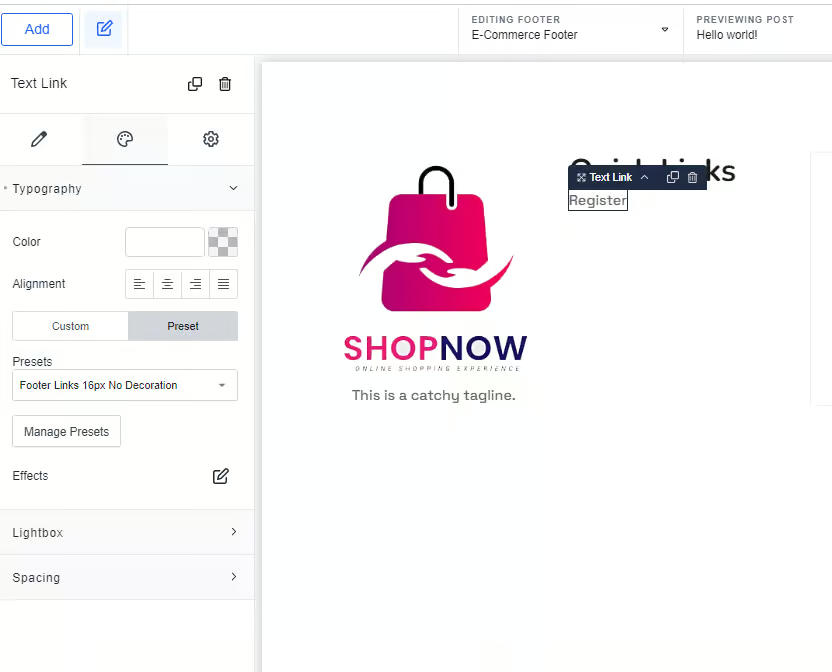
Do the same for the other text links. To duplicate the text, just click the copy symbol beside ‘Text Link’ as shown below.

Update the last two texts to Login and Shop. Then, click the second column and go to Style tab > Layout. Adjust the gap to 10px.

5. Duplicate the second column twice.
The third column will contain your contact information. Replace the text links with ordinary texts and update the data.
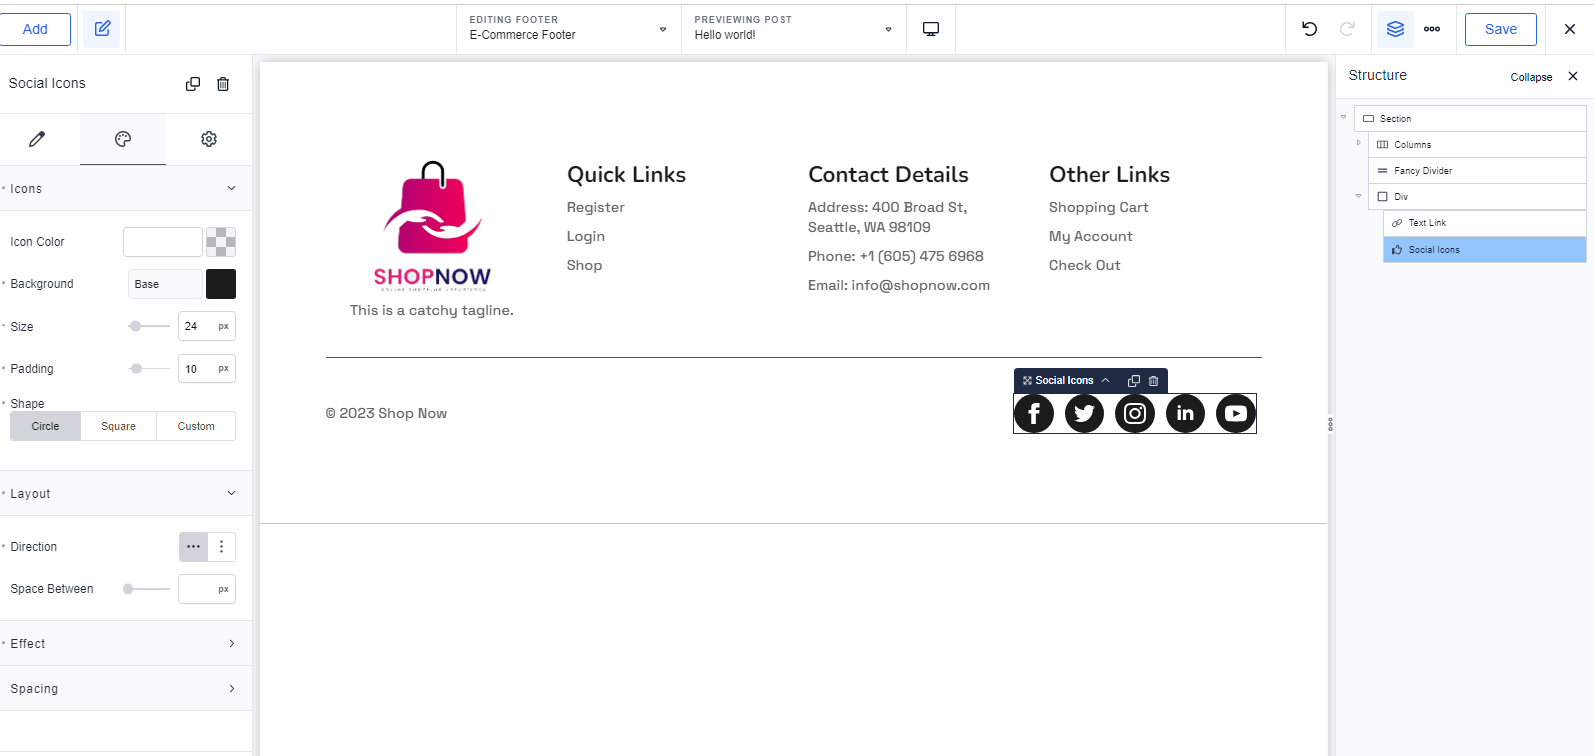
The fourth column will house the user account links. Make sure to update the text links here as well. Here, I’ve added the ‘Shopping Cart,’ ‘My Account,’ and ‘Check Out’ text links, as shown below.

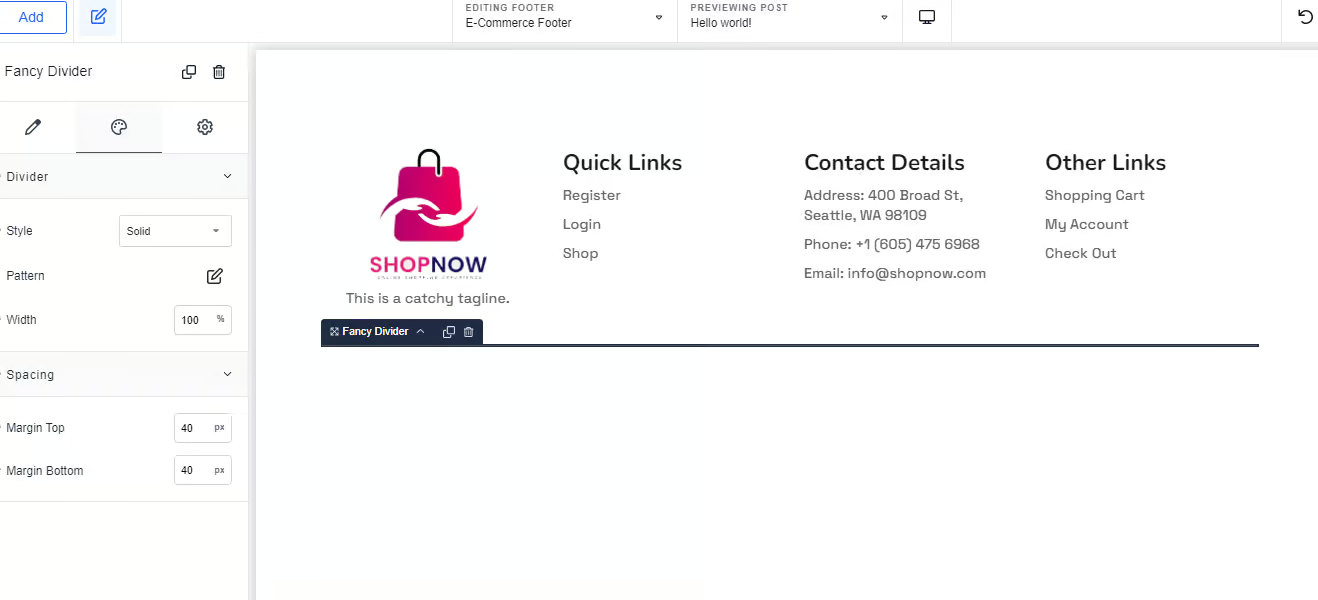
6. Let’s add a divider below the column element.
Click the parent section. On the left-hand side of the editor, add a ‘Fancy Divider.’ Under the Style tab, change the ‘Style’ to solid and ‘Width’ to 100%. Adjust the top and bottom margins to 40px.
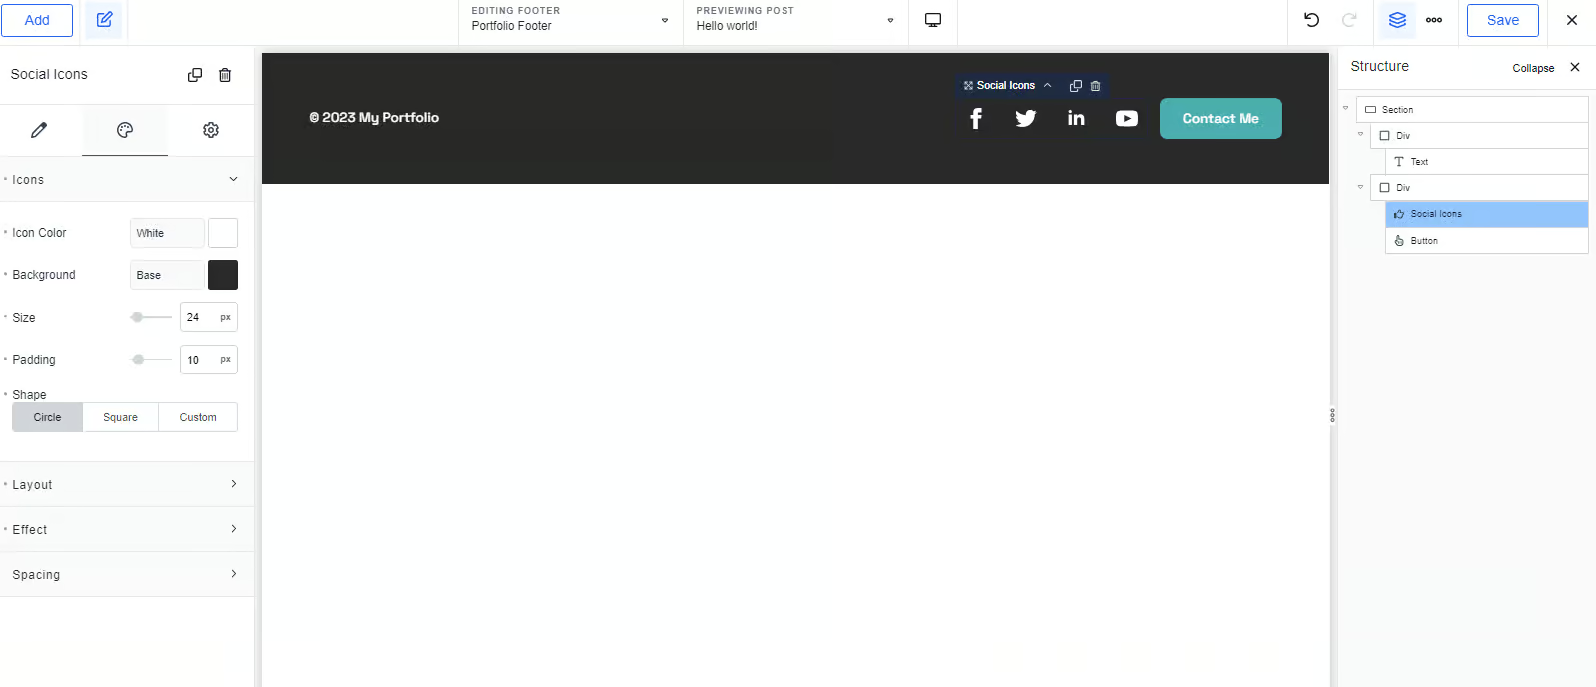
7. Then, let’s add a divider. This will contain your copyright text and social media links.
Under the parent section, go ahead and add Div. Then under Div, add two elements - one for the copyright text and another for the social media icons.
Make sure to change the settings in the ‘Horizontal’ section the same way we did before - ‘Align’ set to ‘Space Between’ and ‘Vertical Align’ set to ‘Middle.’
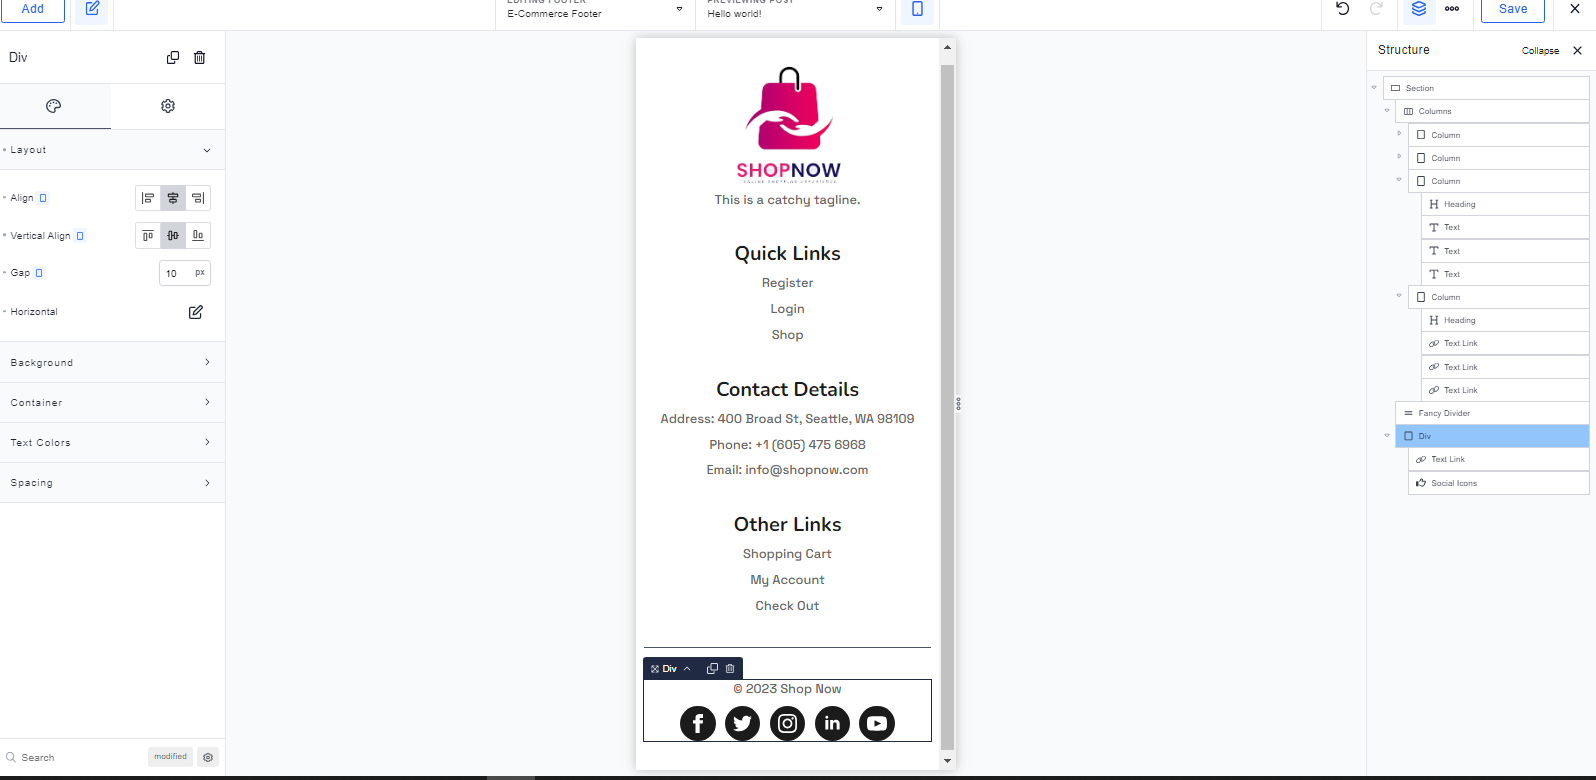
Style the elements by adjusting the gap, padding, icon styles, etc. You should have a footer that looks like this.
8. Make sure that your page footer looks nice in all screen sizes. Adjust the element spacing and size as needed.
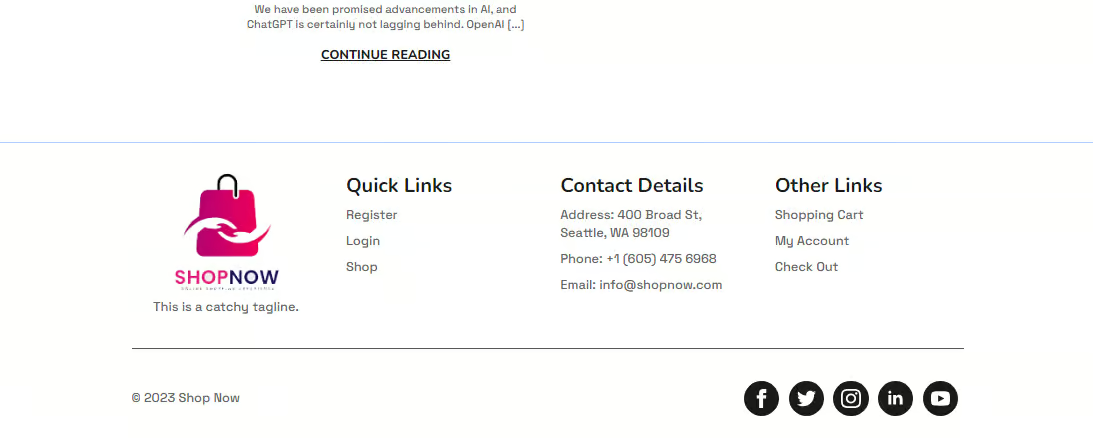
9. Here’s the final look of our page footer.
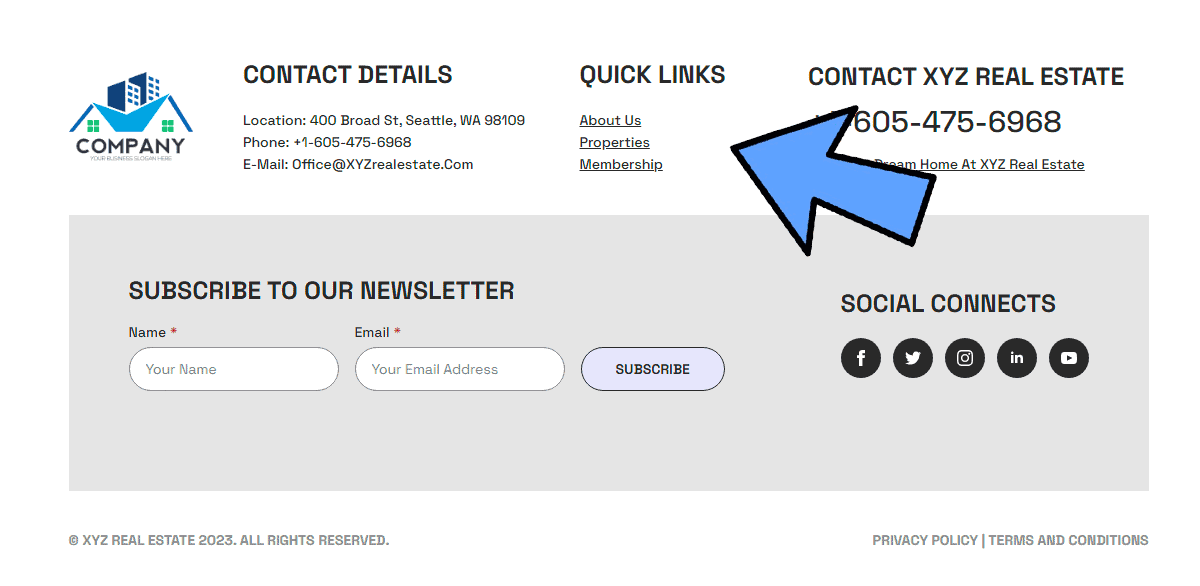
When building your real estate website, you need to add a footer to wrap your contact info, licensing disclosures, FAQs, and policies. You can even add certifications to prove the legitimacy of your operations.
I’ve written the steps below to create a simple footer for a real-estate business. Feel free to edit this to meet your unique needs.
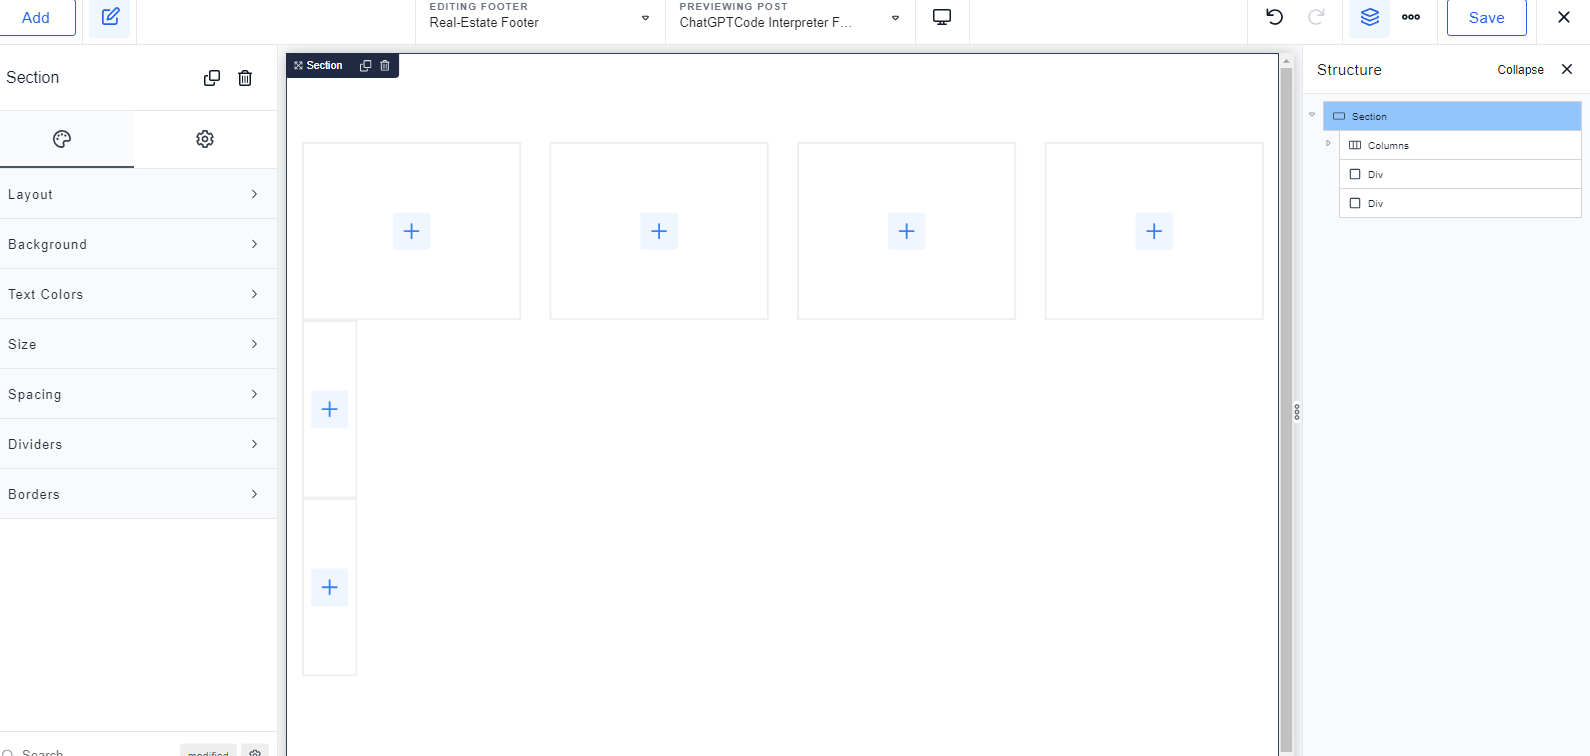
1. Start by adding a section.
2. For the real-estate footer, we want to include the contact information, registration form, and the copyright text. So, let’s divide our section into three parts.
Let’s add a 4-column element and two divs.
3. On the columns, add your company logo, contact details, quick links, and phone number, as shown below. Style each element to suit your needs. Change the color, size, gaps, etc.

4. Let’s add elements to the first div. Here, we’ll add another two divs. The first one will contain a sign up form and the second one will be for the social media links.
As with the other elements above, make sure to adjust the font size, background color, icon styles, and spacing to your liking. Your footer should now look similar to this.

5. On the second div, let’s add the copyright text, privacy policy, and terms and conditions. Here, you will only need to add a div to enclose two elements - one for the copyright text and the other for the text links.
Again, style these elements to your liking. You should achieve something like this.

6. Make sure all your text links and icons are linked to the correct pages.
7. Adjust the size and spacing of your elements on different screen sizes.

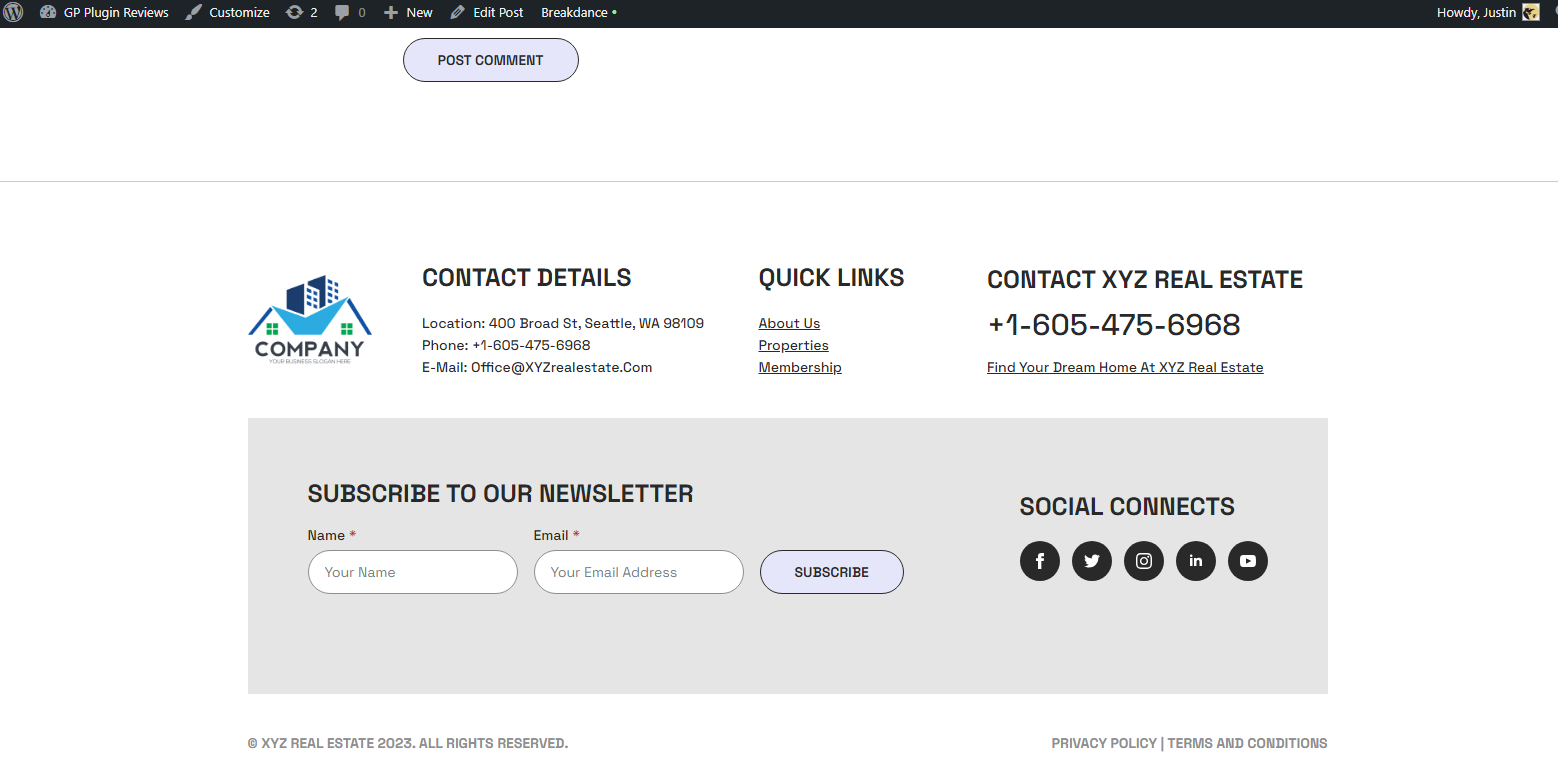
8. Here’s the final view of our real-estate page footer.
Wrapping It Up
Creating a custom footer in Breakdance is a breeze. Now you’re ready to build your pages and link them to your footer. If you haven’t already created a header, they’re even more important than footers. Both of these together are the starting steps of creating an incredible website with Breakdance.
If you have any questions or thoughts about anything created, please drop them in the comments section below!
Want to Learn Even More?
If you enjoyed this article, subscribe to our free newsletter where we share tips & tricks on how to use tech & AI to grow and optimize your business, career, and life.