UpdraftPlus Review & Tutorial: The World’s Most Trusted WordPress Backup Plugin
Backing up a WordPress site is a must, no matter who you are or how protected you think your site is. It's easy, free, and saves you hundreds of hours of headaches if something actually were to happen. Here's why we use UpdraftPlus across all our websites & why you should too.
Angel Cuala
Updated August 13, 2023

a computer monitor with a chained lock sitting on a desk in a bedroom as 4k digital art
Reading Time: 15 minutes
Are you clumsy? Like seriously – ask yourself.
It's ok if you're not. But I'm writing this because I AM.
Picture this – you’ve been sipping on your coffee, crafting a killer blog post, and you’re almost ready to hit publish. But then, your fingers do the cha-cha on the keyboard and, poof, something goes wrong. Or even worse, some sneaky little hacker thinks it’s fun to mess with your site. That’s when UpdraftPlus hops in, whisks away your worries, and makes sure you’re still on top of your game.
Before we even get into the backup plugin, is it really important to back your site up? If you answered that you're not clumsy earlier, think about the other reasons why you might need a backup.
Think about all of the hard work you've put into your site. What if it got erased overnight?
Why Should You Backup Your WordPress Website?
Imagine your WordPress website as the digital embodiment of your hard work, passion, and dedication.
It represents countless hours and resources invested in crafting the perfect platform for your audience or clients.
In a world where data is gold, it’s essential to protect this invaluable asset. Backing up your site is non-negotiable, no matter who you are. Here's why:
Shield Against Cyber Intrusions
Despite WordPress’s stringent security protocols, the cyber landscape is constantly evolving with new threats.
Savvy hackers are continually devising ways to infiltrate websites, and falling victim to such an attack can lead to stolen data or a compromised site.
A backup serves as an insurance policy; it's your ace up the sleeve to promptly restore your site, minimizing downtime and safeguarding your reputation.
I've used plugins like WordFence for many years but still go to sleep with peace of mind after knowing my site is continuously backed up.
Fortifying Against Hosting Vulnerabilities
Reliability is crucial, but even the best hosting services can experience unexpected issues such as server outages. These hiccups could stem from hardware malfunctions, excessive traffic, or even malicious software.
Your backup is akin to an emergency generator; it’s a resource you can rely on to quickly get things up and running, even when the primary systems fail.
A Safety Harness for Human Error
Every seasoned professional knows that human error is inevitable. Whether it's an accidental deletion or an incorrect modification, these mistakes can have significant repercussions on your website.
Having a backup is like a safety harness that catches you when you stumble, allowing you to revert to a prior state and rectify errors without major losses.
Stability Amidst the Waves of Updates
WordPress, along with its plugins and themes, frequently undergoes updates for enhanced security and functionality. However, these updates can sometimes create conflicts or bugs that affect your site.
Think of your backup as an anchor that keeps your ship steady amidst the waves of updates. Should an update cause issues, you can easily roll back to a stable version while you address the problem.
Smooth Sailing During Website Migration
Whether it’s to improve performance or switch to a more reliable hosting service, website migration is a common practice.
However, migration is akin to moving valuable cargo across unpredictable seas; there’s always a risk of data loss.
A backup ensures you have duplicates of your precious cargo. Should anything go missing or get damaged during transit, you have the means to restore it effortlessly. Trust me. I've done this before. It sucks if you aren't prepared.
So how do you backup your site? What works best? That's where UpdraftPlus comes in.
What is UpdraftPlus?
UpdraftPlus is a popular WordPress plugin used for website backup and restoration. It was launched in 2010 as Updraft, a free backup plugin.
After some tweaking made by David Anderson and his team, UpdraftPlus.com was officially registered in 2013. UpdraftPlus now has over 3 million users and is dubbed the world’s most trusted WordPress backup plugin.
UpdraftPlus is a freemium plugin. The free version is 100% sufficient to provide robust backup functionality to create a backup for your WordPress website and is far ahead of the competition. You don't NEED to pay for the plugin, but may run into convenience issues with just the free plan.
UpdraftPlus Premium offers advanced features, stricter security measures, and a higher storage capacity. This is a better option if you post regularly.
UpdraftPlus Key Features
I mean the most crucial part of a backup plugin is to uhh... backup your website, right? Yeah that's wonderful.
Besides that, Updraft has a few features that make it stand out compared to any other WordPress plugin.
Manual and Automated Backups
UpdraftPlus allows you to create a backup for your site in two ways – manually and automatically.
You can also schedule the backup, choose how many backups you want, and select your remote storage, depending on your plan. Backing your site up is also super simple:
- Once you installed and activated UpdraftPlus, go to Plugins > Installed Plugins.
- Click Settings of the UpdraftPlus plugin, and you will be led to the UpdraftPlus menu.

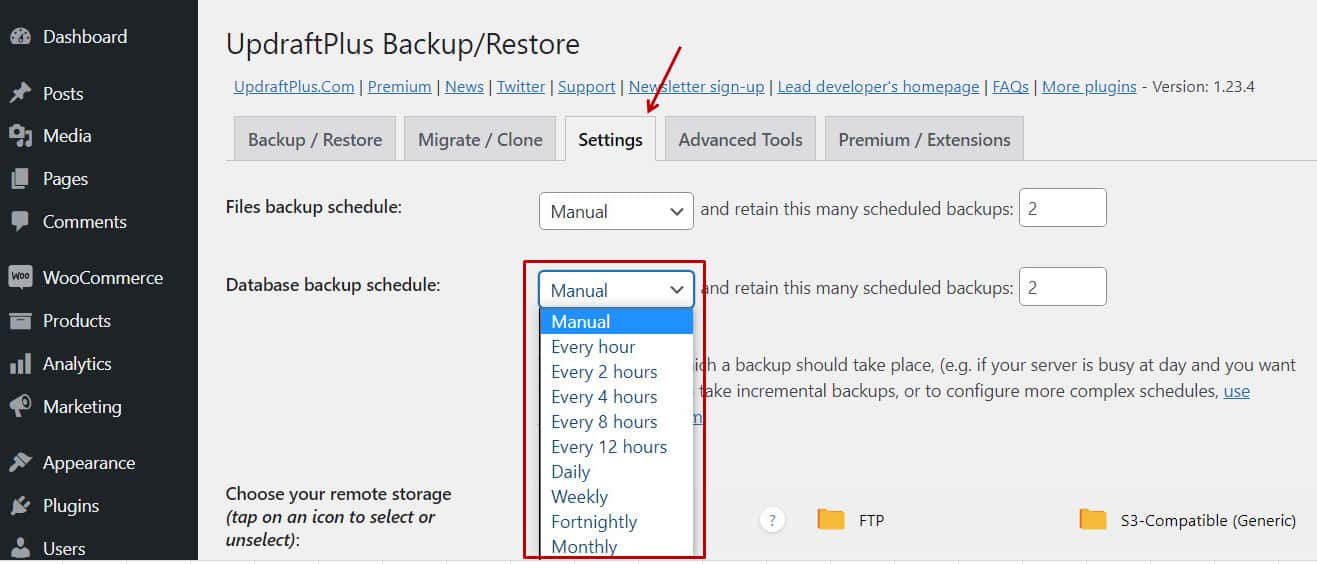
- Go to the Settings tab and you will see 2 types of backup schedules – Files backup schedule and Database backup schedule.
- Use the dropdown menus to select between Manual or scheduled such as Every 2 hours, Every 4 hours, and so on. (Tip: Choose a more frequent backup if you have large files and if you update regularly.)

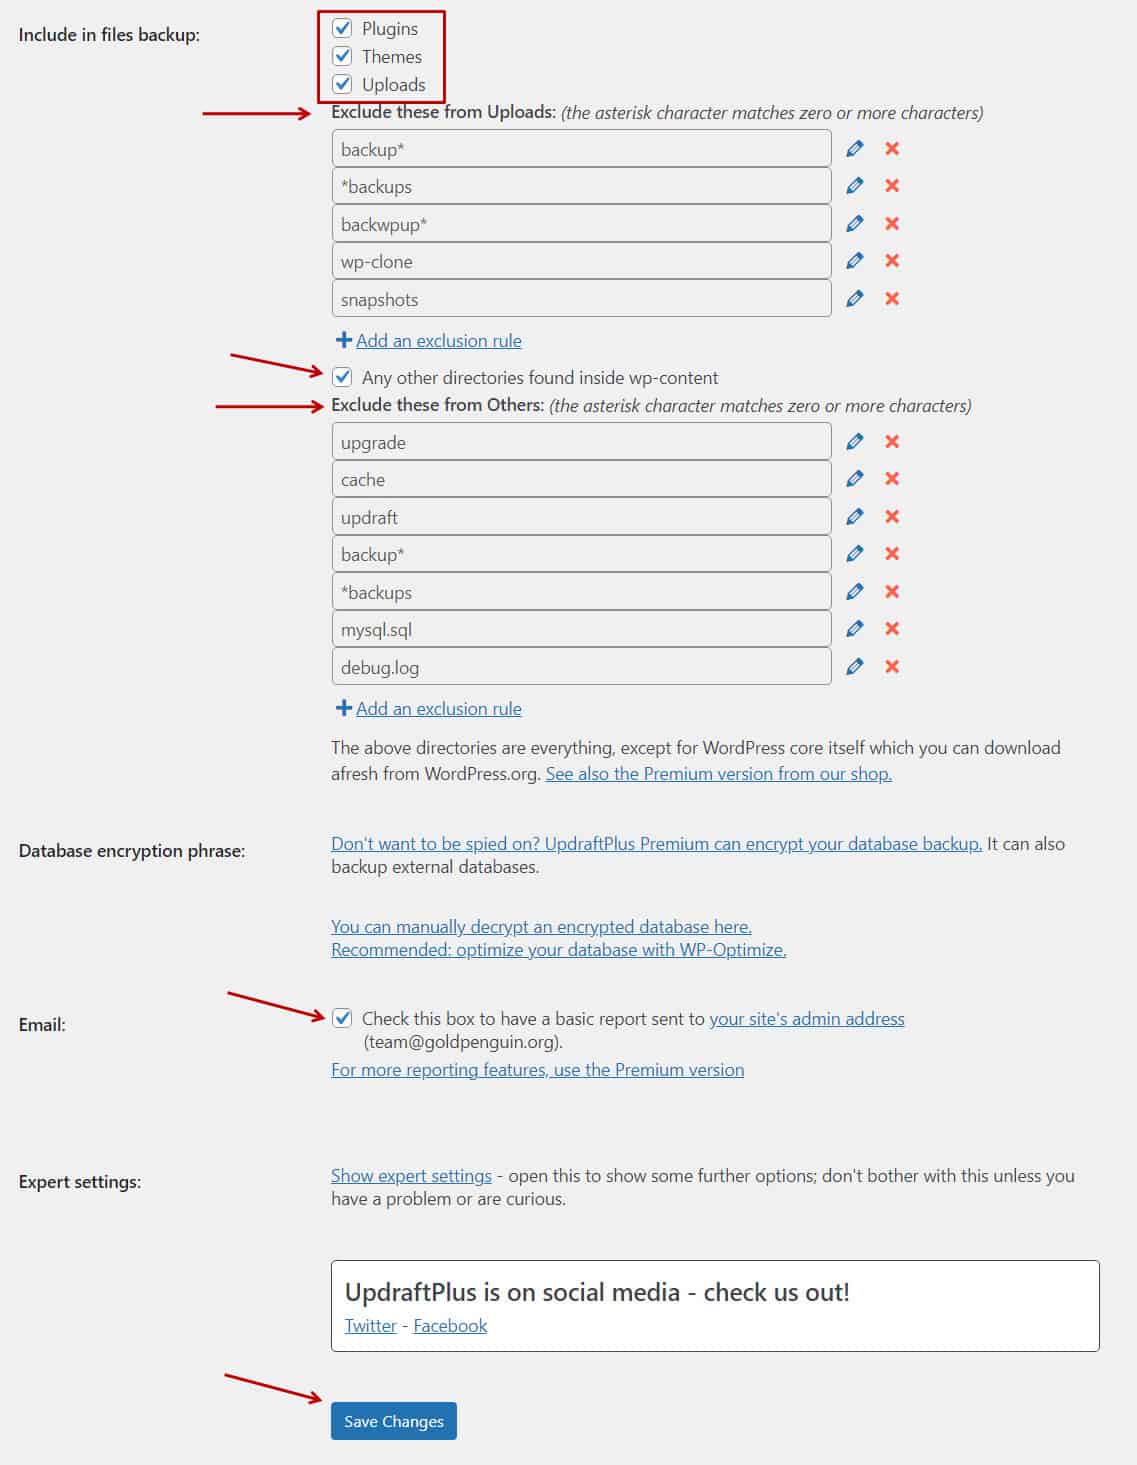
- Scroll down the page and select which files you want to include and exclude during the backup process.
- If you wish, you can also send a report to your website’s admin email address.
- Click the Save Changes button at the bottom of the page.
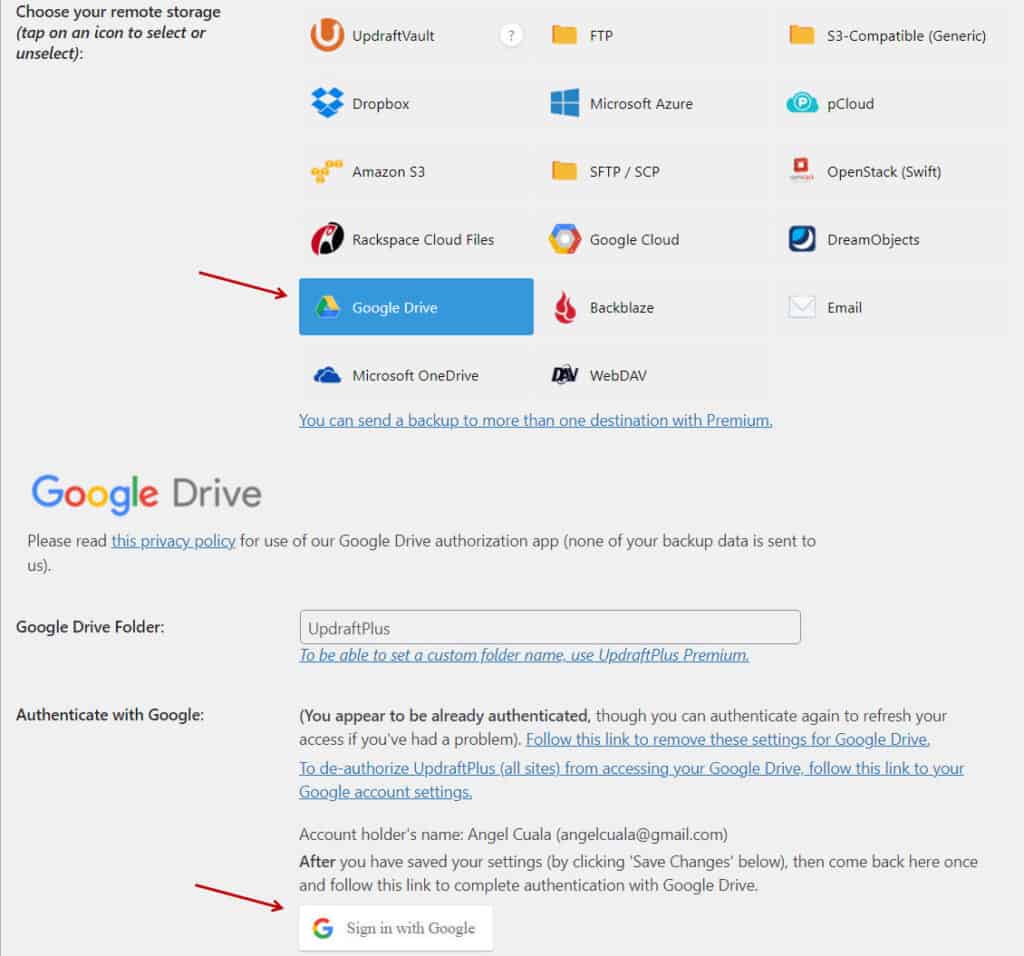
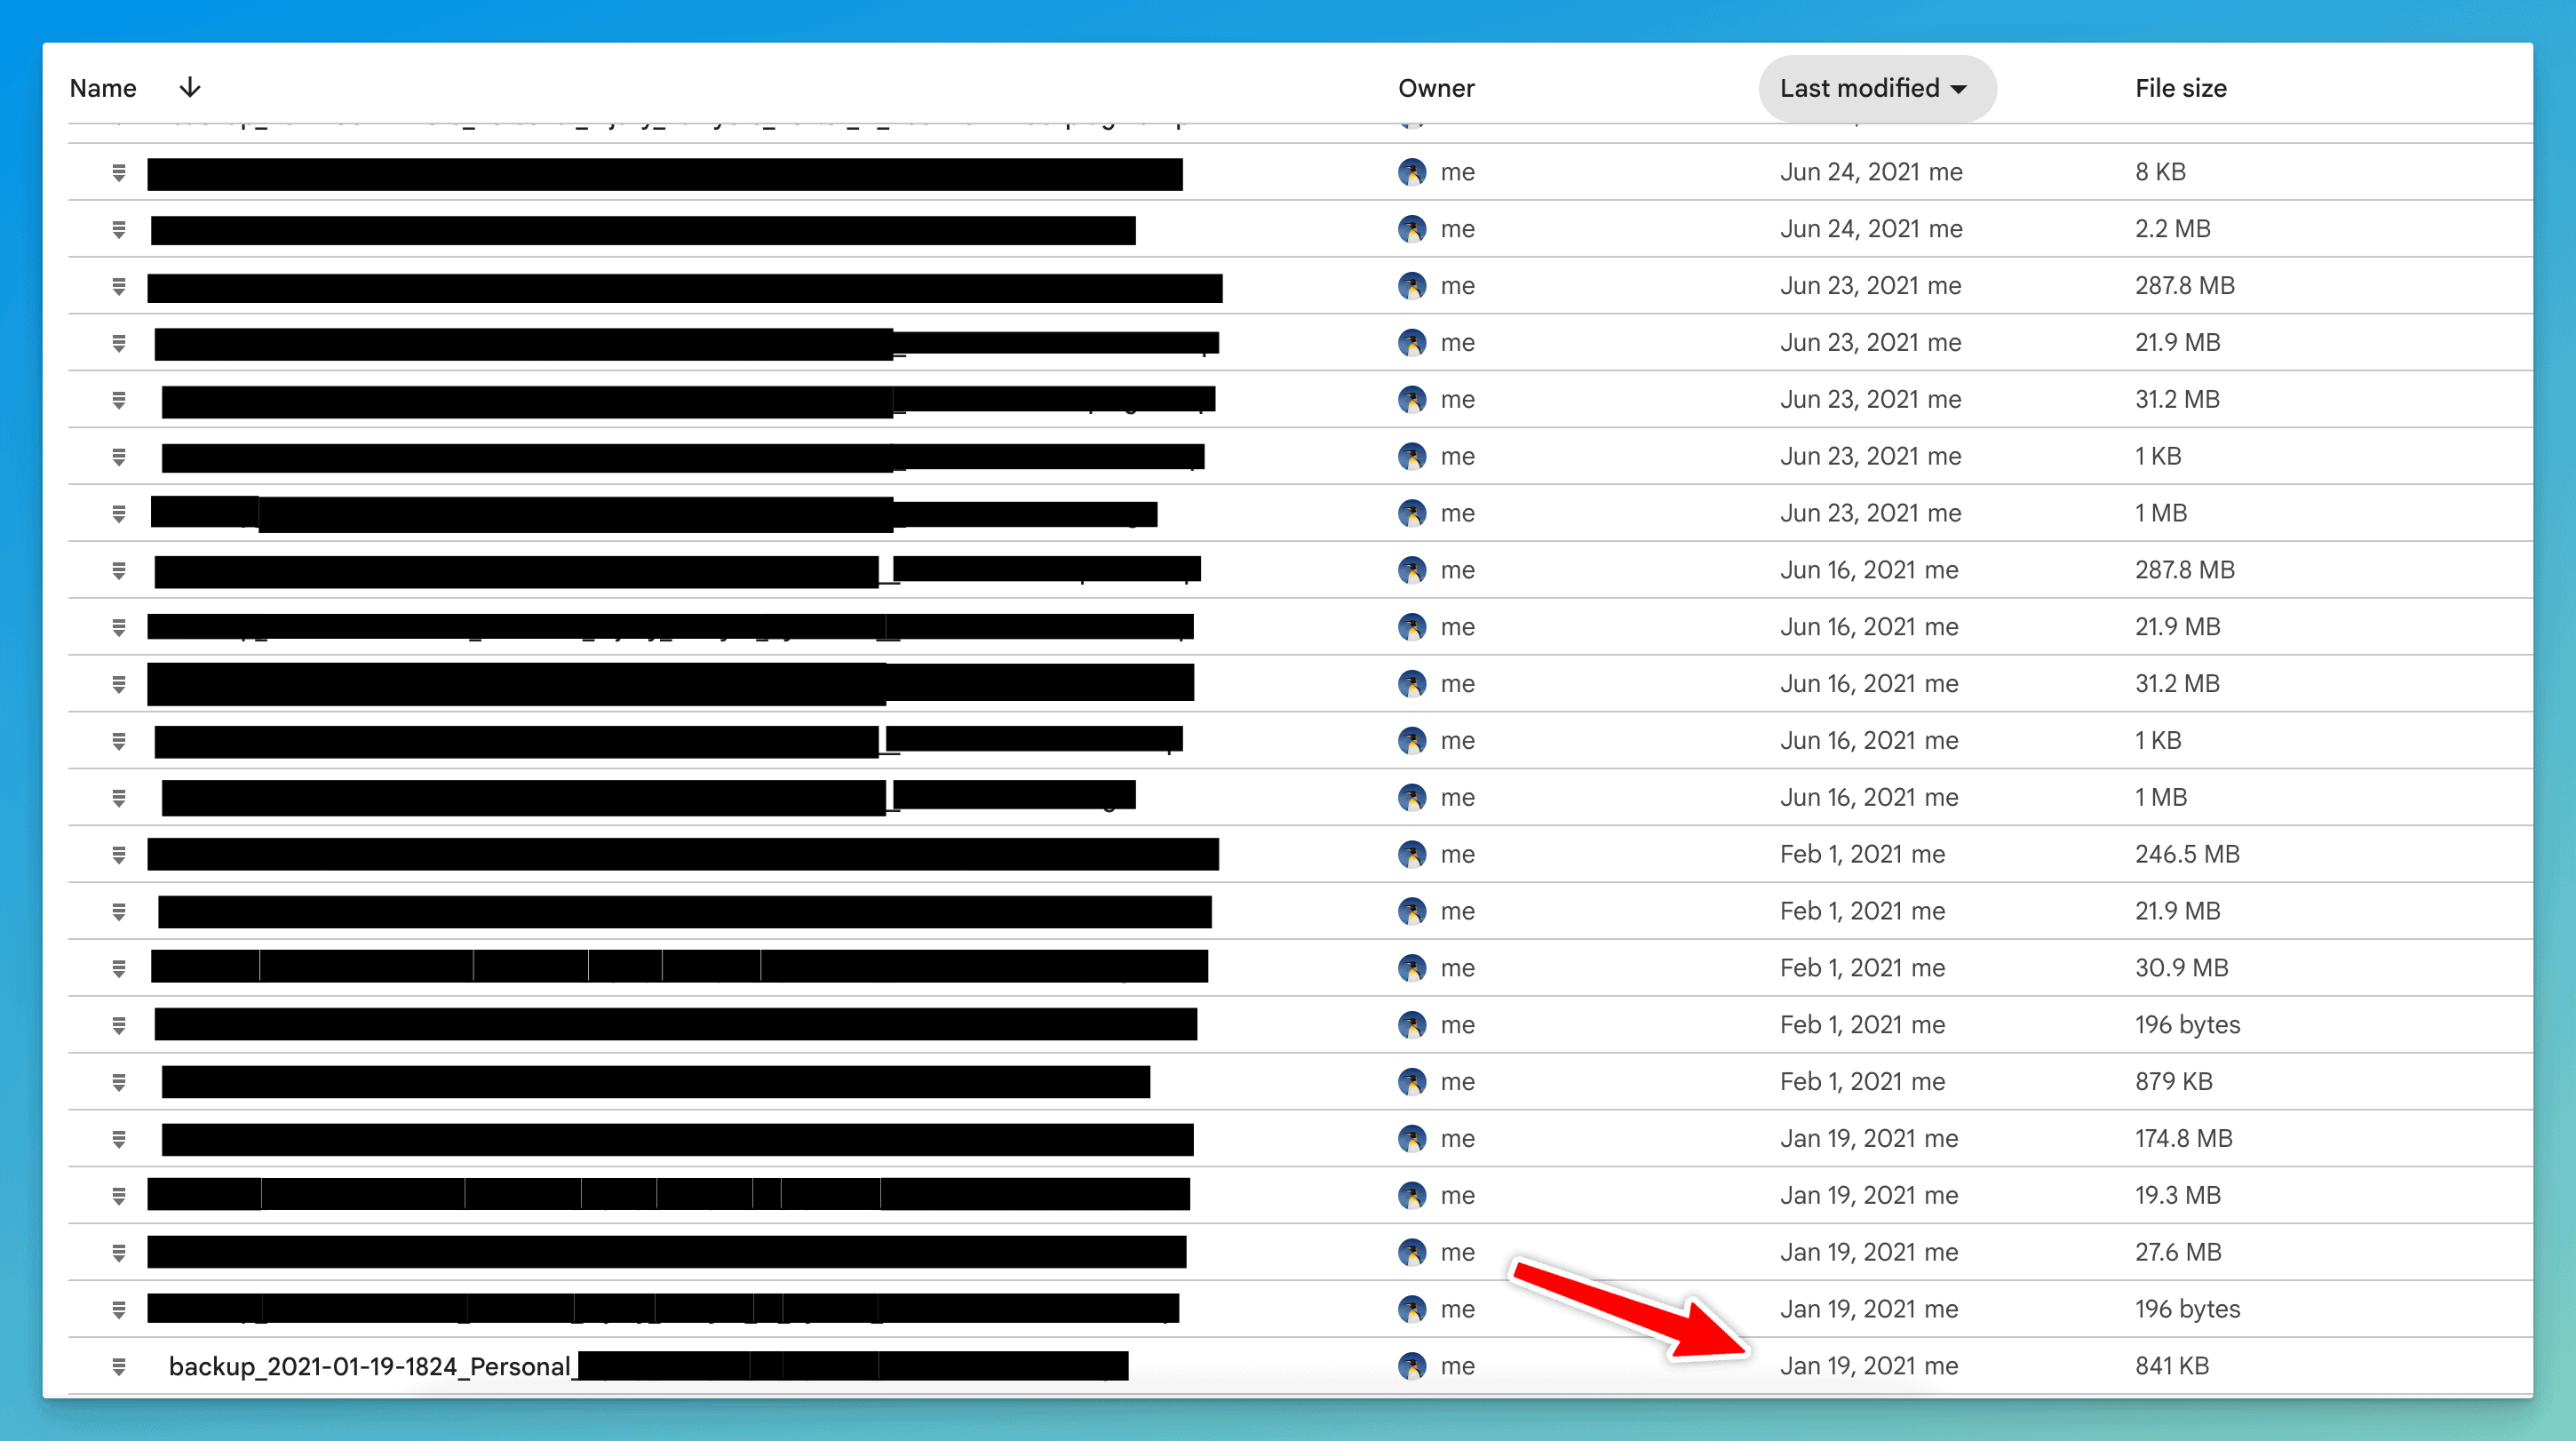
- Scroll up the page and select from the remote storage options. This includes Amazon S3, Dropbox, FTP, Google Cloud, Google Drive, UpdraftPlus, and more. Note that some of them are only available once you upgrade to UpdraftPlus Premium.
- Once you have chosen your remote storage, follow the instructions carefully. For the sake of presentation, let’s try Google Drive.
- Click on the Google Drive icon and the instructions will appear, as shown below.
- Sign in to your Google account and authenticate by allowing UpdraftPlus to have access.
- Complete the set up.
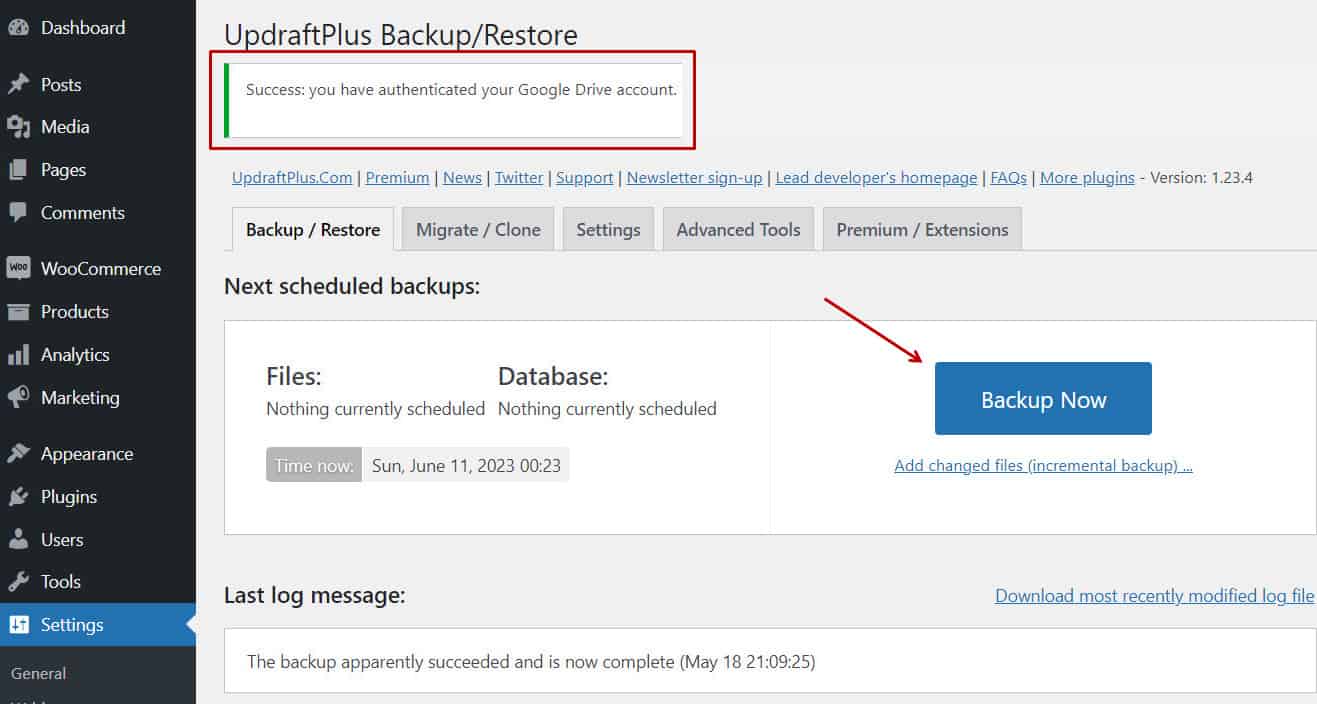
- You will be led to Settings > Backup/Restore menu, and will be greeted by the message, “Success! You have authenticated your Google account.”
- Click the Backup Now Button.
- A popup will appear, showing the actions that you want to do. Check preferred boxes and click Backup Now.

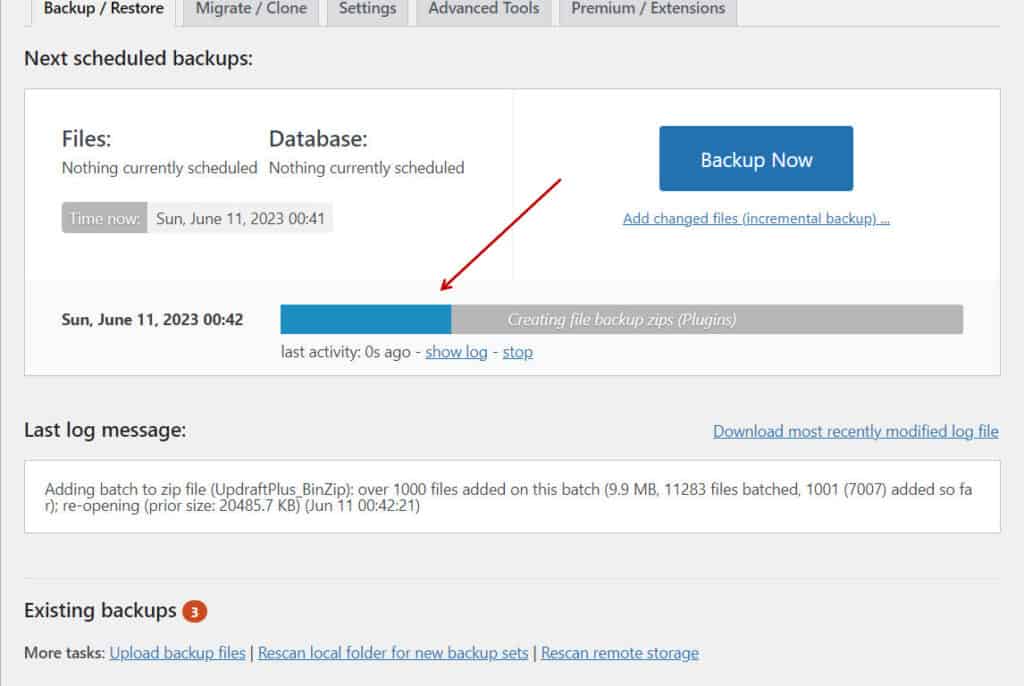
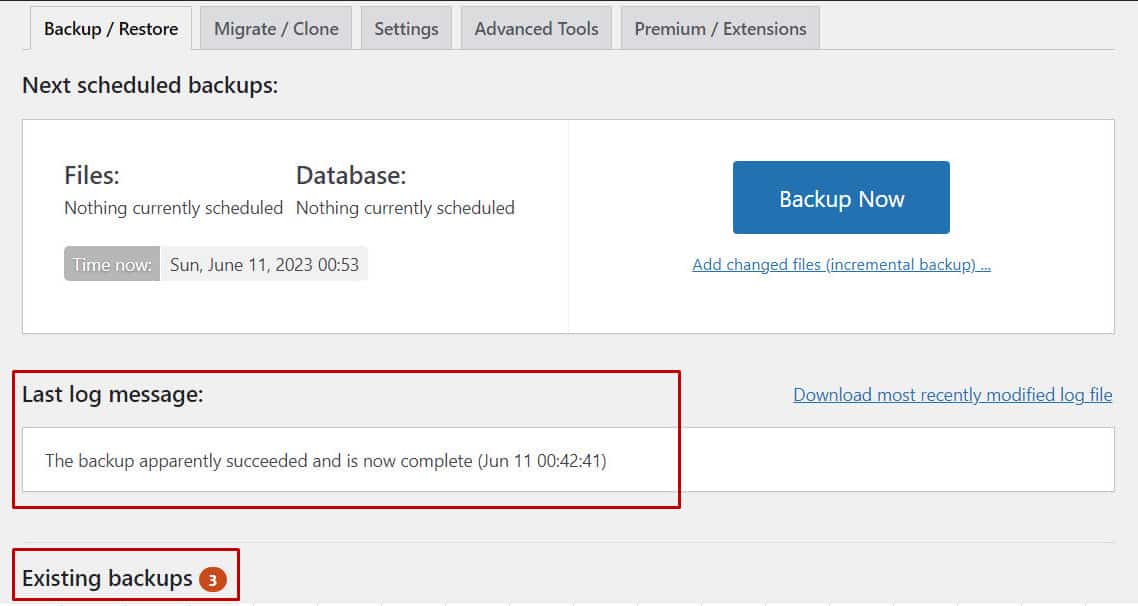
- Once the backup is successful, you will see a new message in the ‘Last log message’ box saying that the backup was successful. The number of your ‘Existing backups will also increase by one.
One-Click Backup Restoration
UpdraftPlus allows you to restore your backup with just one click. Simply go to the Backup/Restore menu and scroll down the page. In the ‘Existing backups' section, you have the option to restore, download, or delete your backup, as well as view the log file.
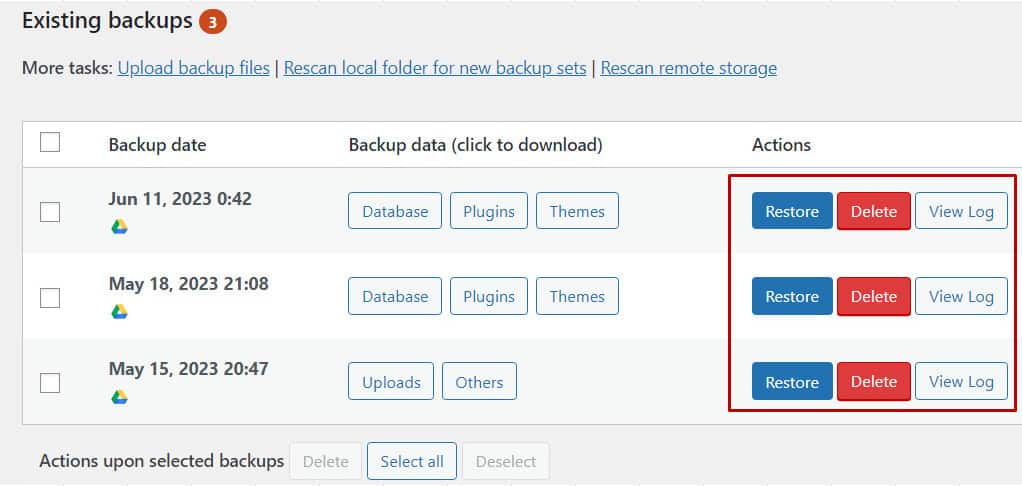
To view the log, click the View Log button. A popup will open, showing the log. You can also download the log file.

To download your backup, click the box of the type of backup files you want to download. This includes Database, Plugins, Themes, Uploads, and Others. A box will open and will give you options on what to do. You can download it to your computer, delete it from your web server, or browse its contents. You can also click Select All.
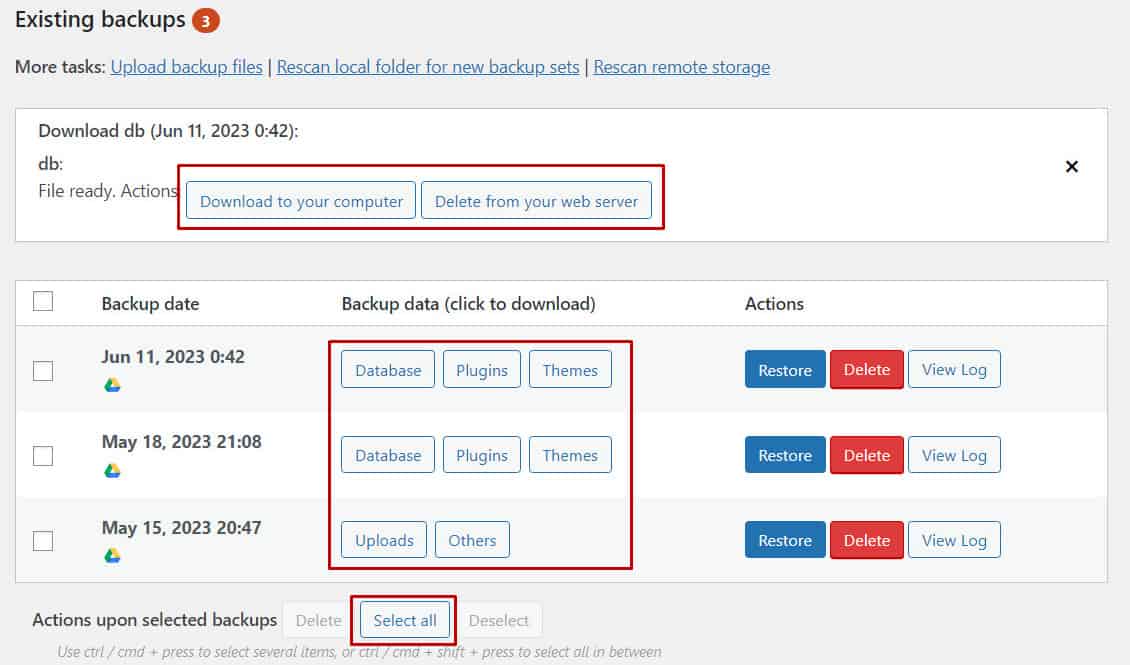
To restore your backup, click the blue Restore button. A popup will appear where you can select which component of your backup you wish to restore. Then, click the Next button.


UpdraftPlus will then prepare the backup files, and if the process is successful, press the Restore button again.

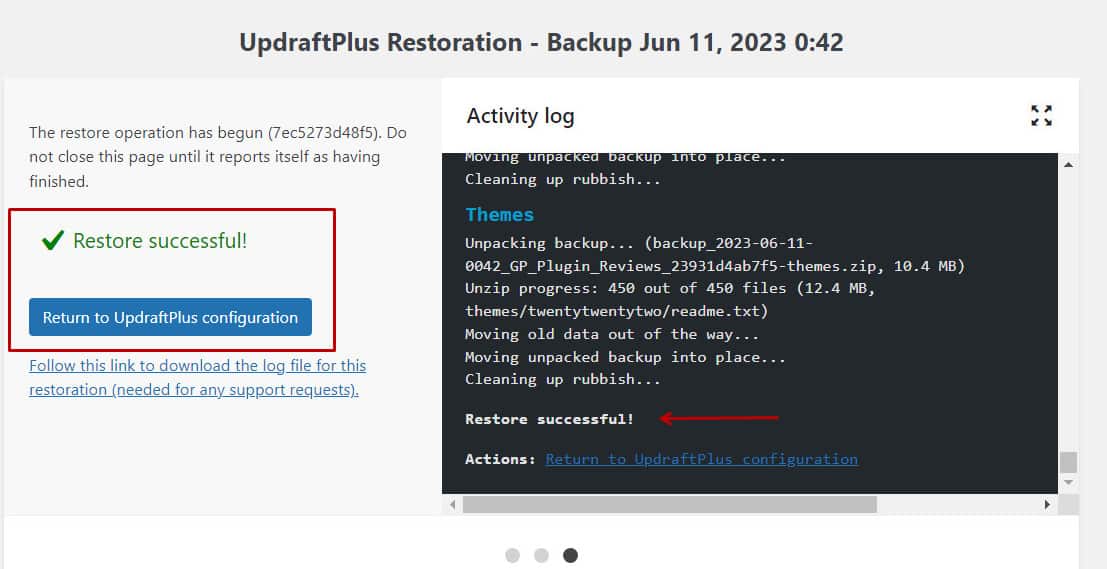
Once the restoration process begins, you can see the Activity Log. The entire process usually takes a few seconds, depending on the size of your backup files.
Once the restoration process is finished and successful, you will see a green message “Restore successful” with a green check beside it. Then, click the “Return to UpdraftPlus configuration” button.
In the Backup/Restore menu, you will see the message:
Your backup has been restored. Your WordPress install has old folders from its state before you restored/migrated (technical information: these are suffixed with -old). You should press this button to delete them as soon as you have verified that the restoration worked.
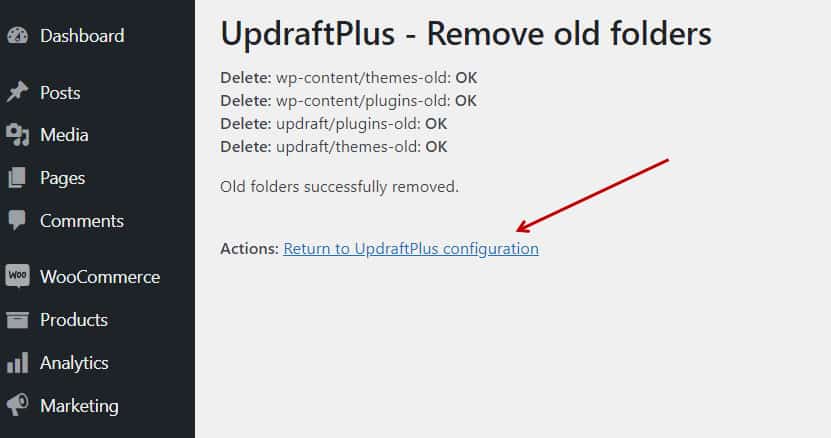
Press the Delete Old Directories button.

UpdraftPlus will then start removing the old folders. Once the process is successful, click “Return to UpdraftPlus configuration”.
UpdraftMigrator
UpdraftMigrator is a feature that allows you to migrate your WordPress website to a different URL/domain. But while you can also migrate a website without a plugin, UpdraftPlus makes the migration faster, easier, and safer. The free version of UpdraftPlus has no migration feature, but you can purchase it as an add-on.
UpdraftMigrator is available in two unlimited add-on plans – the Migrator and the Migrator Pro. You can purchase them individually, depending on your needs. You can also upgrade to UpdraftPlus Premium, which includes other advanced features. But regardless of how you avail UpdraftMigrator, the migration process is always the same.
- Create a new WordPress website (target site). This is where the contents of the original website (source site) will migrate.
- Install and activate UpdraftMigrator (or Migrator) on both websites/domains.
- Create a backup copy of your source website.
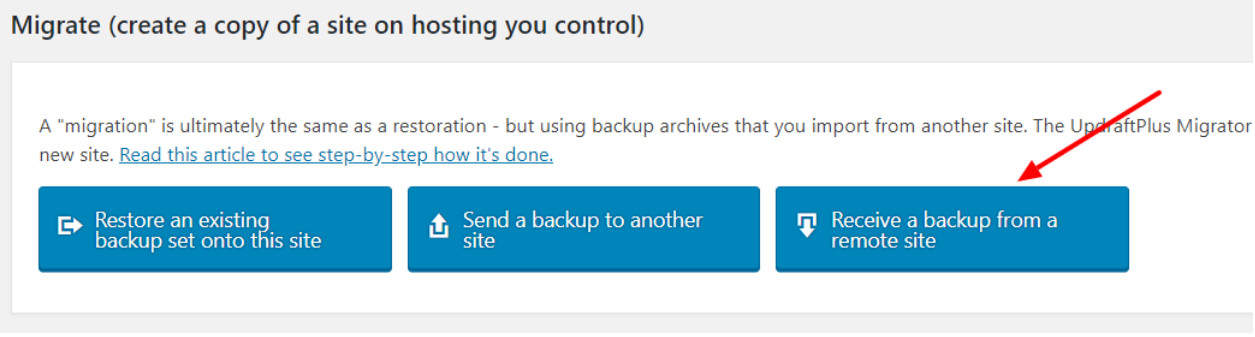
- In your target site, go to Settings > UpdraftPlus Backups > Migrate / Clone.

- Scroll down the page until you reach the Migration section. Click the ‘Receive a backup from a remote site’ button.

- You will be led to the Settings page. Click the Create a Key button and copy the key.
- Log in to your source site and go to Settings > UpdraftPlus Backups > Migrate / Clone.
- Scroll down the page until you reach the Migration section. Click the ‘Send a backup to another site’ button.
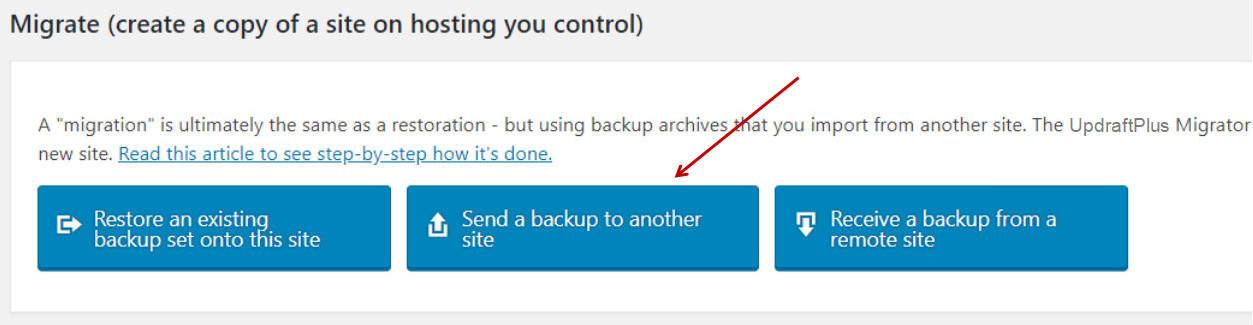
- Click on the ‘Add a site’ link and paste the key generated from the target site. The URL of your target site will then appear in the link box. Click the Send button.

- Once the migration is successful, you will see a new message in the ‘Last log message’ box in your target site, saying that the backup was successful. The number of your ‘Existing backups’ will also increase by one.
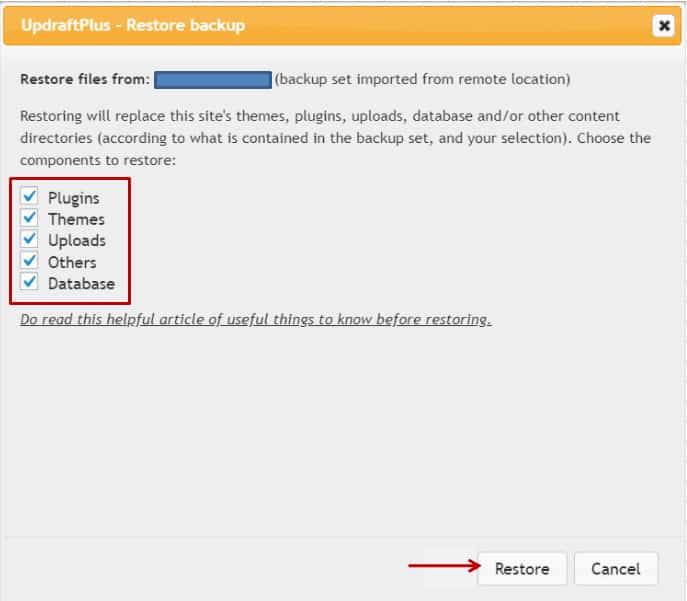
- Click the Restore button. This will lead to a page where you can select the files you want to restore. After selecting, click the Restore button.
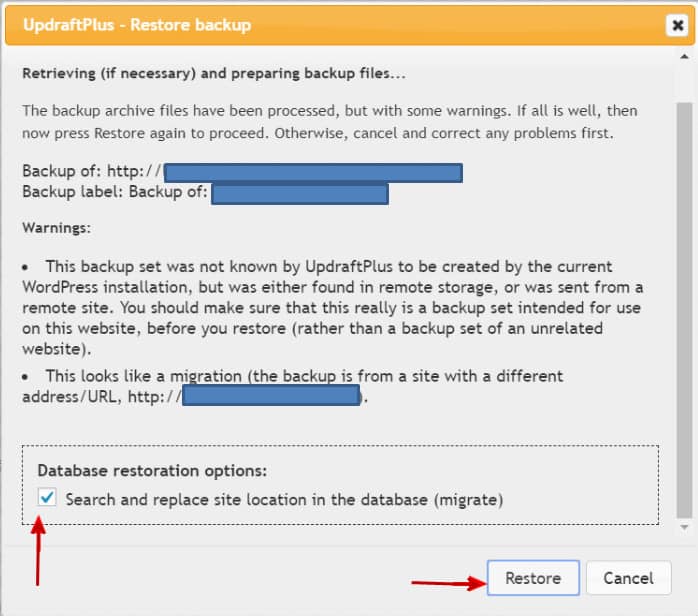
- Check the box on the Database Restoration options. This is to update the URLs with the new site URLs. Then, click the Restore button.
- Once the process is successful, you will see a green message “Restore successful” with a green check beside it. Click the “Return to UpdraftPlus configuration” button.
- You will be required to log in to your WordPress dashboard. You must enter the username/password of your source site.
UpdraftMigrator Pricing
Migrator ($30/year)
- Unlimited sites
- 60-days support
- 1 year of new installs
Migrator Pro ($49/year)
- Everything in Migrator
- 1-year support
Note: A generated clone site active for 24 hours costs 1 token. Every additional week costs another 1 token.
UpdraftClone
An additional service to UpdraftPlus is called UpdraftClone, and it really works as its own thing. Like UpdraftMigrator, UpdraftClone also allows you to create a new copy of your WordPress website. But you'll actually instantly clone it to a sandbox (test site), directly from UpdraftPlus using their own servers.
You can also use UpdraftClone even if you’re using the free version of UpdraftPlus.
All you have to do is to purchase UpdraftClone tokens through your UpdraftPlus account. Alternatively, you can upgrade to UpdraftPlus Premium to use UpdraftClone, along with other advanced features such as UpdraftMigrator and UpdraftVault.
Once you have purchased UpdraftClone tokens, there are two ways to clone your WordPress website using UpdraftClone. The first one is through your WordPress dashboard. Below is the step-by-step procedure:
- Log in to your UpdraftPlus account.
- Log in to your WordPress dashboard and go to Settings > UpdraftPlus Backups > Migrate / Clone.
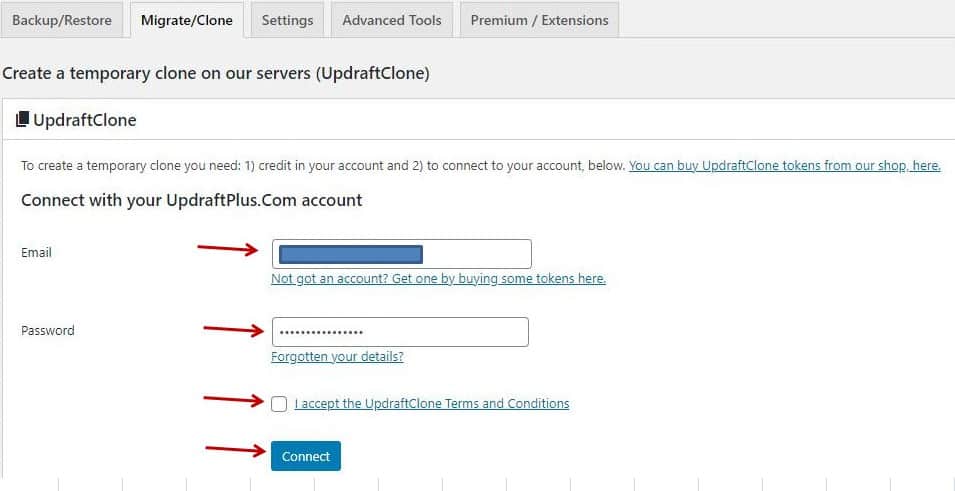
- Enter your UpdraftPlus account details, and check the box for the Terms and Conditions. Click the Connect button.
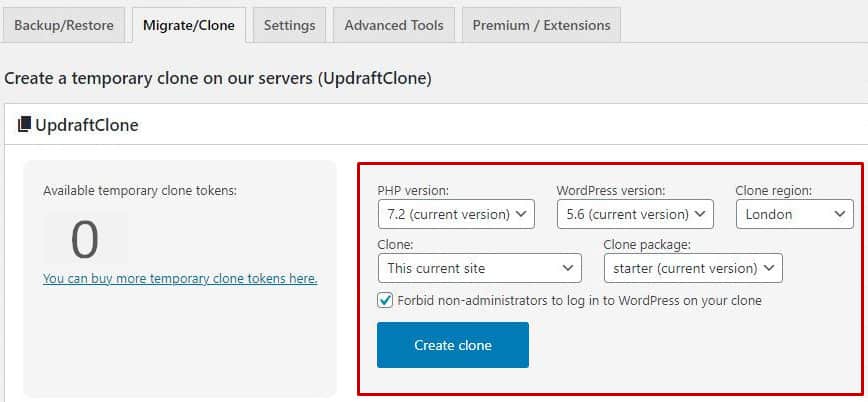
- Once connected, select the PHP and WordPress versions, the details of the cloned site you wish to create, and the clone region. Aside from London, the other available clone regions are Amsterdam, Bangalore, Frankfurt, New York, San Francisco, and Toronto.
- Press the ‘Create clone’ button.
- You will then see a message, “The clone has been provisioned, and its data has been sent to it. Once the clone has finished deploying it, you will receive an email.”
- Once the cloning process is finished, you can find the link to the cloned site in the Migrate / Clone tab. Your username and password are the same as that of your source site.
Here is another way to clone your WordPress website using UpdraftClone tokens.
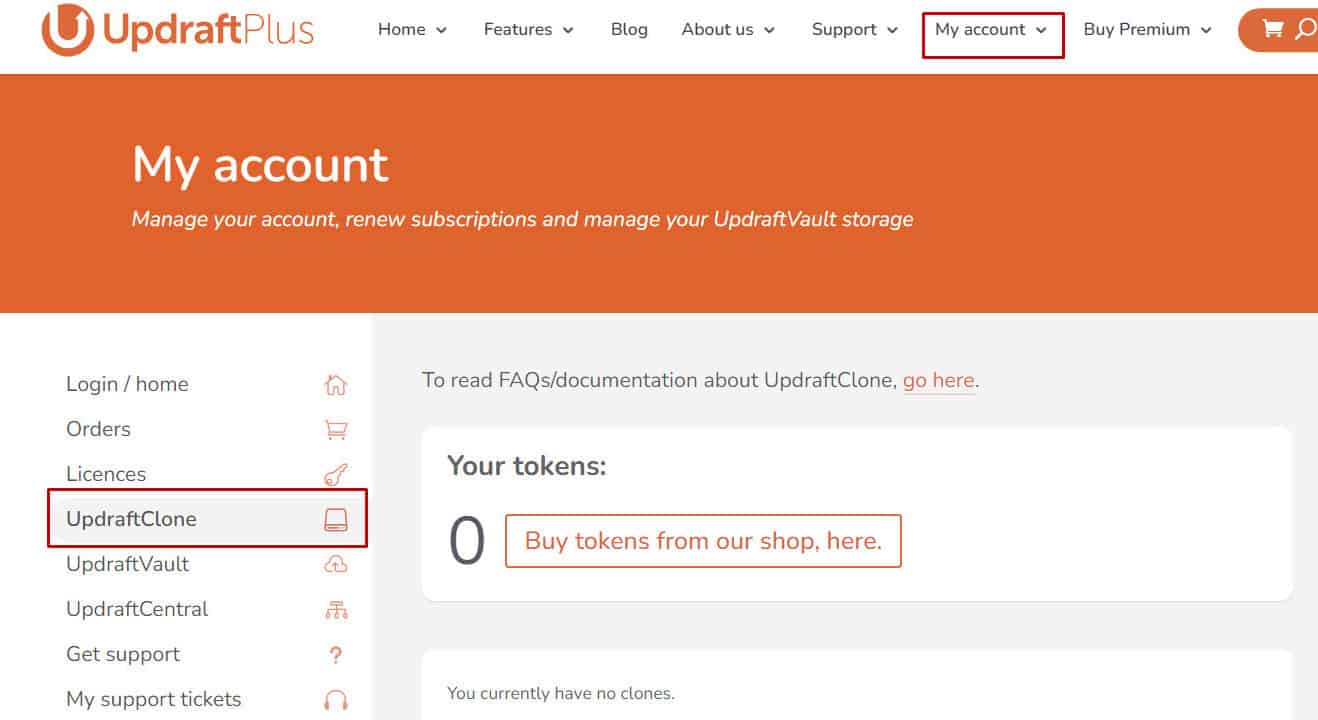
- Log in to your UpdraftPlus account.
- Go to My Account > UpdraftClone (My Clones) and check if you still have enough tokens to clone your site.
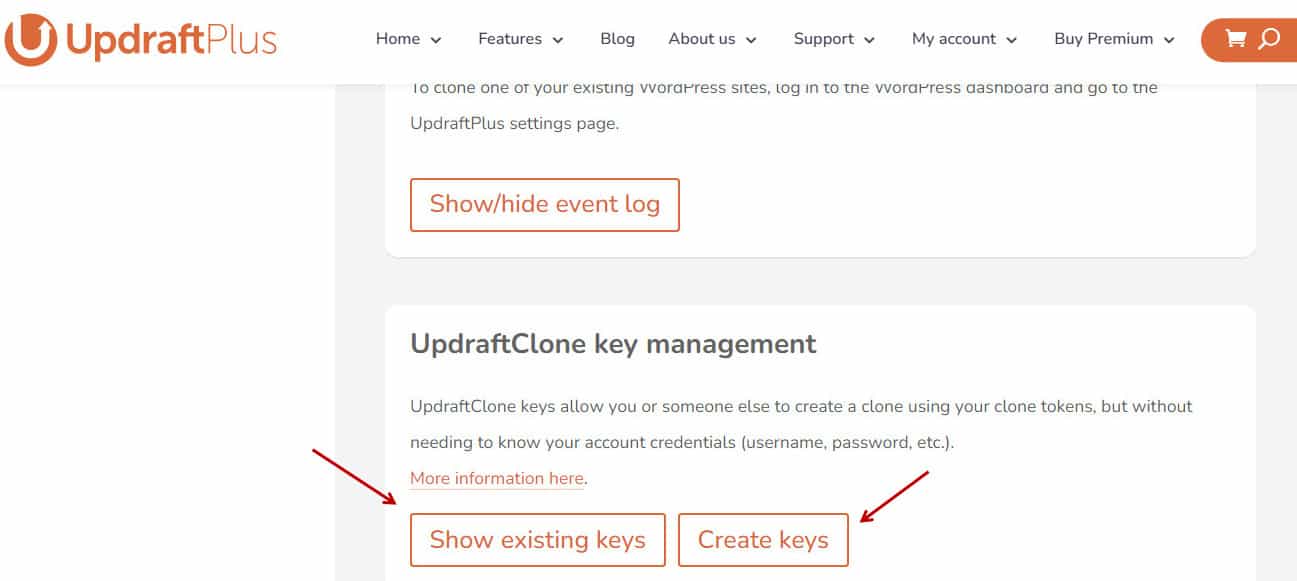
- Scroll down the page until you reach the bottom. If this is your first time creating a key to clone a site, click the “Create keys” button. Otherwise, click “Show existing keys.”
- Copy the key or one of the keys and log in to your WordPress dashboard.
- Go to Settings > UpdraftPlus Backups > Migrate / Clone.
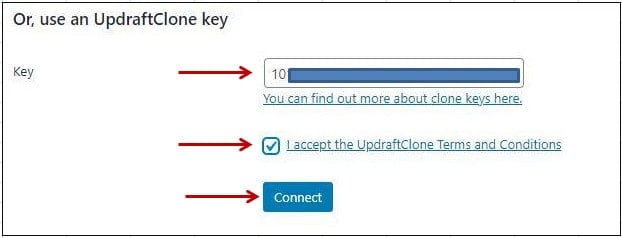
- Scroll down the page and paste the key into the key box. Check the “I accept the UpdraftClone Terms and Conditions” box and click the Connect button.
- Perform Steps 4-7 from the earlier method.
UpdraftVault
UpdraftVault is an optional storage location for your website backup if the other remote storage systems are unavailable or you don’t want to use them. If you are using the free UpdraftPlus version, you can purchase any of the provided options. But if you are a UpdraftPlus Premium user, you automatically have 1GB of storage on UpdraftPlusVault.
- To use UpdraftVault, log in to your WordPress dashboard.
- Click Settings > UpdraftPlus Backups and go to the Settings menu.
- Scroll down to the remote storage options and click the UpdraftVault icon.
- You will have two options – ‘Show the options’ and ‘Connect.’
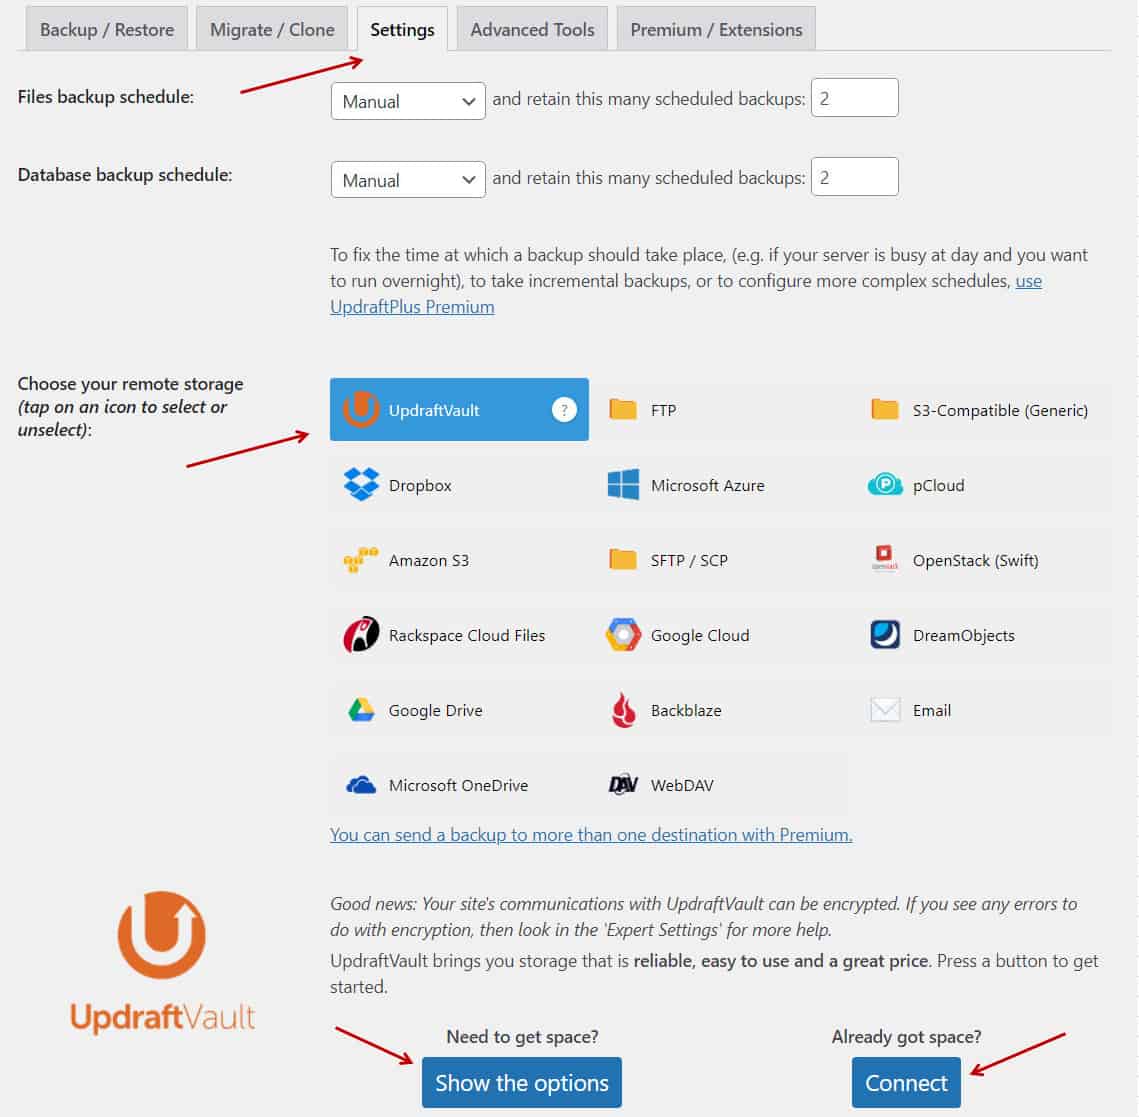
- If you are a free UpdraftPlus user and this is your first time using UpdraftVault, click the ‘Show the options’ and select the one you want to purchase.
- If you are an UpdraftPlus Premium user and this is your first time using UpdraftVault, click the ‘Connect’ button. Then, log in to your UpdraftPlus account to connect to your website. A confirmation message will appear shortly.


- Scroll down the page and click the Save Changes button.
Note: You can also choose to Disconnect anytime.
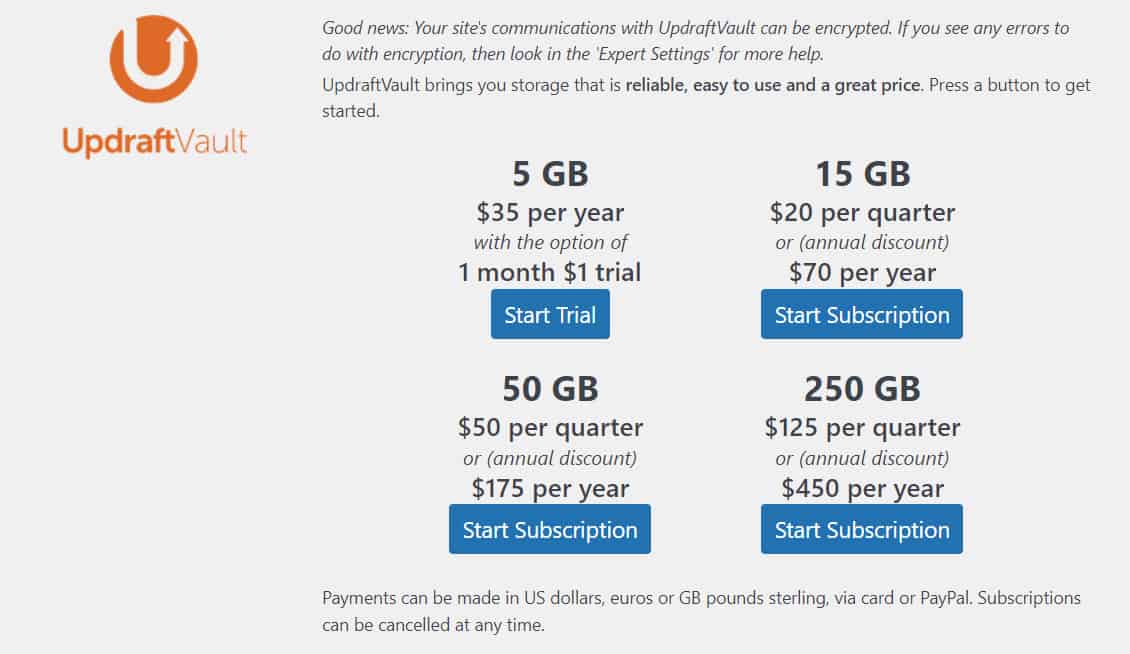
UpdraftVault Pricing
5 GB
- $35/year with the option of 1-month trial for $1
15 GB
- $20/quarter or $70/year (annual discount)
50 GB
- $50/quarter or $175/year (annual discount)
250 GB
- $125/quarter or $450/year (annual discount)
UpdraftPlus: Free vs Premium
The free UpdraftPlus plugin is already a complete website backup tool to begin with.
It safely stores backup files in various remote storage locations, performs scheduled backups, and can restore them quickly. However, the main difference between the free and the paid version is in the additional convenience features.
UpdraftMigrator, UpdraftClone, and UpdraftVault (1GB) are available in UpdraftPlus Premium. You also get access to more storage options, incremental backups, database encryption, advanced reports, and many more. UpdraftPlus Premium also supports multiple websites, depending on your chosen plan.
UpdraftPlus Pricing
UpdraftPlus Premium is available in 5 different plans – Personal, Business, Agency, Enterprise, and Gold. All of them come with all premium features, 1 year of support and free updates, and 1 GB storage of UpdraftVault (50 GB for Gold). Below are the full details:
Personal ($70/year)
- Up to 2 sites
- +1 UpdraftClone token
Business ($95/year)
- Up to 10 sites
- +2 UpdraftClone tokens
Agency ($145/year)
- Up to 35 sites
- +5 UpdraftClone tokens
Enterprise ($195/year)
- Unlimited sites
- +10 UpdraftClone tokens
Gold ($399/year)
- Unlimited sites
- +10 UpdraftClone tokens
- 50 GB UpdraftVault
- Unlimited UpdraftCentral Cloud
UpdraftPlus Pros and Cons
PROS | CONS |
|
|
UpdraftPlus Alternatives
Duplicator
Duplicator is a very popular backup and migration plugin for WordPress websites. The free version now has over 30 million downloads & claims to be used by 1.5 million professionals.
Duplicator has similar features to UpdraftPlus but differs in quite a few different ways. I also think its cons outweigh its pros.
Pros
- Easy to install
- Drag-and-drop migration
- Unlimited backups and migrations
- Cheaper than UpdraftPlus
- Wider support for free and paid versions
Cons
- Free version lacks some features (automated backup, scheduling)
- No real-time and incremental backups
- Fewer restoration features
- Fewer third-party integrations
- No database encryption
- Up to 100 sites only
All-in-One WP Migration
Introduced in 2013, All-in-One WP Migration is a free WordPress plugin that can create backups, and import or export a website. The tool is extremely popular, boasting use on 60 million websites with 5 million+ active installations. Instead of having a paid version, you can purchase add-ons individually which cost between $69 to $129 a year.
Pros
- Simple, intuitive UI design
- Beginner-friendly
- Mobile-friendly
- Drag-and-drop to import websites
- No limits on hosting or operating system
- 50+ language translations
- GDPR Compliant
Cons
- Free version has very limited features
- Import/Export site size up to 512 MB only
- Not so focused on the backup operation
- No premium version
Is UpdraftPlus Worth Trying?
Duh, that's why we wrote this. Just kidding that sounded kinda harsh.
UpdraftPlus is 100% worth trying. I've used this on multiple sites spanning over 2 years now and don't see ourselves getting rid of it anytime soon.
It's just so easy to backup & restore sites (and that's not even getting into the myriad of other features we spoke about earlier). Give them a try, you won't regret it.
Want to Learn Even More?
If you enjoyed this article, subscribe to our free newsletter where we share tips & tricks on how to use tech & AI to grow and optimize your business, career, and life.