Create Search Bar & Template in Oxygen
Oxygen Builder comes with a built-in search form widget that you can use to add a search bar that can integrate with a search results page.
Justin Gluska
Updated October 11, 2022

website search bar digital art
Reading Time: 6 minutes
One of the great things you can do when creating a WordPress site is to add a search feature. This can be super helpful for visitors who are looking for specific information on your site. You can easily add a search bar and search page to your site using Oxygen Builder.
In this tutorial, we'll show you how to create a search bar and search page in Oxygen Builder. We'll also go over some of the benefits of having a search feature on your WordPress site.
Why do you need a Search Bar in WordPress?
A search bar is a great way to help visitors find what they are looking for on your WordPress site. If you have a lot of content, a search bar can be especially helpful.
For example, let's say you have a blog with 100 posts. A visitor comes to your site and wants to read a specific post about cats. The visitor can use the search bar to search for the term "cats" and all of the posts that include the term "cats" will appear in the results.
The visitor can then click on the post they want to read and be taken directly to that post. This is much easier than having the visitor scroll through all 100 posts to find the one they want.
Benefits of a Search Page in Oxygen
There are a few benefits of having a search page on your WordPress site. First, it helps to keep your site organized. If you have a lot of content, a search page can help visitors find what they are looking for without having to scroll through all of your content. Second, a search page can help improve the user experience on your site. If visitors can easily find what they are looking for, they are more likely to stay on your site and continue browsing. And lastly, a search page can help you track which topics are most popular on your site. You can use this information to create more content that is relevant to your audience.
How to build a Search Bar in Oxygen
Step 1: Use built-in search bar widget
Oxygen Builder comes with a built-in search form widget that you can use to add a search bar to your WordPress site. To use the widget, simply drag and drop it into your desired location. Once you've added the widget, you can customize it to match the look and feel of your site.

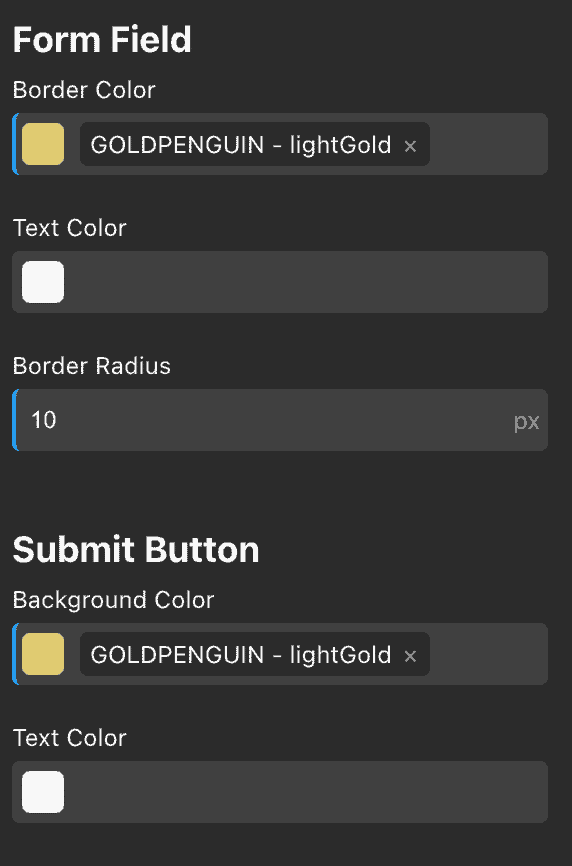
Step 2: Customize the search bar
The default search bar comes with a few different options that you can customize. You can change the form field and the submit button. The default block is pretty ugly, so we're going to go ahead and style it to match the look and feel of our site. Ensure proper formatting is set up (centered, in the header, etc). Once the design is done, we're going to add the template so we can collect our results.


How to build a Search Page in Oxygen
Step 1: Setting the Page Template
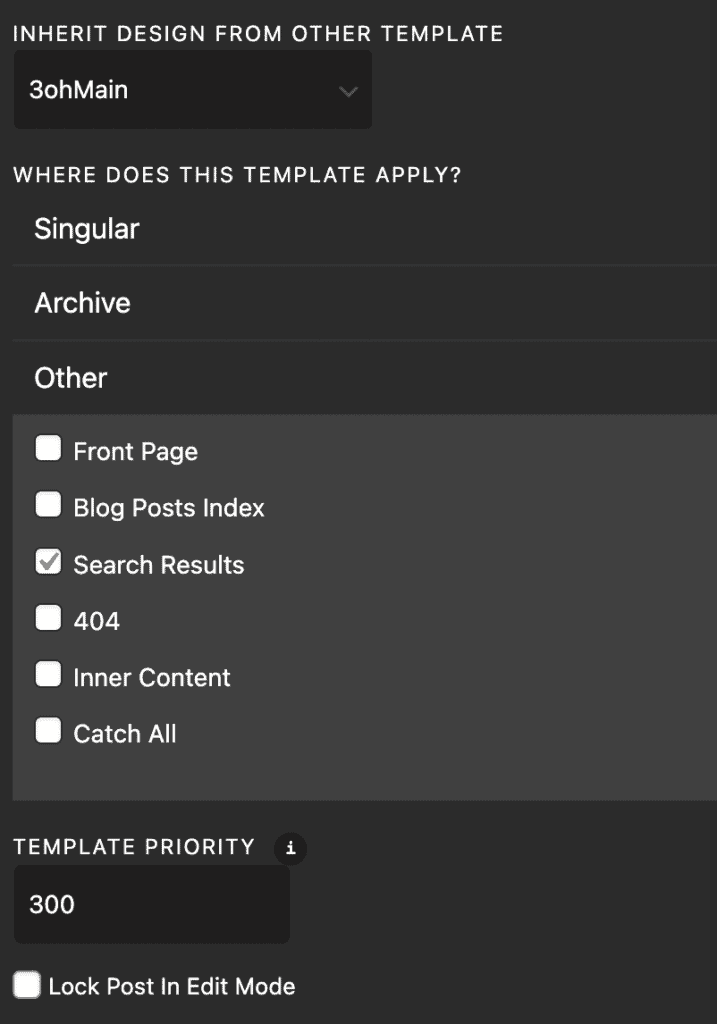
The first thing we need to do is create a new page and assign it the "Search" template. Head into your Oxygen template page and create a new template. Inherit the background of the styling you want on your search page. Now under "other" select ''Search Results" and save the template. Make sure to set the template priority higher than your other post templates, or the search won't redirect properly.
Step 2: Adding The Search Results with EasyPosts
Now that we have our search page template, we can add the search results using the EasyPosts widget. The EasyPosts widget will allow us to query our WordPress database and display the results on our search page.
To use the EasyPosts widget, simply drag and drop it into your desired location. In the widget settings, you'll want to keep the query set to default and style your posts in whatever way you want!
Step 3: Add Search Result Title
If you want to show the query users are searching for, we can easily use php to display the search term. This code goes in the html/php section of a code block.
<?php echo esc_html(get_search_query(false));?>
You could wrap this in an h1 tag and add "Search Results:" before the php if you want to set it as your page header. Save your changes and you're all set! Now when users search for something on your WordPress site, they'll be taken to a search results page that shows all of the posts that match their query.

Make your Search Page Adaptive:
You can make your new page adaptive by adding condition settings to your EasyPosts widget. This will allow you to show different content on your search page depending on what device a user is using. For example, you could show 5 results on desktop devices and 10 results on mobile devices.
You could also set conditional settings to show different results depending on if the query returns any results. This is helpful because you can show a "No results found" message if there are no posts that match the user's query.
To do this, you can use a code snippet built by Elijah from Oxygen and add it to any kind of snippet manager (we use Code Snippets)
if( function_exists('oxygen_vsb_register_condition') ) {

global $oxy_condition_operators;

oxygen_vsb_register_condition('Has Results', array('options'=>array('true', 'false'), 'custom'=>false), array('=='), 'search_has_results_callback', 'Search');

function search_has_results_callback($value, $operator) {

global $wp_query;
$posts_found = $wp_query->found_posts;

if( $value == "true" && $posts_found > 0) {
  return true;
} else if( $value == "false" && $posts_found == 0 ) {
  return true;
		}

	}

}
Now, add a condition to only show your query if "Has Posts" is equal to true. Otherwise, you can add a message that says "No results found".


Conclusion
The search feature is a powerful tool that can help you keep your WordPress site organized and improve your user experience. By creating a search page, you can make it easier for visitors to find the content they're looking for. So why not add a search page to your Oxygen site today? You might be surprised at how much it can help add some complexity and organization to your site.
If you have any questions about this tutorial, feel free to post them in the comments section below. We hope this helped!
Want to Learn Even More?
If you enjoyed this article, subscribe to our free newsletter where we share tips & tricks on how to use tech & AI to grow and optimize your business, career, and life.