Set Up WP Mail SMTP for Sending Emails & Forms in Breakdance & WordPress
Wondering how you can improve your site’s email deliverability? Here’s our easy-to-follow guide on setting up WP Email SMTP on Breakdance.
Christy Cañete
Updated October 1, 2023

WP mail smtp in Breakdance
Reading Time: 7 minutes
Ever wonder why some emails from your WordPress site don't make it to the inbox, or worse, end up in the spam folder?
Good news! There's a solution: setting up WP Mail SMTP. When done right, this plugin can dramatically improve email deliverability.
But how do we set it up on Breakdance?
This short guide will walk you through the process. Keep reading!
How to Set Up WP Mail SMTP in WordPress and Breakdance
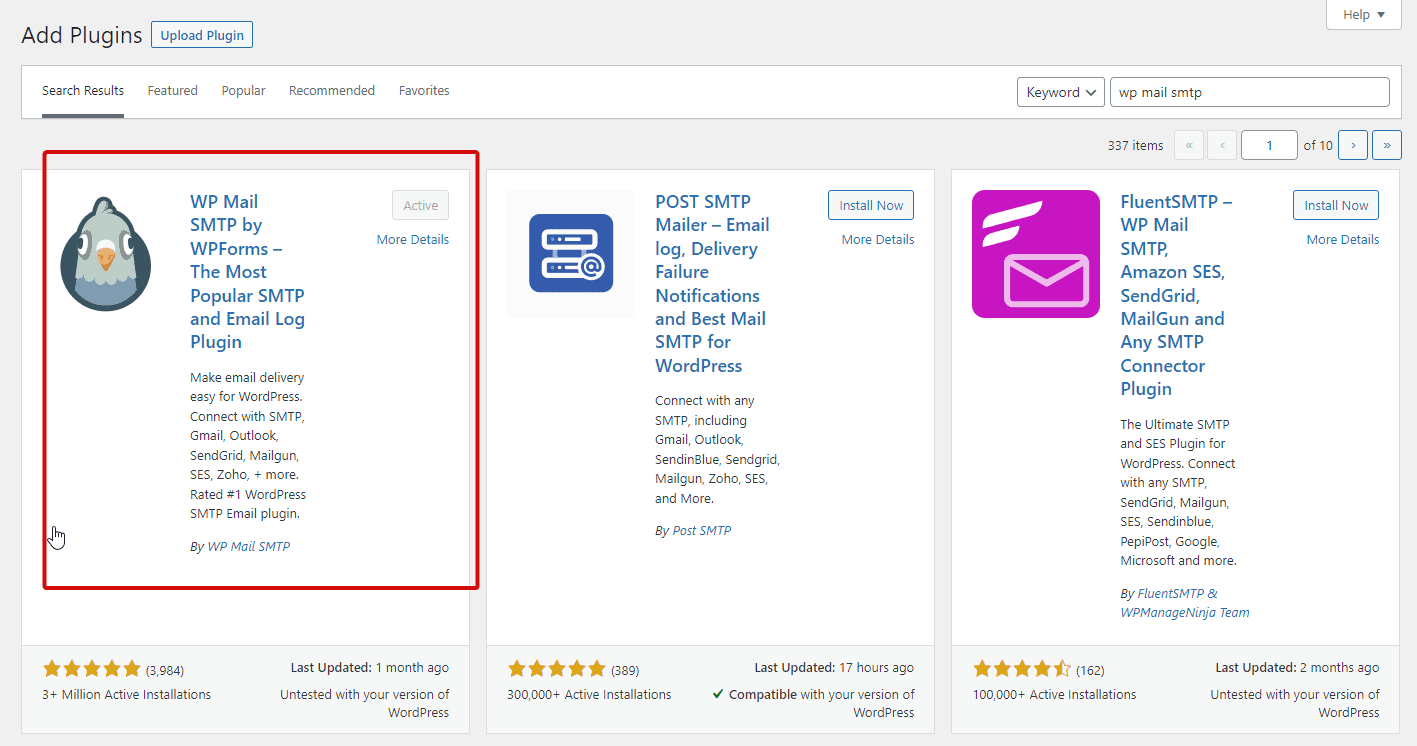
1) Install WP Mail SMTP Plugin
Got to Plugins > Add New. Search and install WP Email SMTP. Then, click to activate.
2) Configure the Plugin Settings
a) Open the WP Mail SMTP general settings. Enter the email address that emails are sent from. Click ‘Force From Email’ if you want all emails to use this same email address.
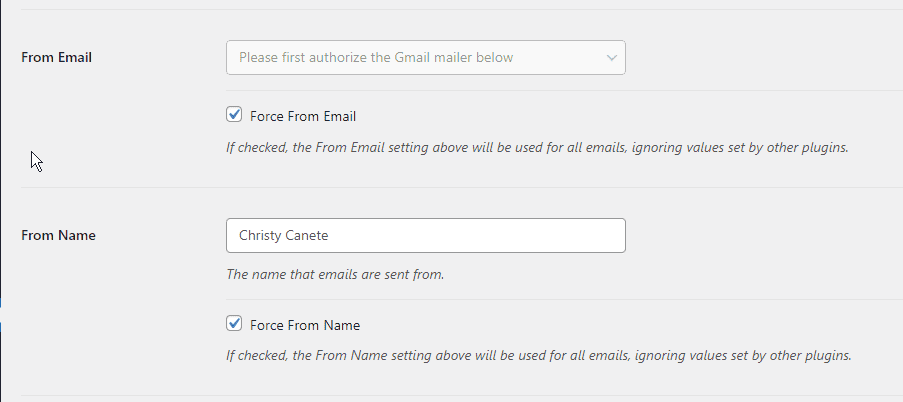
b) Enter ‘From Name’ - all emails sent from your website will be associated with the name entered here. Click ‘Force From Name’ if you want to use the name for all your emails.
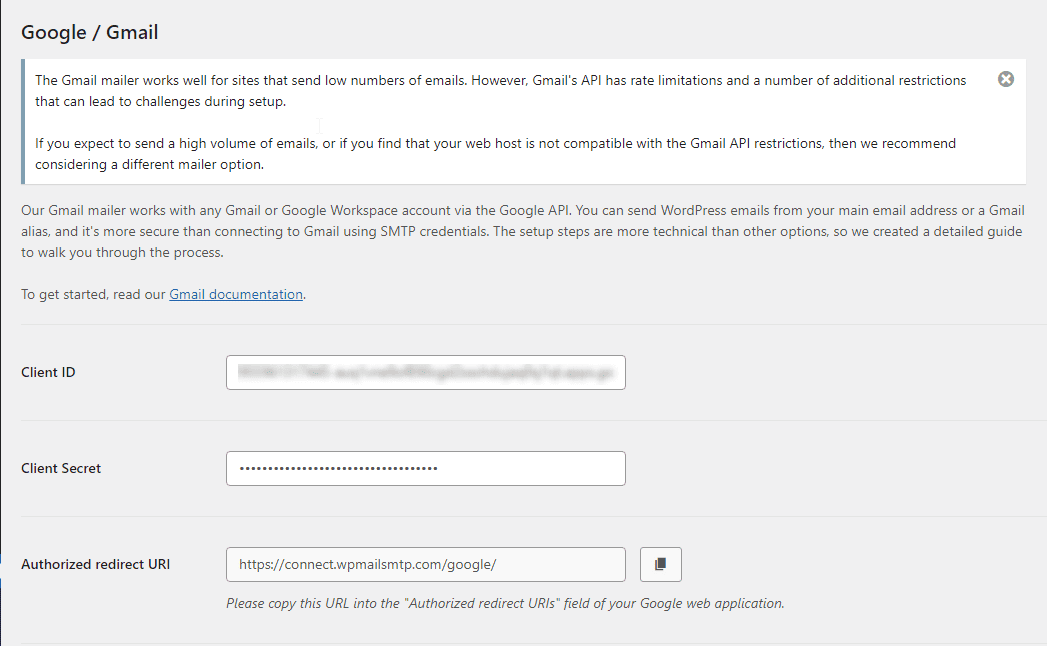
c) Scroll down to the ‘Mailer’ section. Here, you can choose which mailer service you want to use to send your emails. In this tutorial, we’re going to use Google/Gmail.
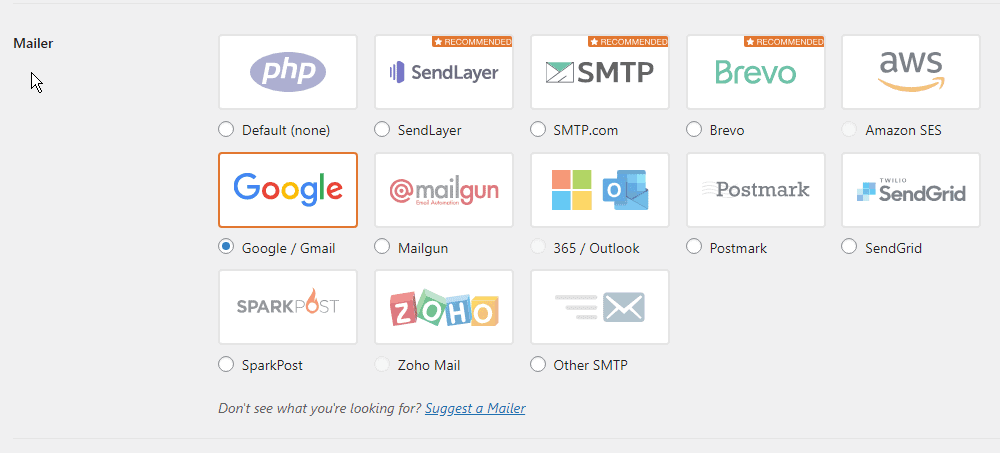
d) When Gmail is selected, you will be prompted to enter the Client ID and Client Secret codes. Leave the settings for now until you’ve configured your Gmail API key in the next steps. Make sure to keep this tab open.
3) Generate the Client ID and Client Secret From Your Google Cloud Account
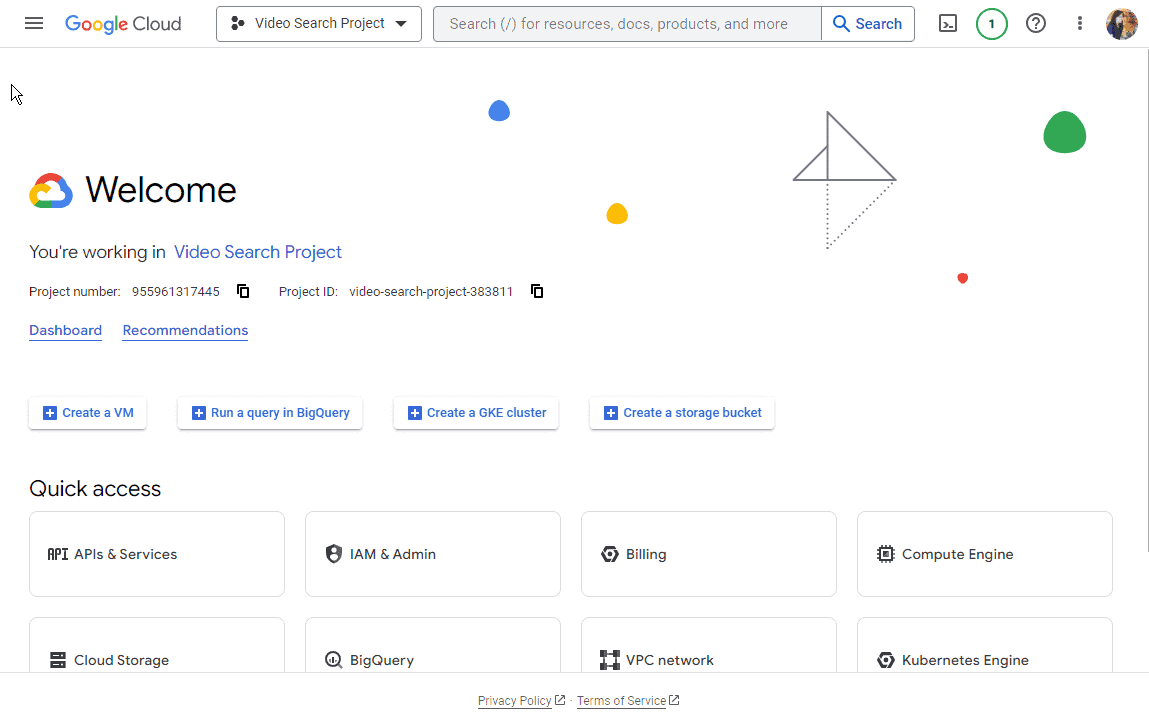
a) Open a new window. Log in to your Google Cloud account.
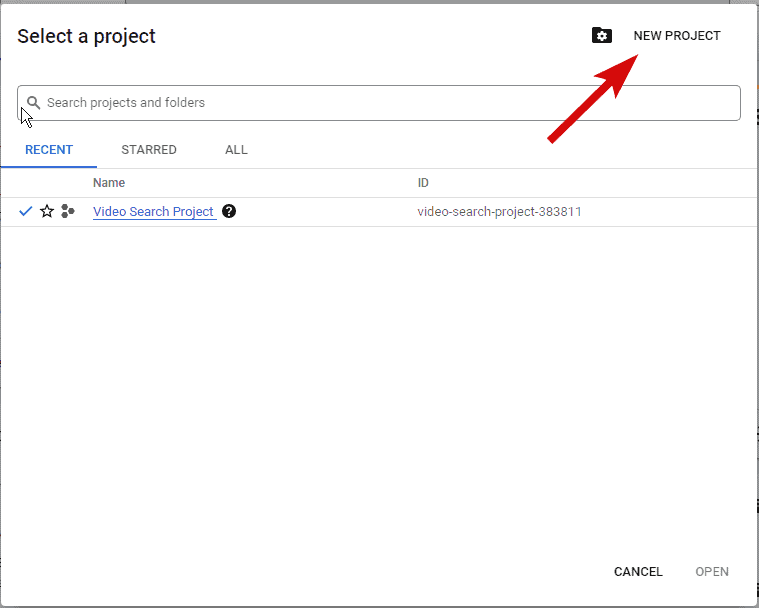
b) Click the projects drop-down menu at the top of the page.
c) On the pop-up window, select an existing project or create a new one.
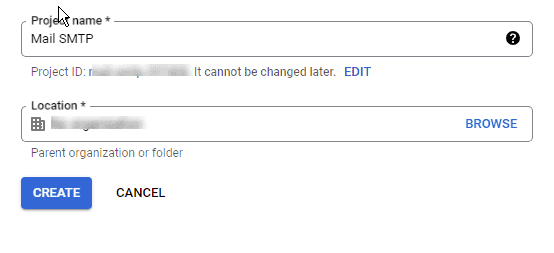
In this tutorial, let’s create a new project. Enter a project name and select an organization from the available drop-downs. Then, click ‘Create.’
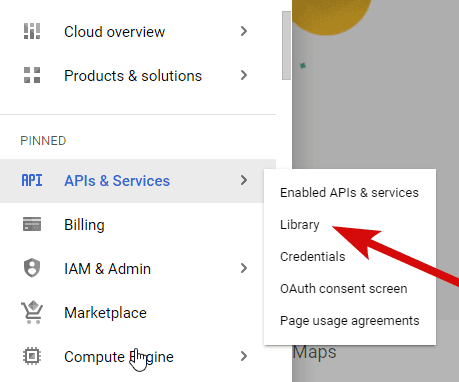
d) Let’s now enable the Google API services for your project. On your dashboard, go to APIs & Services > Library.
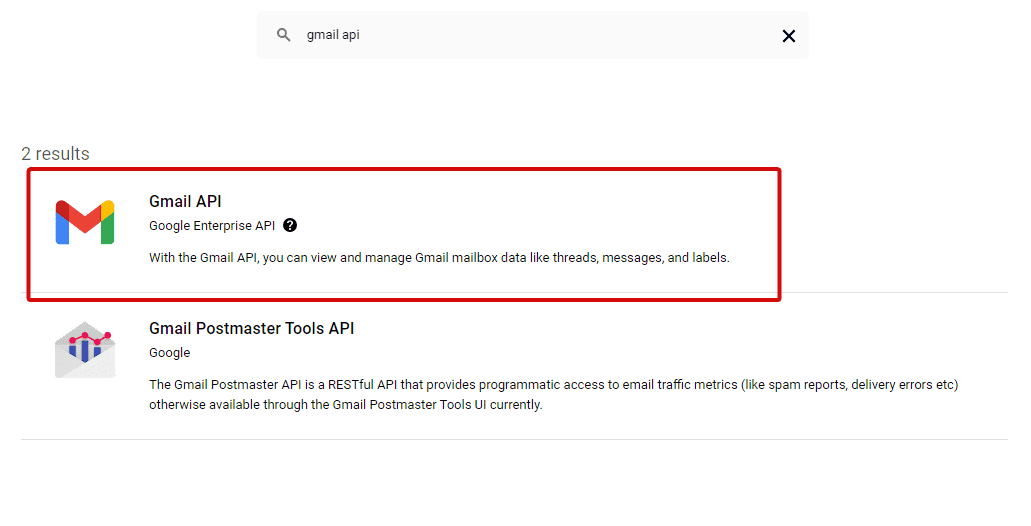
e) Search for ‘Gmail API’ on the search bar. Click the Gmail API and then tap the enable button. You will then be redirected to the Gmail API overview page.
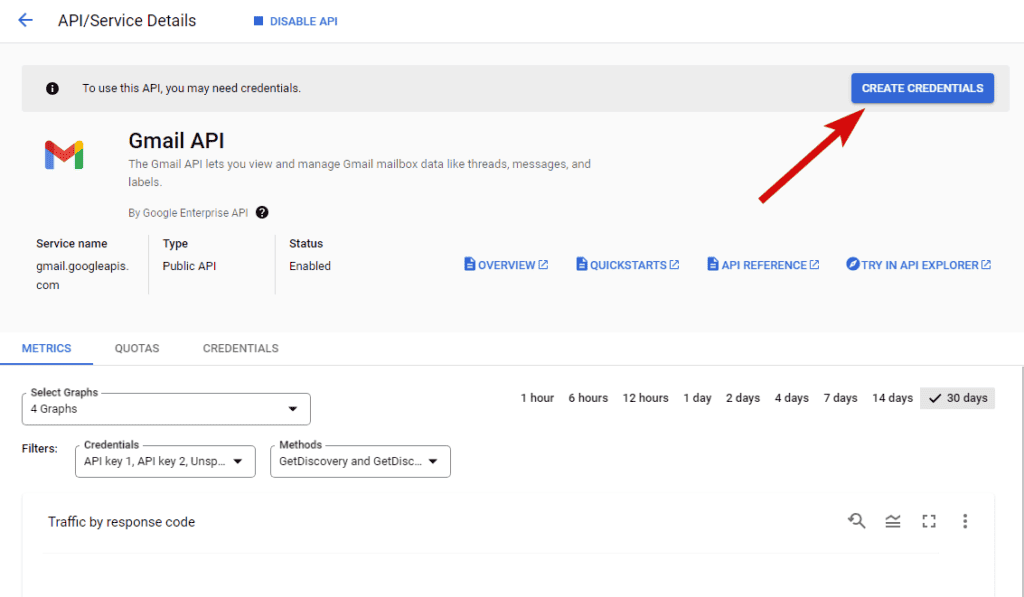
f) At the top right side of the page, click ‘Create credentials.’ Here, you will need to answer a few questions to generate your API codes.
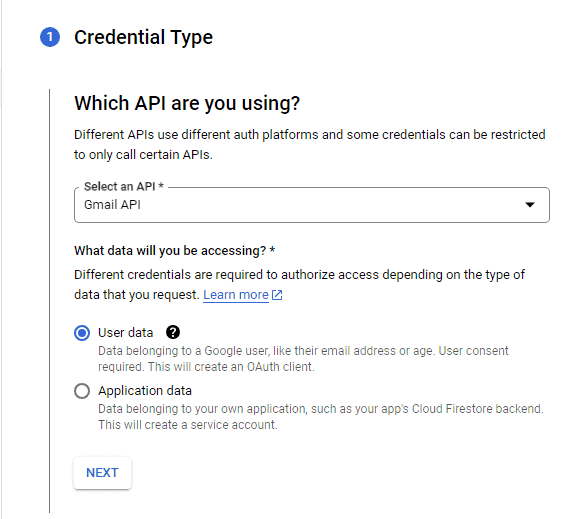
g) Under the ‘Credential Type.’ select the Gmail API from the drop-down menu. Tap the ‘User data’ option, as shown below. Click ‘Next.’
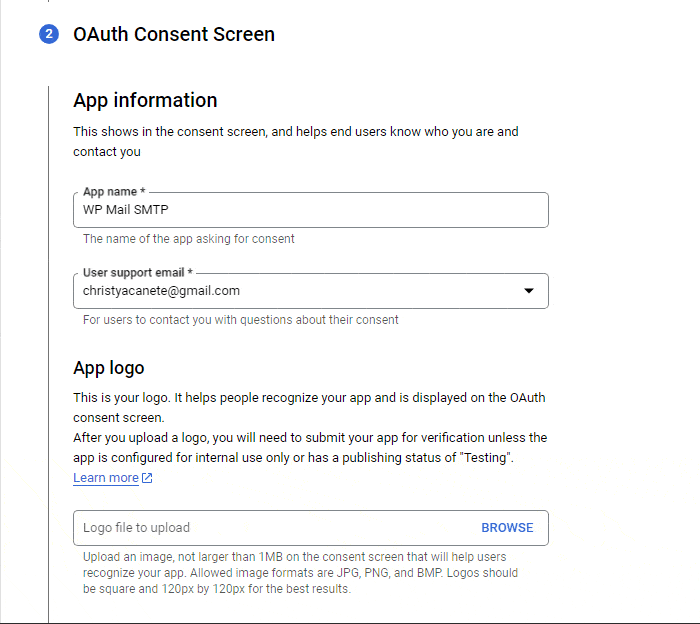
h) Under the ‘OAuth Consent Screen,’ enter the basic information about your app, like the app name, support email, app logo, and developer contact information. Click ‘save and continue.’
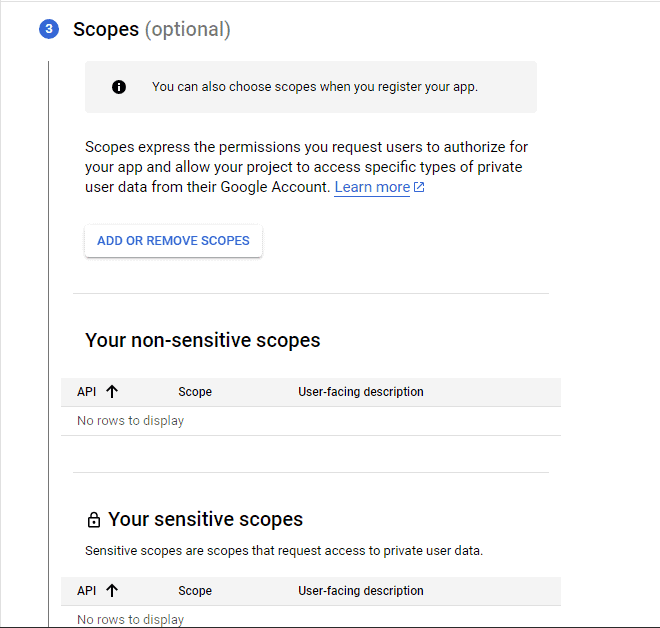
i) Next is the ‘Scopes’ section. This is optional, so let’s skip this section and proceed to the next step.
j) The next step is to enter the OAuth Client ID. On the drop-down menu, choose ‘Web application.’ Enter a name on the ‘Name’ field, or leave the default name as it is. This name is only used to identify the client in the console and will not be shown to your website visitors.
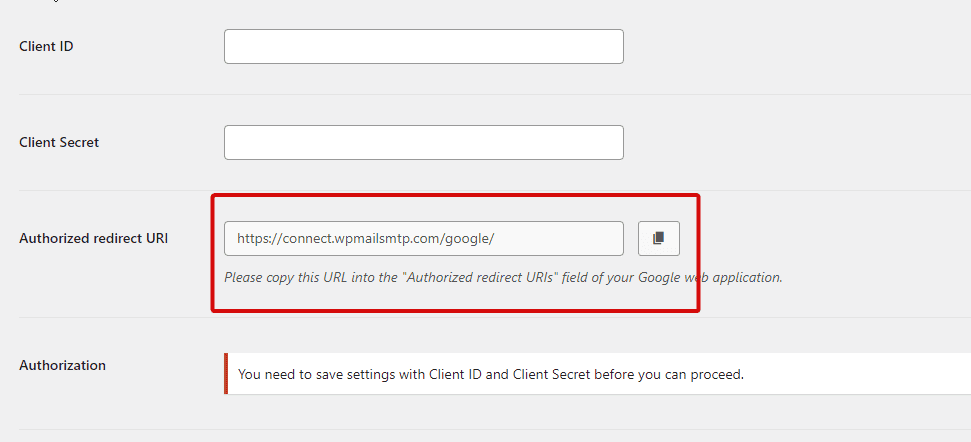
k) Scroll down further and click the ‘Add URI’ button under the ‘Authorized redirect URIs’ section. Here, you will need to paste information from your WordPress SMTP settings.
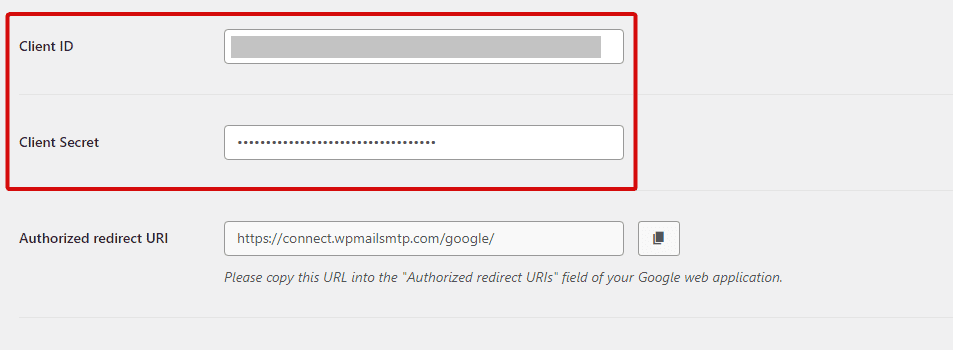
So, go back to your WordPress admin site. On the WP Email SMTP settings page, copy the URL from the ‘Authorized redirect URI’ field.
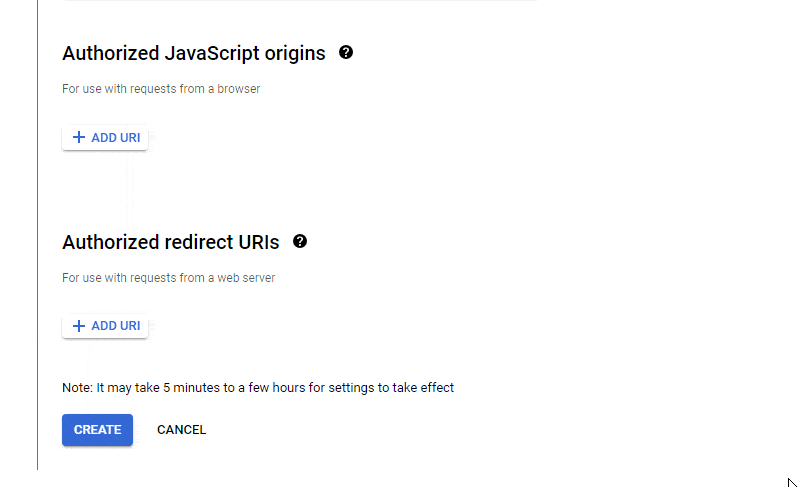
Back to your Google Cloud Console, paste the URL on the ‘Authorized redirect URIs’ section. Click ‘Create’ then ‘Done.’
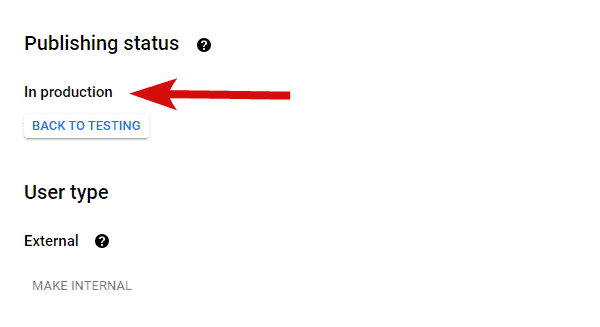
l) On the sidebar, go to ‘Oauth consent screen.’ Make sure that the user type is set to external.
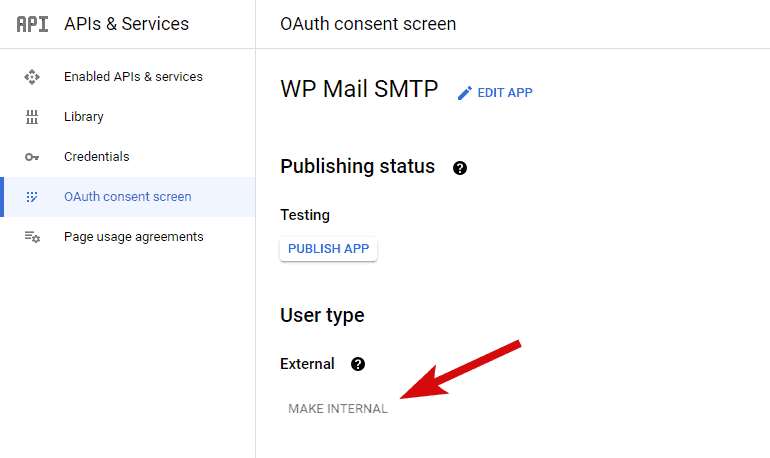
Then, click ‘Publish App.’ The publishing status should now be changed to ‘In production.’
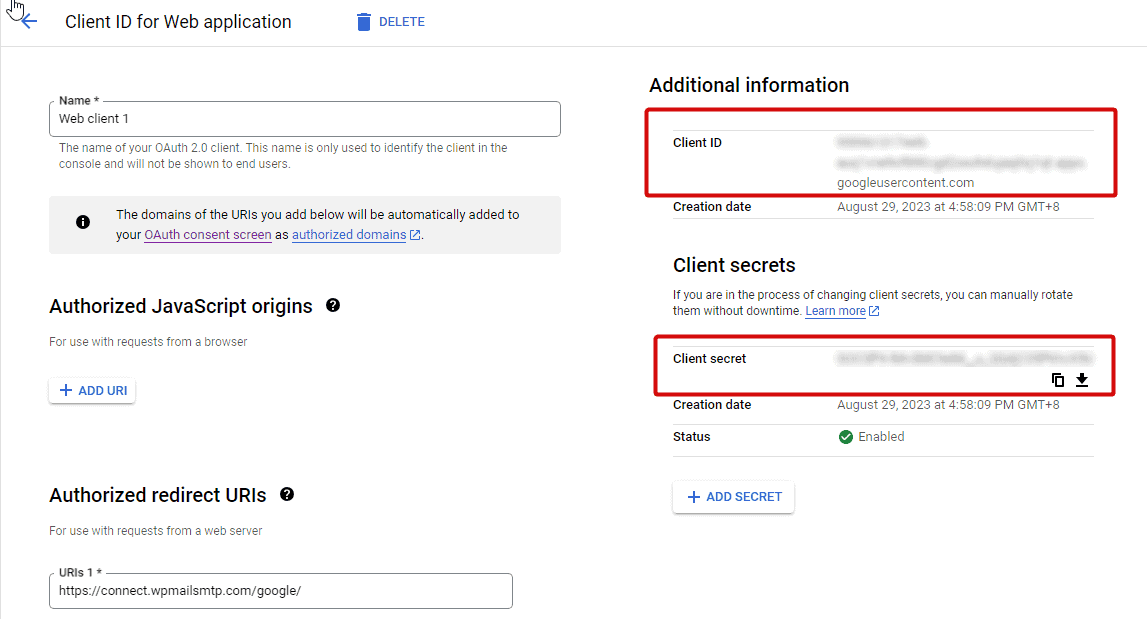
m) On the left side menu, click ‘Credentials.’
Under the ‘Oauth 2.0 Client IDs’ table, you should see the client name of your app. Click the ‘pencil’ icon on the right. This will open a new page.
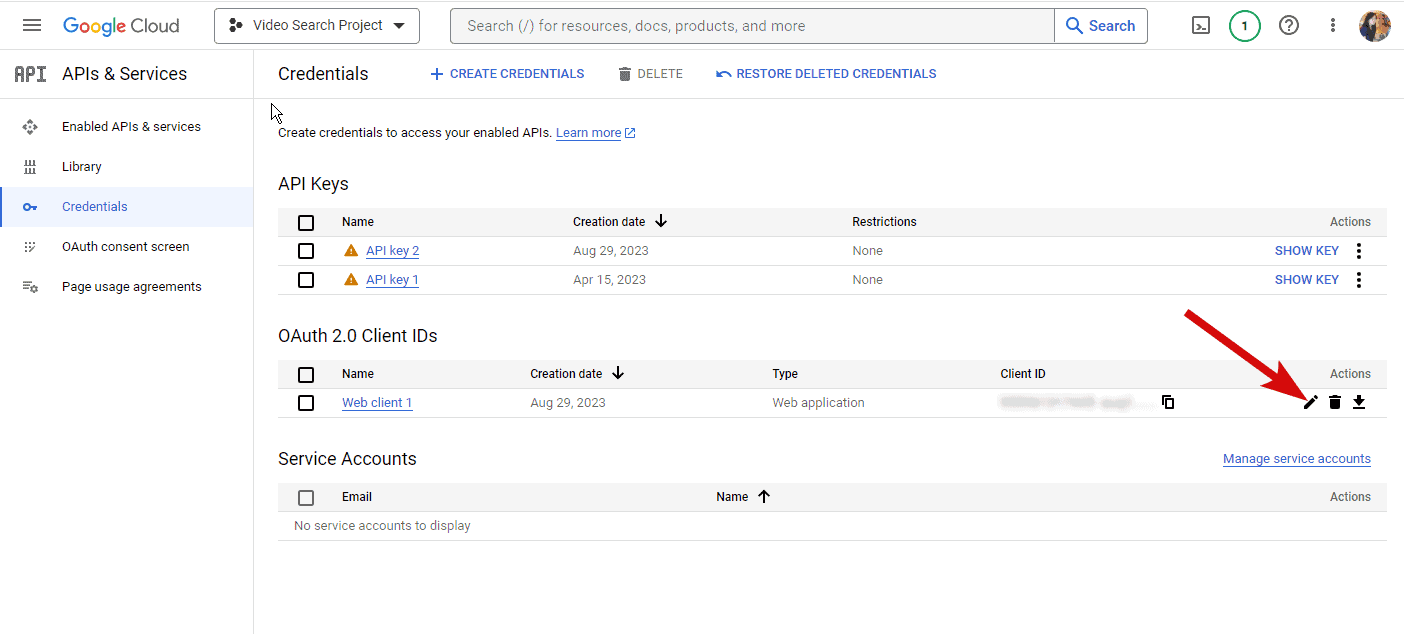
On the right side of the page, you should see the Client ID and Client Secret codes. You’ll need to copy this information and paste it to the corresponding fields on your WordPress Settings.
4) Finish the WP Email SMTP Setup
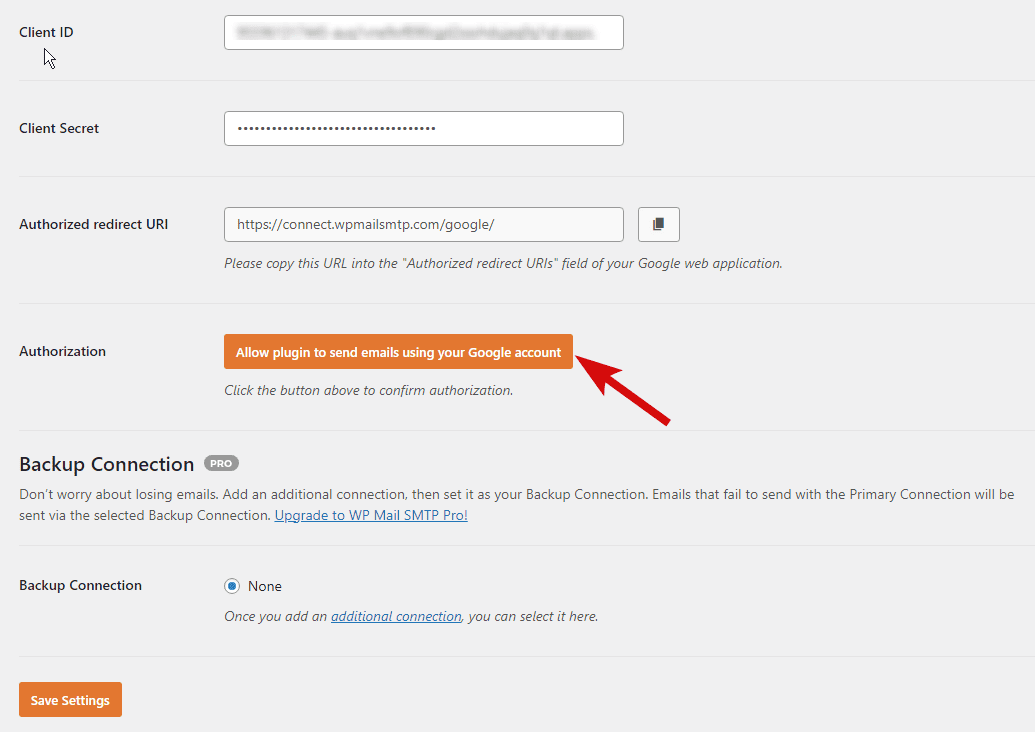
a) Back to your WordPress SMTP settings, paste the Client ID and Client Secret codes. Then, Click save.
b) Once the page is refreshed, you should see a new button ‘Allow plugin to send emails using your Gmail account.’ Click this to allow WordPress to send emails on your behalf.
c) You should then be redirected to the Gmail login page. However, you might encounter an error saying that Google hasn’t verified the app.
But in this tutorial, you don’t need the verification process since the app will only be used by you.
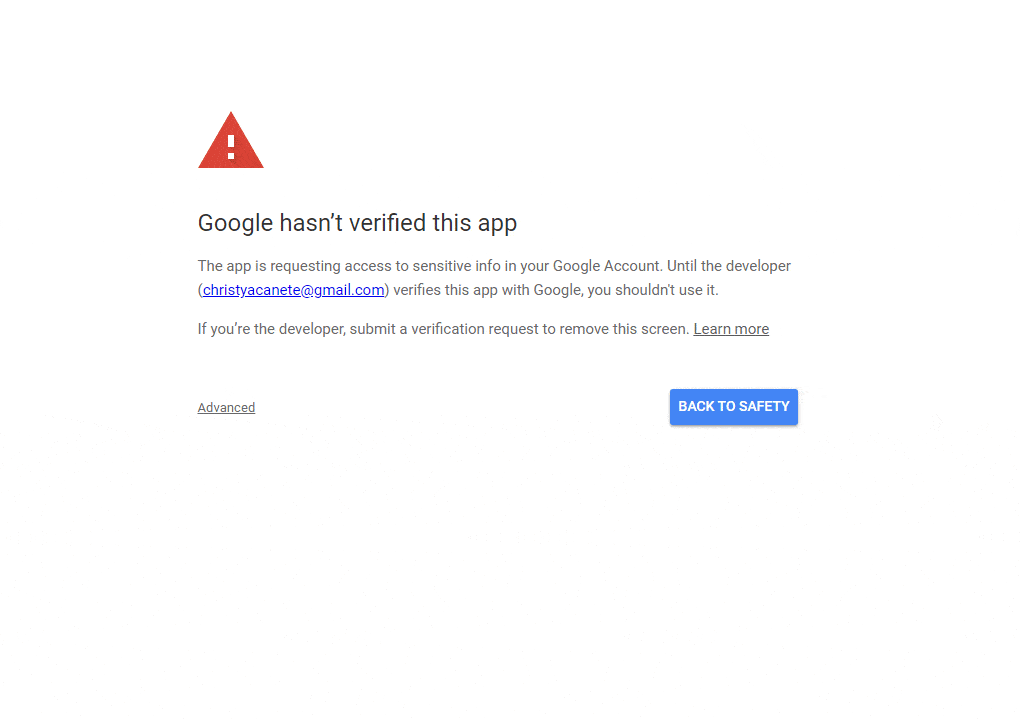
To proceed, tap the ‘Advanced’ link in the bottom left corner. Click the ‘go to wpmailsmtp.com (unsafe)’ link. This will open a new page prompting you to authorize WP Mail SMTP plugin to access your Gmail. Click ‘Continue.’
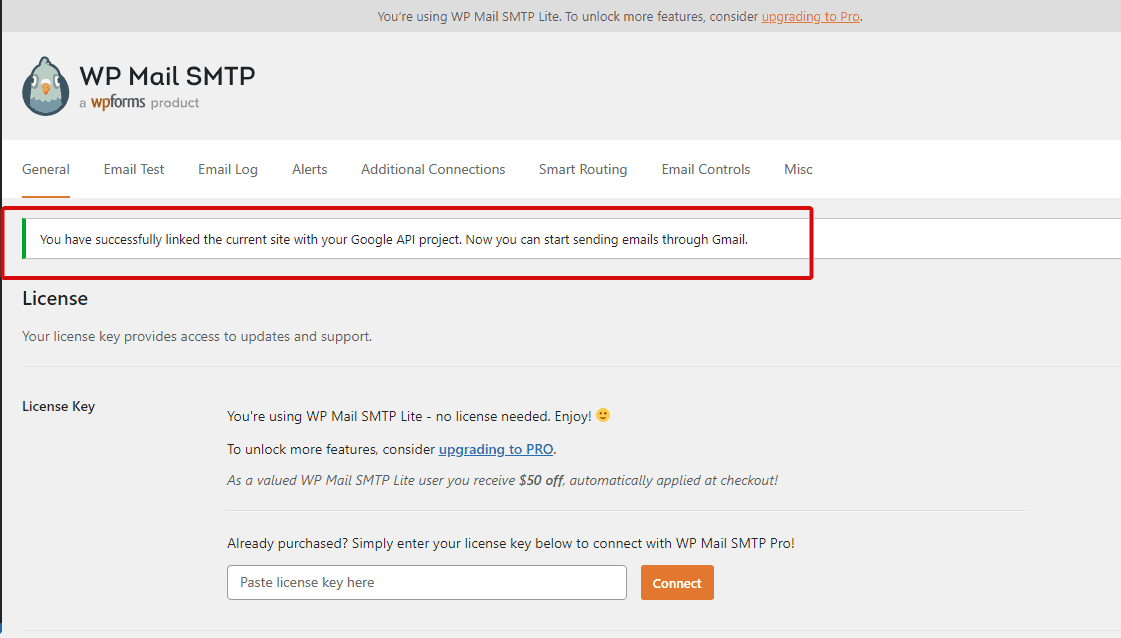
d) You’ll be redirected back to your WordPress settings page. You should see a message saying that you’ve successfully linked your Gmail to the plugin.
5) Send Test Email From WordPress
a) Let’s send out a test email to make sure that everything is working properly. On the ‘Email Test’ tab, enter a valid email address in the ‘Send to’ field. This is where you’re going to receive the test email.
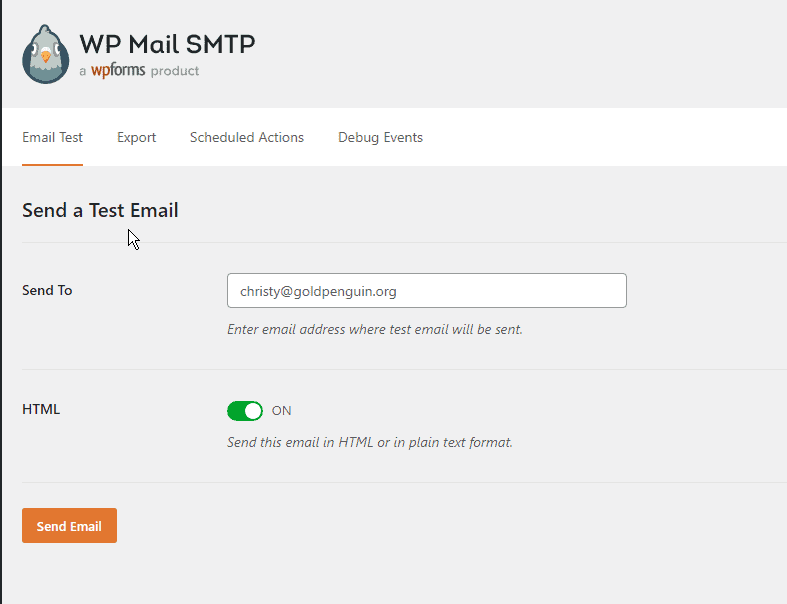
b) Keep the HTML tab ‘ON.’ Then, click ‘Send Email.’
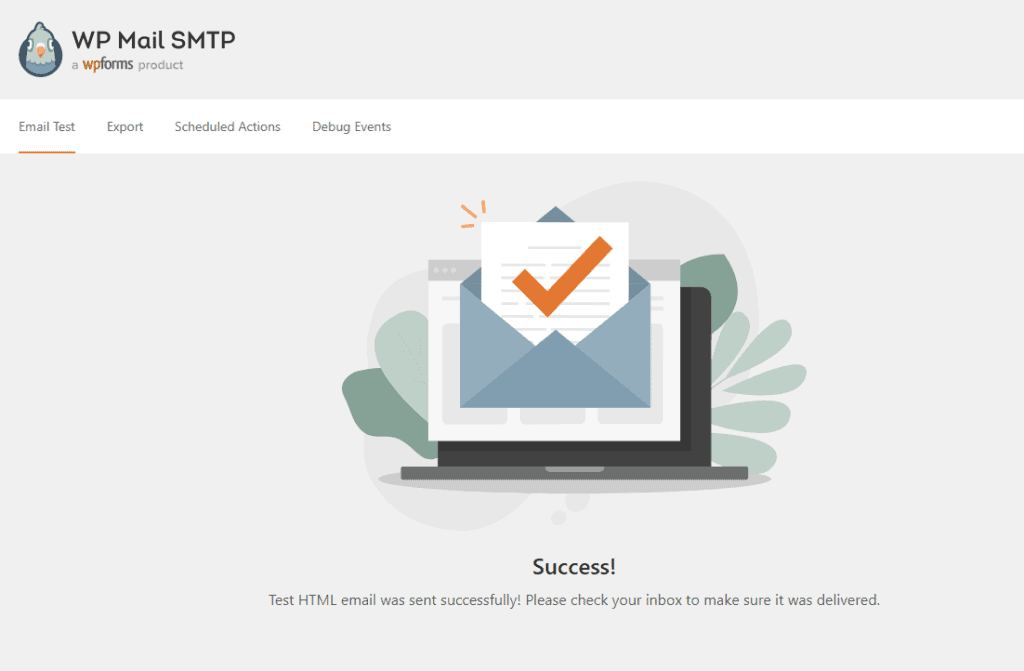
c) Once the test email is sent, you’ll see a success message like the one below.
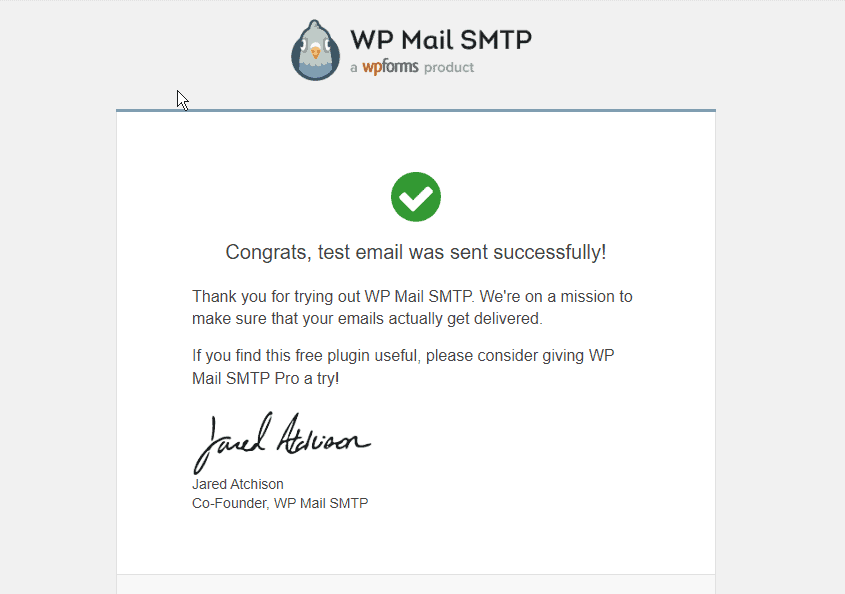
d) Check your inbox. You should receive a message, as shown below.
6) Send Breakdance Forms Using WP Email SMTP
Now, let’s try to send a contact submission form using Breakdance.
On your WordPress dashboard, open any page you want to add a submission form. Then, edit the page in Breakdance.
Add a section and a form builder element.
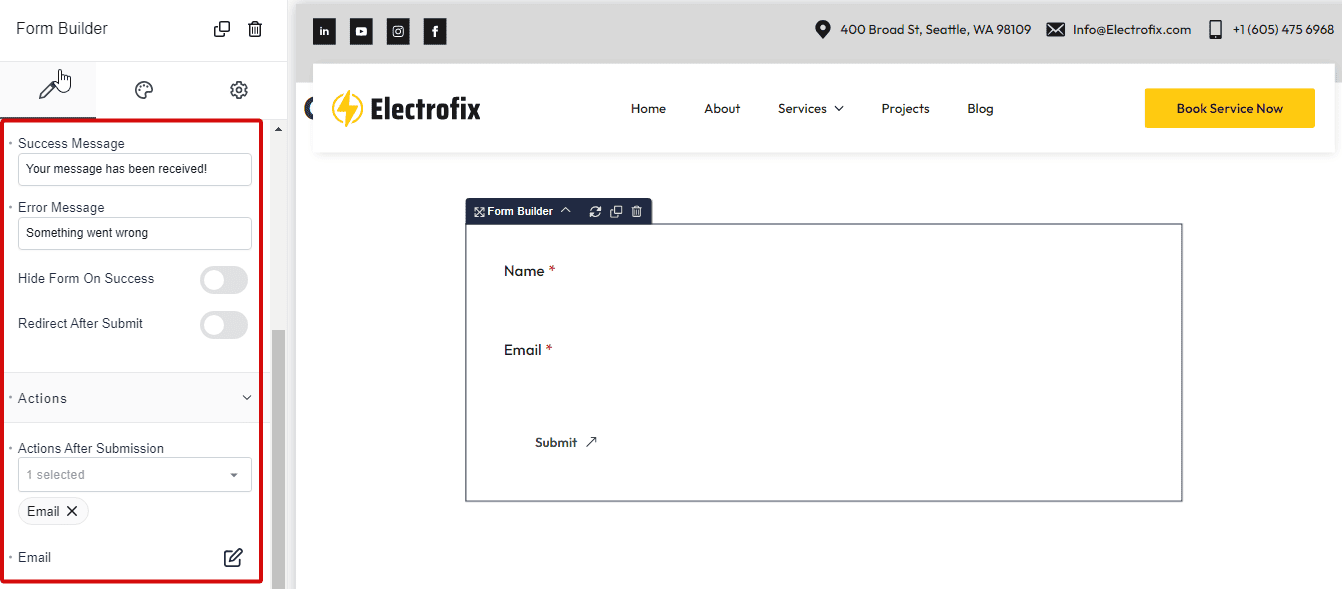
Click the form builder element to modify the actions settings on the left side menu. Under the ‘Actions’ drop-down, select ‘Email.’
The ‘Email’ settings should appear just below the drop-down menu. You can click it if you want to configure the other settings like the email subject, message, and email address to receive a copy of the form sent.
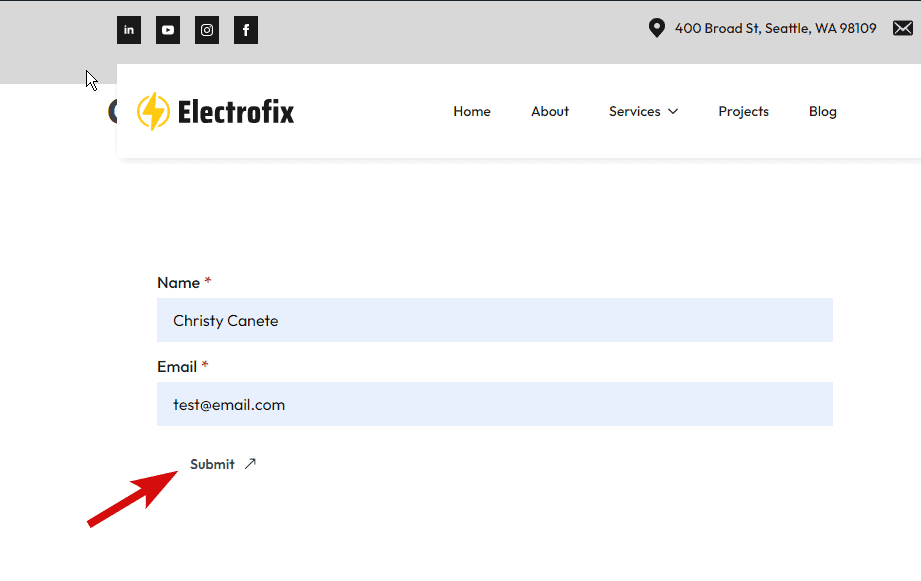
Test the Breakdance form on the front-end by entering a name and email address. Click ‘Submit.’
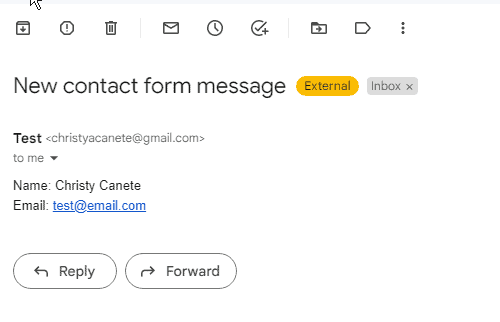
Check the inbox of the recipient. You should see a message containing the email address you’ve set on the SMTP and the details entered on the form.
What’s Next?
With the SMTP plugin set up, you've taken a significant step in ensuring your WordPress emails reach their intended recipients. You can also use this feature to send emails, contact forms, WooCommerce order forms, and many others.
But it doesn’t end there - Breakdance offers other features to level up your email marketing game.
For instance, why not integrate Breakdance forms with third-party platforms? For guidance, check out our tutorial on how to send Breakdance forms to Convertkit.
Hopefully, you’ve found this guide helpful! Let us know if you have any questions, and we’ll try our best to help.
Want to Learn Even More?
If you enjoyed this article, subscribe to our free newsletter where we share tips & tricks on how to use tech & AI to grow and optimize your business, career, and life.