Sell Physical & Digital Photography Prints in Breakdance Builder
Want to transform your photography skills into a thriving business? Learn how to create an online store for selling digital photo prints in Breakdance. Our tutorial covers everything from start to finish.
Christy Cañete
Updated August 25, 2023
sell photo prints in Breakdance
Reading Time: 10 minutes
Ever thought about selling your photography prints online? It's easier than you think!
Breakdance offers you opportunities to sell photos online without the need to hire a web developer.
Simply choose one of the beautiful templates from the design library. Or create your custom template through its drag-and-drop feature. Integrate eCommerce plugins like WooCommerce to manage products, payments, and shipping options.
And, you’re all set!
Whether you’re a professional or an amateur photographer looking to make a passive income, this guide is for you.
Let’s dive in and let your creativity pay off!

How to Sell Physical and Digital Photography Prints Using Breakdance
1) Set Up Your WordPress Account and Plugins
Before we begin, make sure that you’ve already set up the following:
- Domain name and hosting: The domain name will serve as your website’s address while the hosting service makes your online store live.
- WordPress account: This is where you'll manage, design, and publish your website content.
- Breakdance theme: This is a drag-and-drop website builder to give your store a specific look and feel. Choose a pre-designed template from the design library, or customize your own template. In this tutorial, we’re going to use the ‘oclock’ Breakdance template
Next, you’ll need to install some plugins for your online photography store. For this tutorial, we’re going to use:
- WooCommerce: This is a free WordPress plugin to help you add products and manage orders easily.
- Product Addons for WooCommerce – Product Options with Custom Fields: This is a free WooCommerce extension plugin to add custom fields and personalizations to your products.
Make sure that these plugins are activated on your WordPress account.
2) Set Up Your WooCommerce Account
WooCommerce will automatically launch a setup wizard upon activation. Go ahead and enter your store information such as the address and types of products to sell.

The setup wizard will also offer you additional free features to add to your store. Install them or skip them for now.
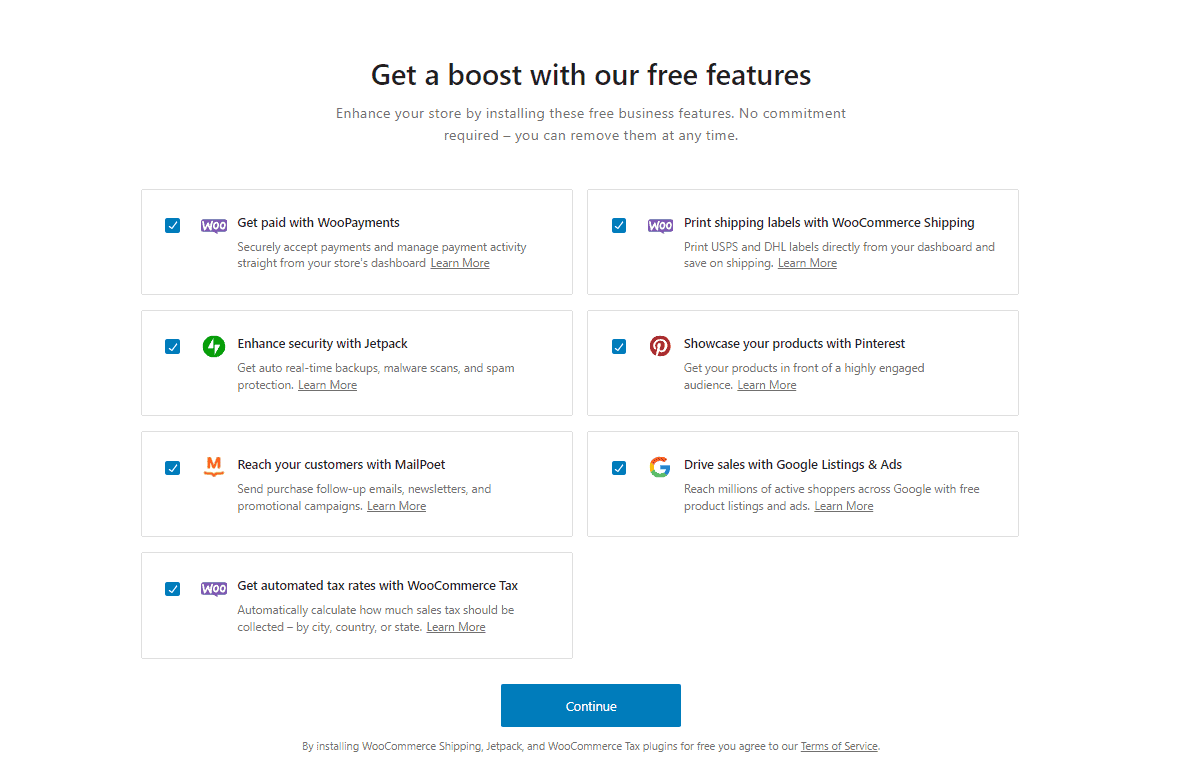
You’ll also be asked whether you want to choose a new theme or continue with your current theme. I highly recommend you continue with the active theme in Breakdance.
In this tutorial, I used the ‘oclock’ Breakdance template. On your WordPress dashboard, just head over to Breakdance > Design Library. Choose ‘oclock’ or other templates you wish to add.

If you want to create custom templates, we’ve created these separate tutorials you can follow:
- Create a page header in Breakdance
- Create a page footer in Breakdance
- Create an individual blog post template in Breakdance
Once you’re satisfied with your options, click continue. This saves your settings and takes you to the WooCommerce dashboard to finish the setup.
3) Set Up Your WooCommerce Store
Customizing your online store in WooCommerce is straightforward.
On the dashboard, a setup checklist will guide you through creating your photography store. This covers adding products, payment methods, taxes, and shipping.

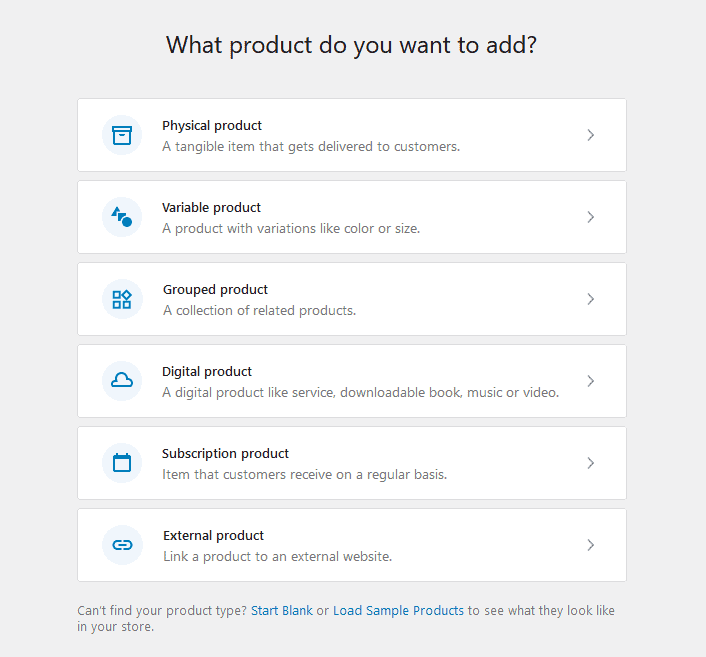
a) Let’s start by adding our first products. Click the ‘Add my products’ on the checklist. You’ll see options to upload products: template, manual entry, CSV, or migration service. For this guide, pick the template.
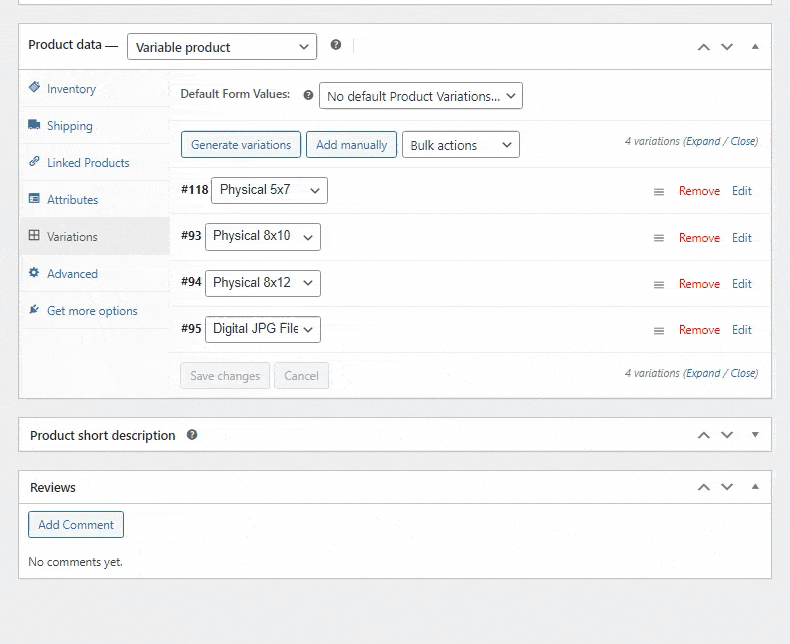
Next, you’ll be asked to select a type of product to sell. Choose ‘Variable product’ since we’re selling photography prints in different sizes.
You’ll be then taken to the product editor to add your products. Later on, you can add new products by navigating to Products > Add New from your WordPress left-side menu.
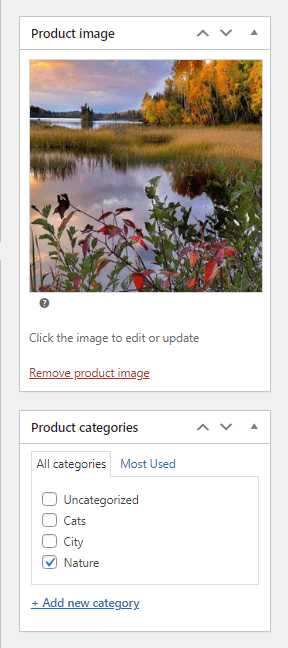
In the product editor, input product details: title, image, description, category.
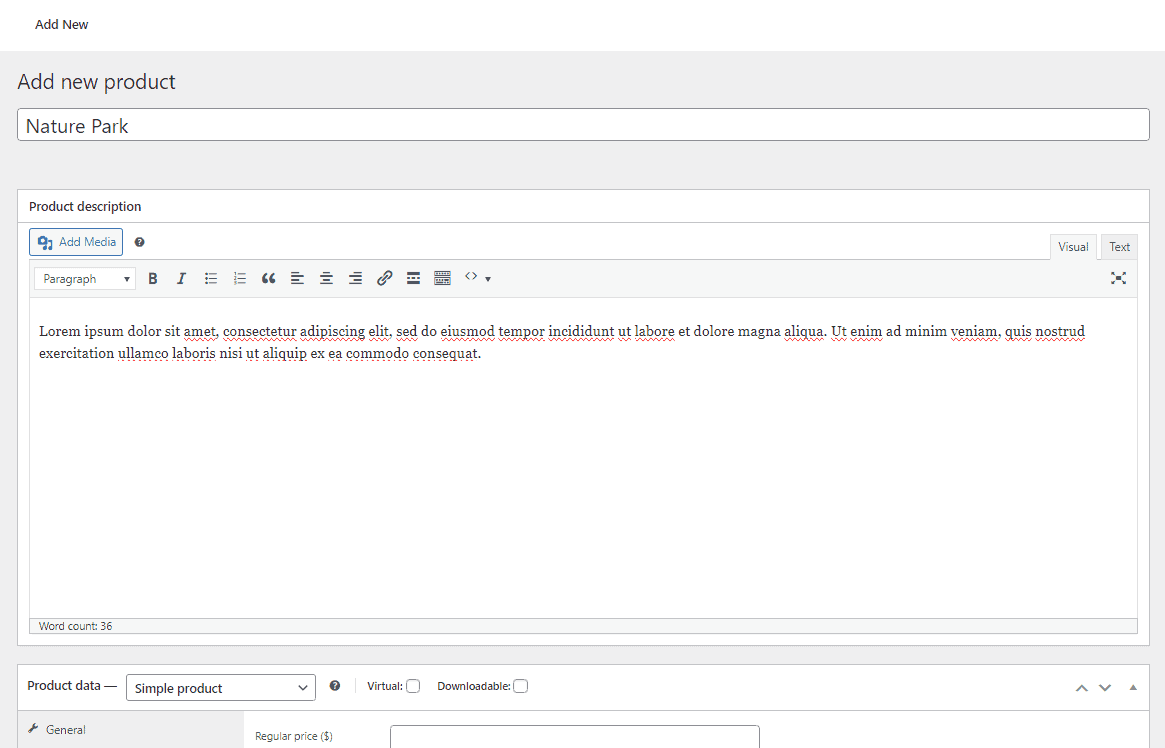
Within the ‘Product data’ section, make sure that the ‘Variable product’ option is selected. On the left side, you’ll see options such as inventory, shipping, linked products, etc. For now, we’ll skip these and proceed to the attributes tab.
Click ‘Add New’ and enter a label for your product attributes. Then, under the values field, enter the variations you want and separate them with ‘|’ as shown below.
Here, I’ve added three different sizes for the physical photography prints and one downloadable digital file.

Once you’re satisfied, click ‘Save attributes.’
Next, click the variations tab to add more details for each product variation. Upload a photo, price, description, etc.
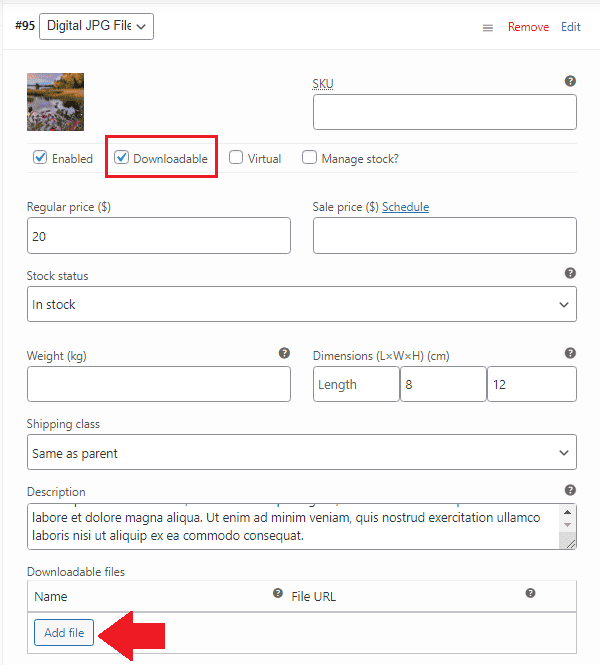
For the downloadable copy, make sure to upload a file or add a file URL.
Save your settings and click ‘Publish.’
Repeat the process to add more products to your store.
b) Next, you’ll need to set up your payments in WooCommerce. Return to WooCommerce > Home and select ‘Set up payments’.

A new page will open up with a list of payment methods you can connect to. Some of the options are Stripe, PayPal, cash on delivery, and direct bank transfer.
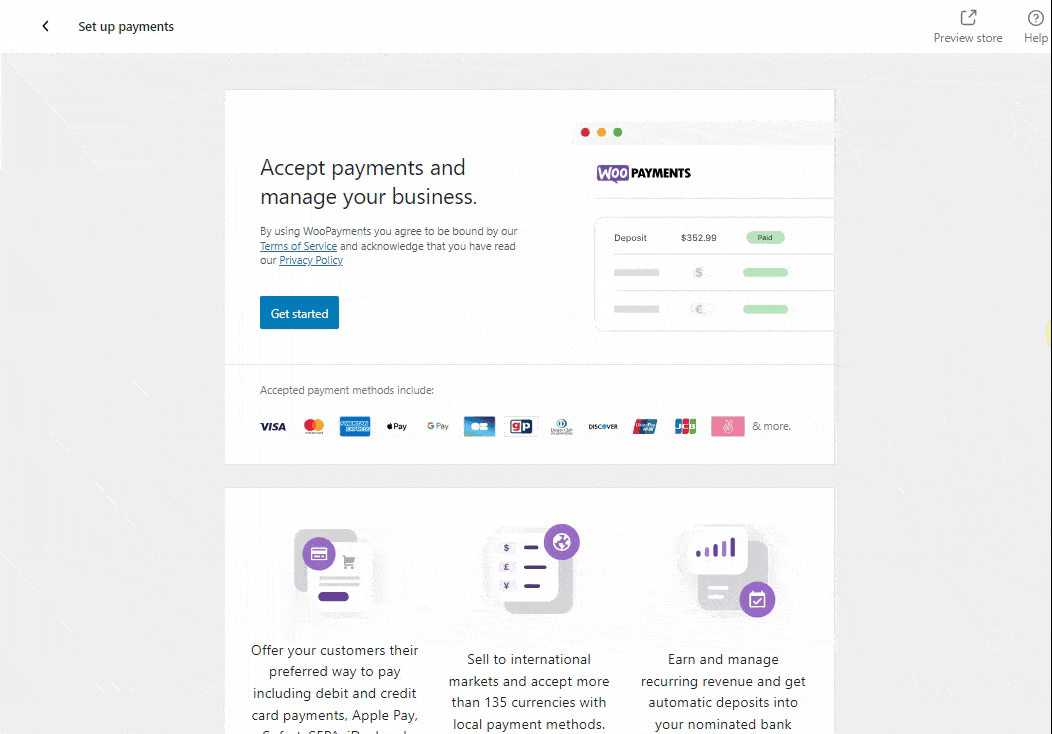
Choose a payment gateway and follow the on-screen instructions. To add more later, navigate to WooCommerce > Settings > Payments.
c) The next step is to set up your tax in WooCommerce. Here, you’ll be given an option to use WooCommerce Tax.
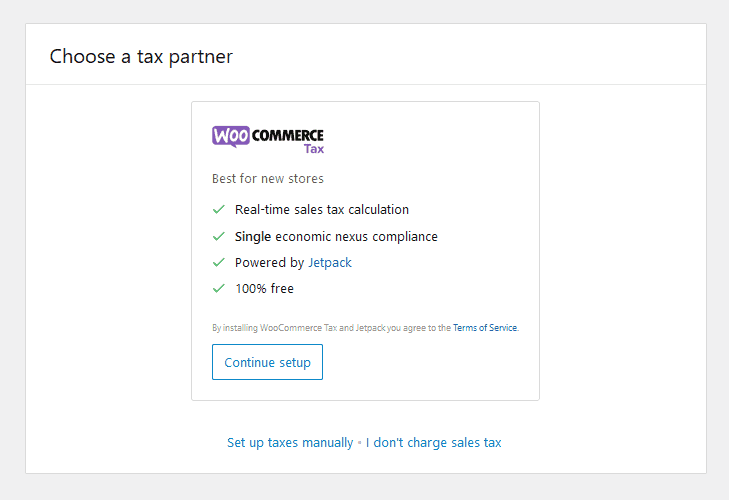
You can also set up your tax manually. If you click this option, you’ll be taken to the tax settings page to enter your tax details. This includes your country, address, tax rate, and tax name. Click save once you’re finished.

Note: If you don’t add taxes, simply click the ‘I don’t charge sales tax’ option at the bottom of the setup page.
d) Go back to your WooCommerce home page and click the ‘Set up shipping’ option on the checklist.
Enter shipping details, including costs and any specific rates for products.

Enable ‘Rest of the world’ for international shipping, and set its cost.

Click proceed and decide on enabling shipping label printing.

And that’s it!
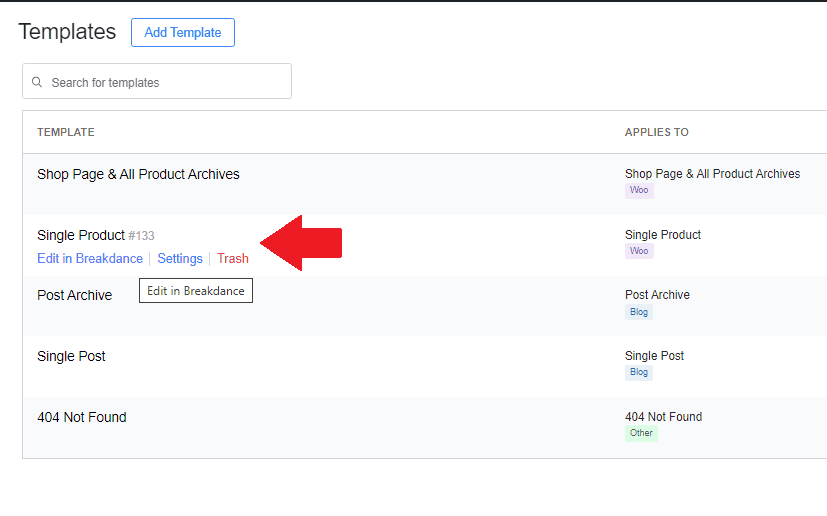
4) Style Your Single Product Page
Navigate to Breakdance > Templates from your WordPress menu. Find the ‘Single Product’ template and open it in the Breakdance editor.
To style an element, click on it and go to the ‘Style’ tab on the left.
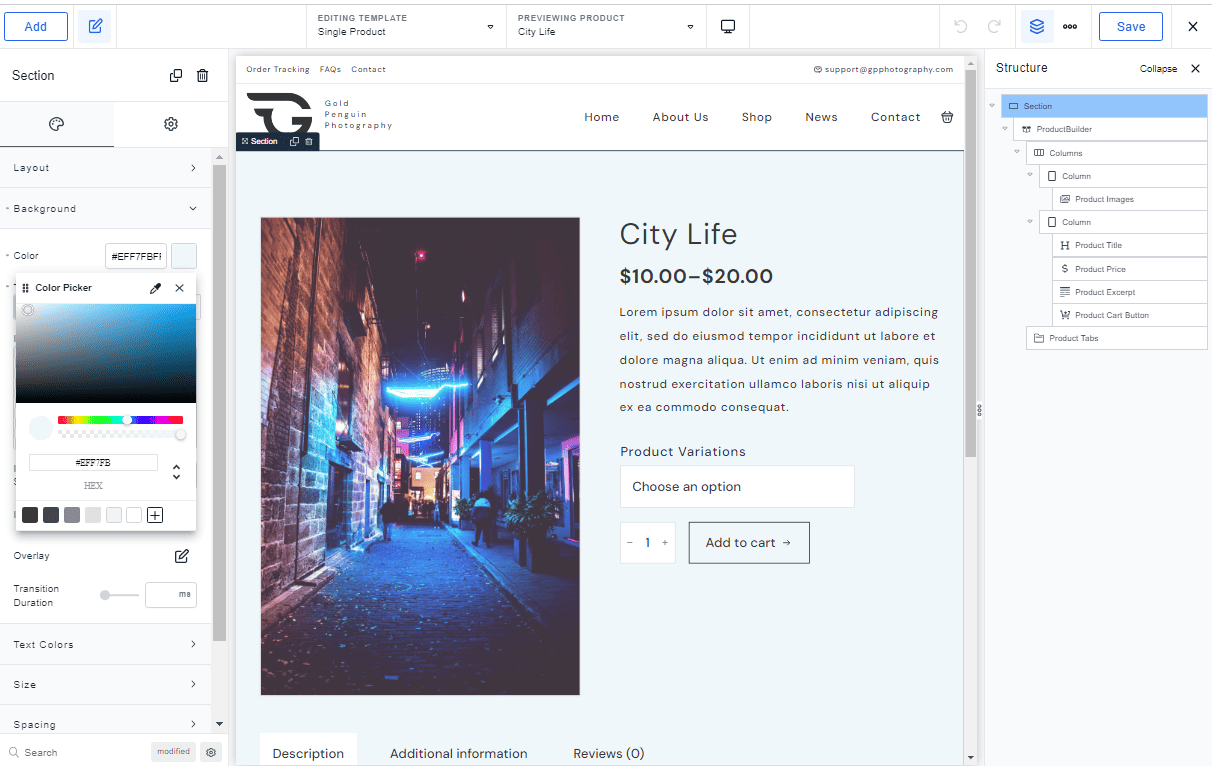
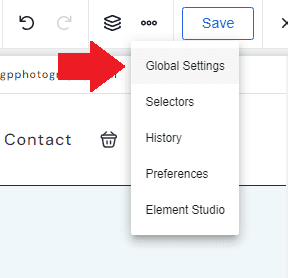
You can also click the global styles on the top to apply changes site-wide.
Minimal edits might be needed if you’ve chosen one of the templates from the design library. But if you’re finicky like me, I’d prefer to change the style a bit. Here, I adjusted the spacing, added a background color, edited the size of the column, and changed the font.
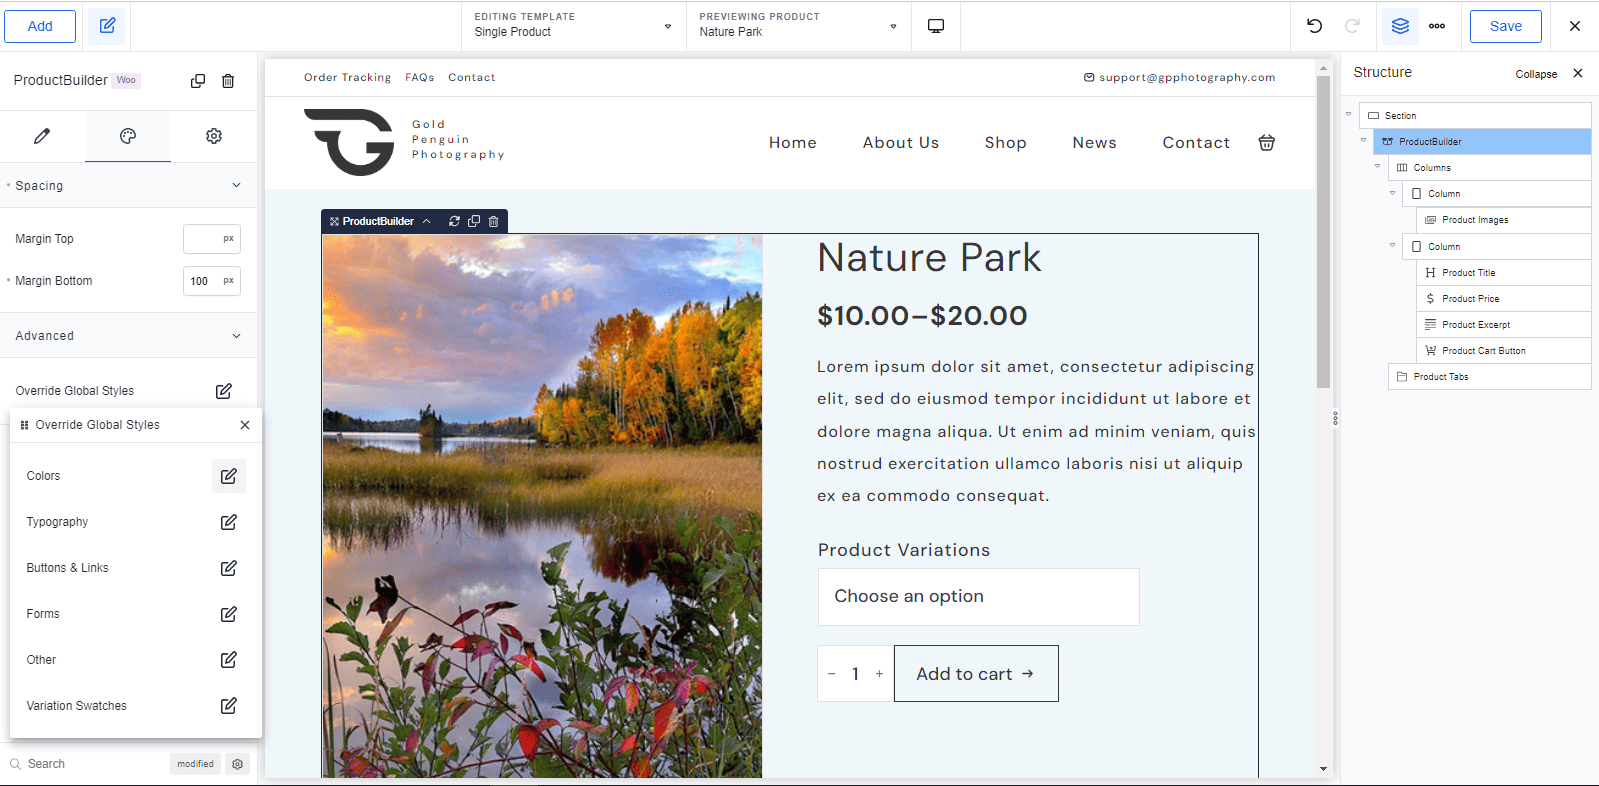
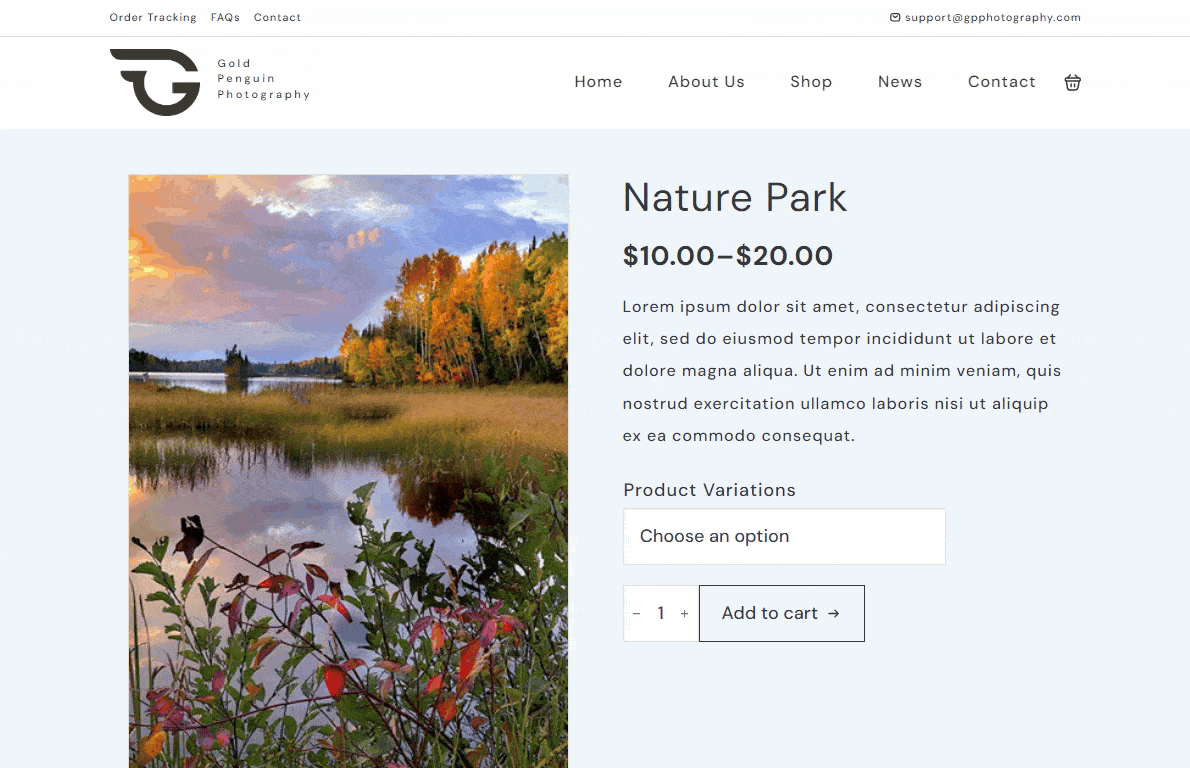
Once you’re satisfied, click save. Check your product page on the front-end. For the ‘oclock’ template, your single product page should look like this.
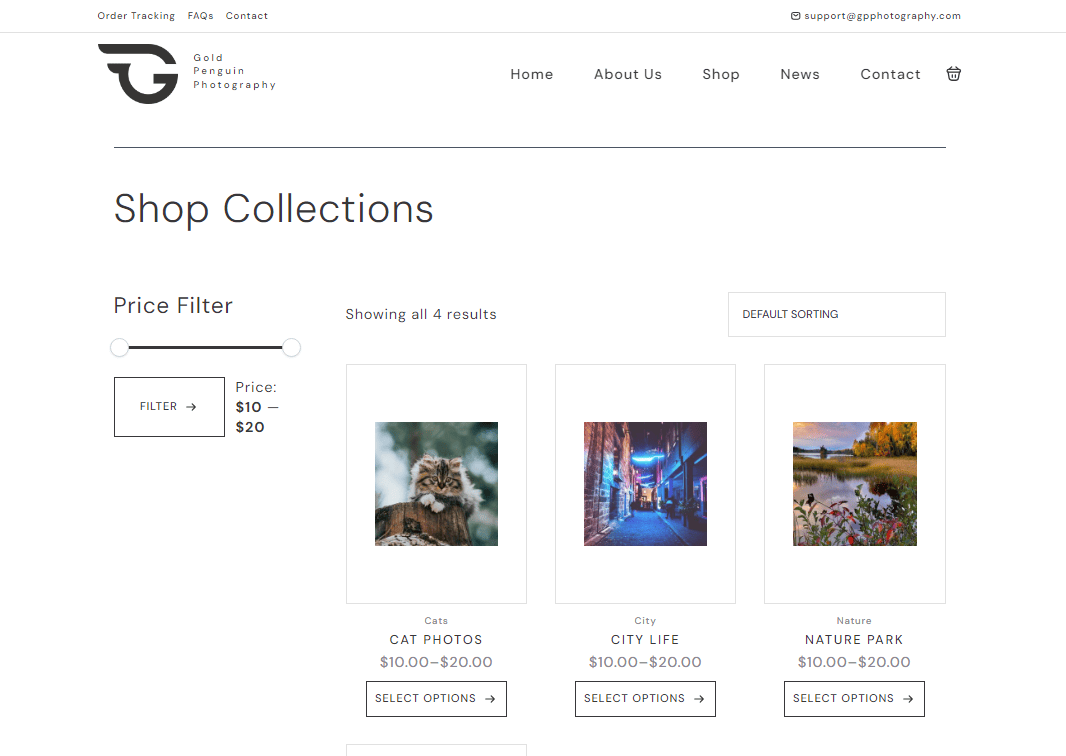
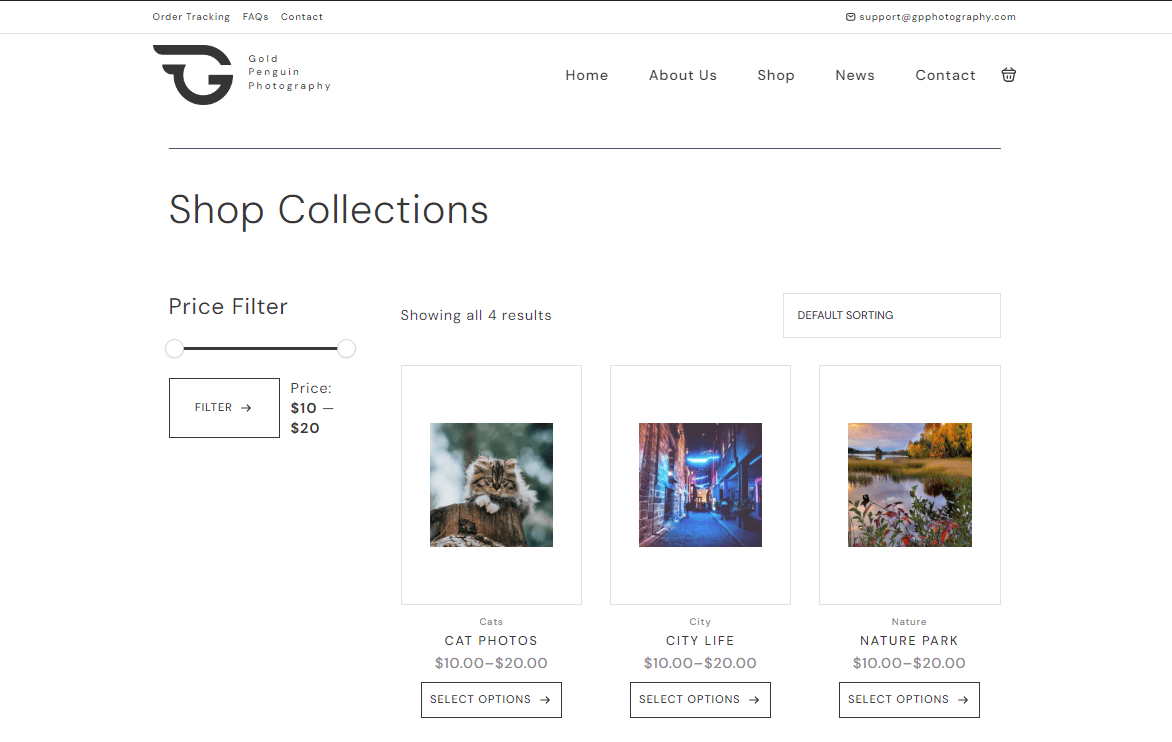
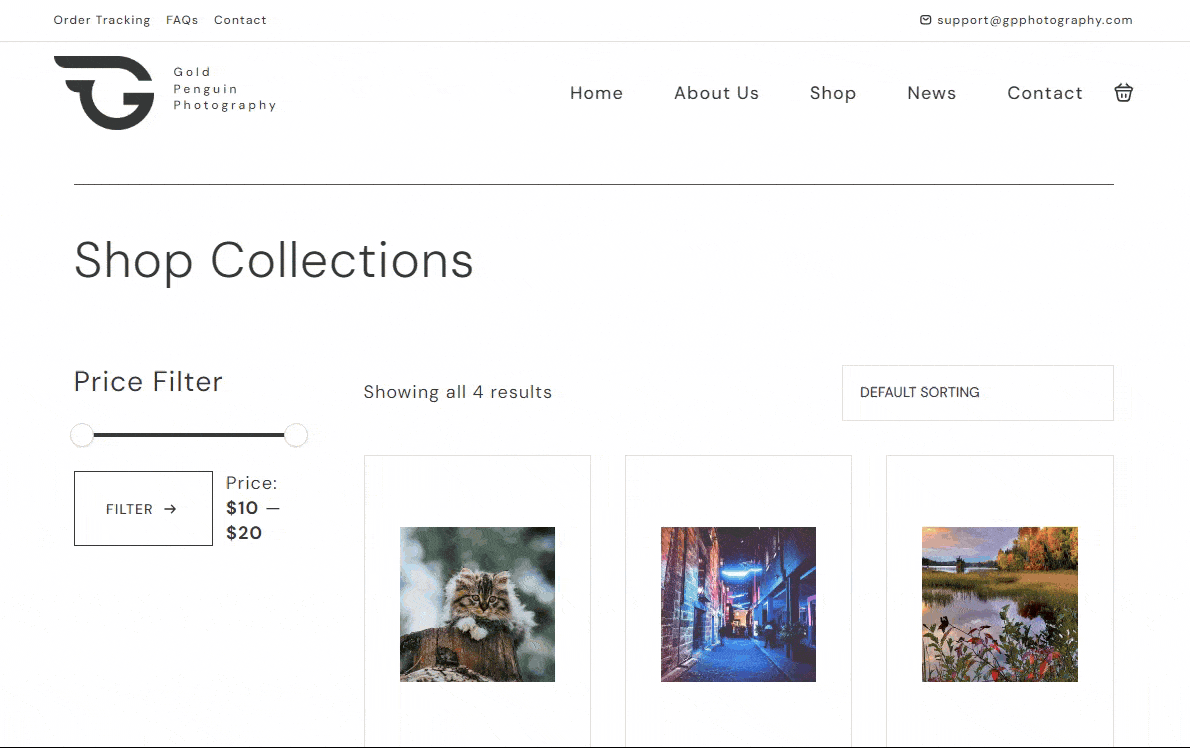
5) Style Your Product Listing Page
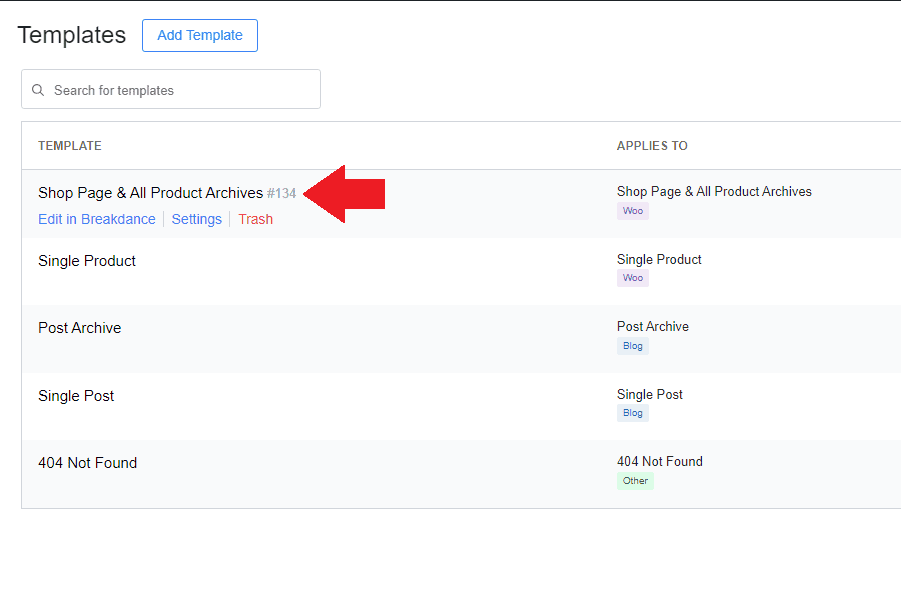
Again, head over to Breakdance > Templates. Open the ‘Shop Page & All Product Archives’ template in the Breakdance editor.
Here, the initial layout is set. But feel free to modify the style as you wish. Then, click save.
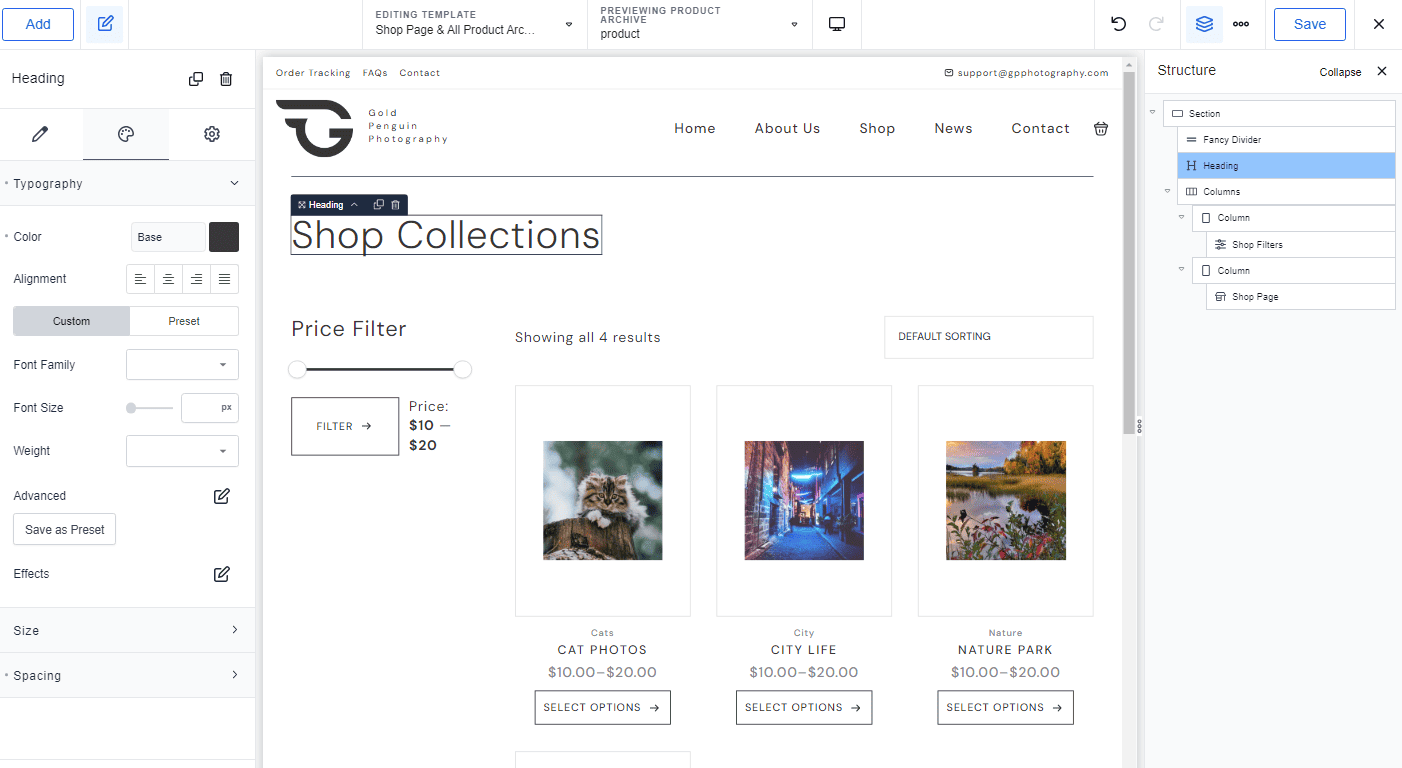
Here’s what my product listing page looks like.
6) Add Custom Product Fields (Optional)
Let’s say you’ve taken hundreds of photos at an event. You want to offer your clients a printed copy of one of the photos. You might want to consider having them visit your online store and order the photos they want by entering a number.
This makes the ordering process easier. You don’t need to upload hundreds of photos on your website. Just give your clients a preview of all the photos with an assigned number each.
On your online store, you only need to add a single product for the event photos. But you’ll need an extra field to enter the photograph number.
This is where custom fields come into play.
Custom fields allow you to add input fields (or product add-ons) like text fields, checkboxes, select fields, and other personalized details of your products.
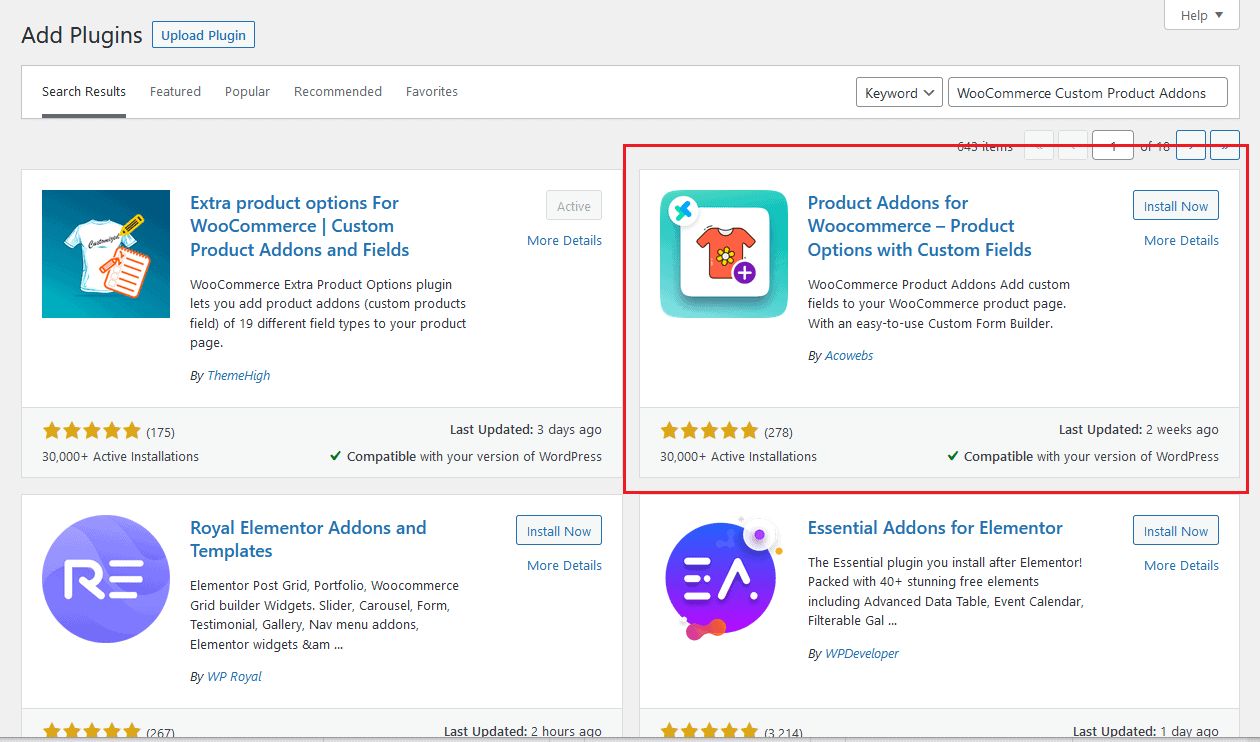
WooCommerce alone might not provide you with the option to add custom fields. You’ll either need to add a custom code to your theme function file. Or simply install a third-party plugin to do the job.
The second option is much easier, so let’s do that.
While there are multiple plugins available to add custom fields, I find the Product Addons for Woocommerce – Product Options with Custom Fields plugin easier to work with in Breakdance. So, make sure this plugin is installed and activated on your WordPress.
Then follow these steps to add input options for your products:
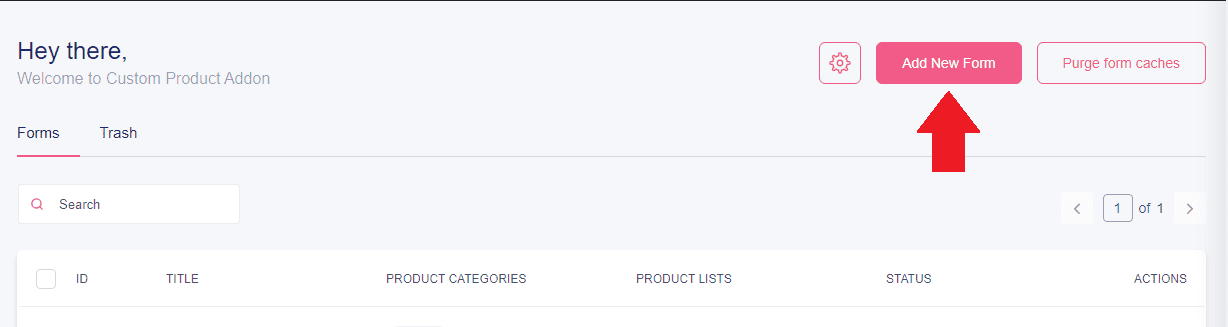
a) Head over to ‘Product Addons’ from your WordPress side menu. Then, click ‘Add New Form.’
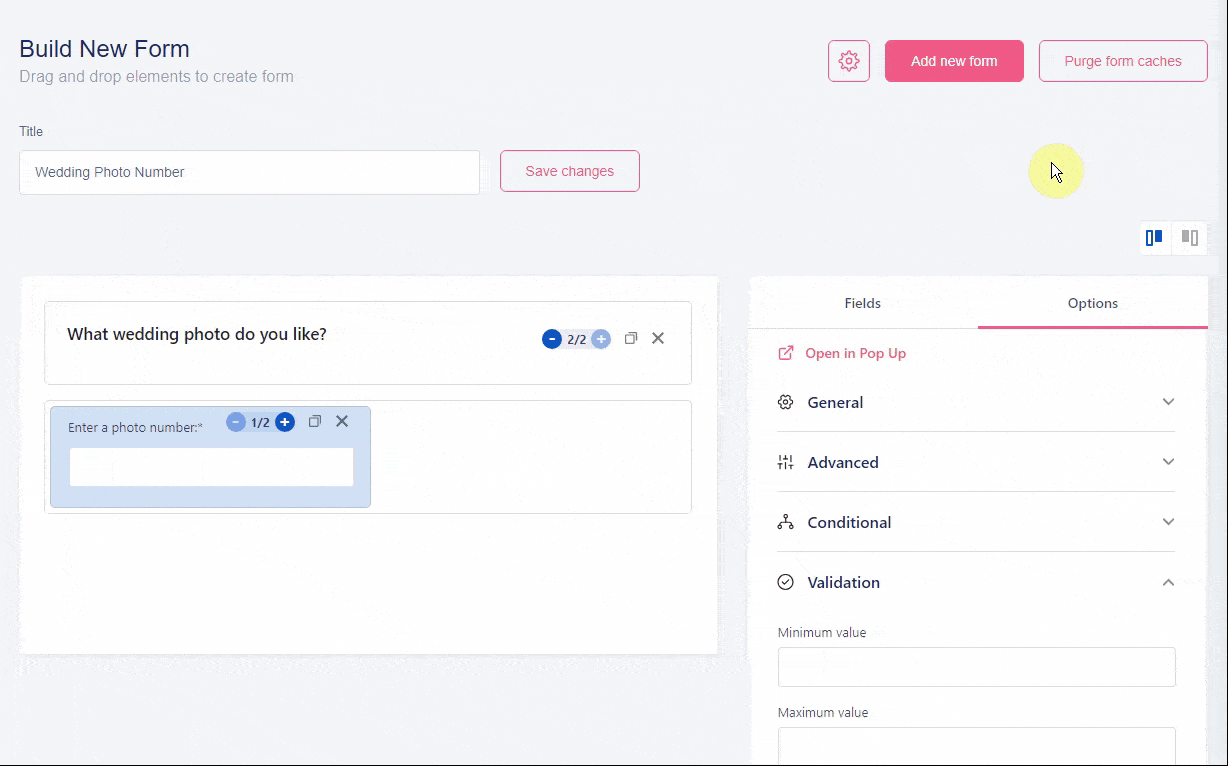
b) This will open a drag-and-drop editor. Enter the title of your form.
From the 'Fields' on the right, drag your preferred field to the left side. Adjust its size by clicking the circle buttons at the top. Here, we’re using a header and a number field.

Under the ‘Options’ tab, enter a field label.
You can also add other details like the element ID, default field value, etc. Or, add a custom CSS class for the styling under the ‘Advanced’ section. There is also an option to add conditional statements.

But let’s keep it simple and skip these settings for now.
c) Click the form settings button at the top (or bottom) of the page. Choose which products or categories you want the custom fields to appear.
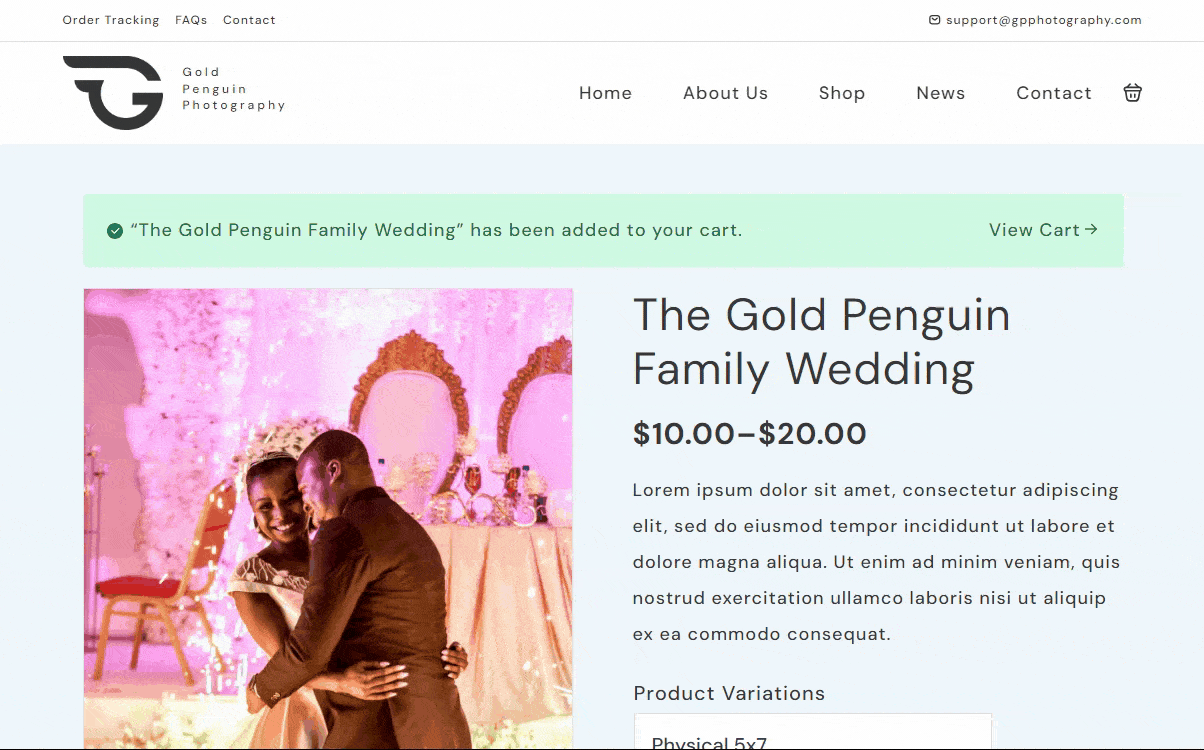
For this example, I’ve created a product called ‘The Gold Penguin Family Wedding’ and added it under the ‘wedding’ category. So, I’m going to choose this category.
Note that you can also assign a product list instead of a category for the custom fields.
Once you’re done, save the changes and click publish.
d) Check your products page on the front-end. You should now see the number field displayed.

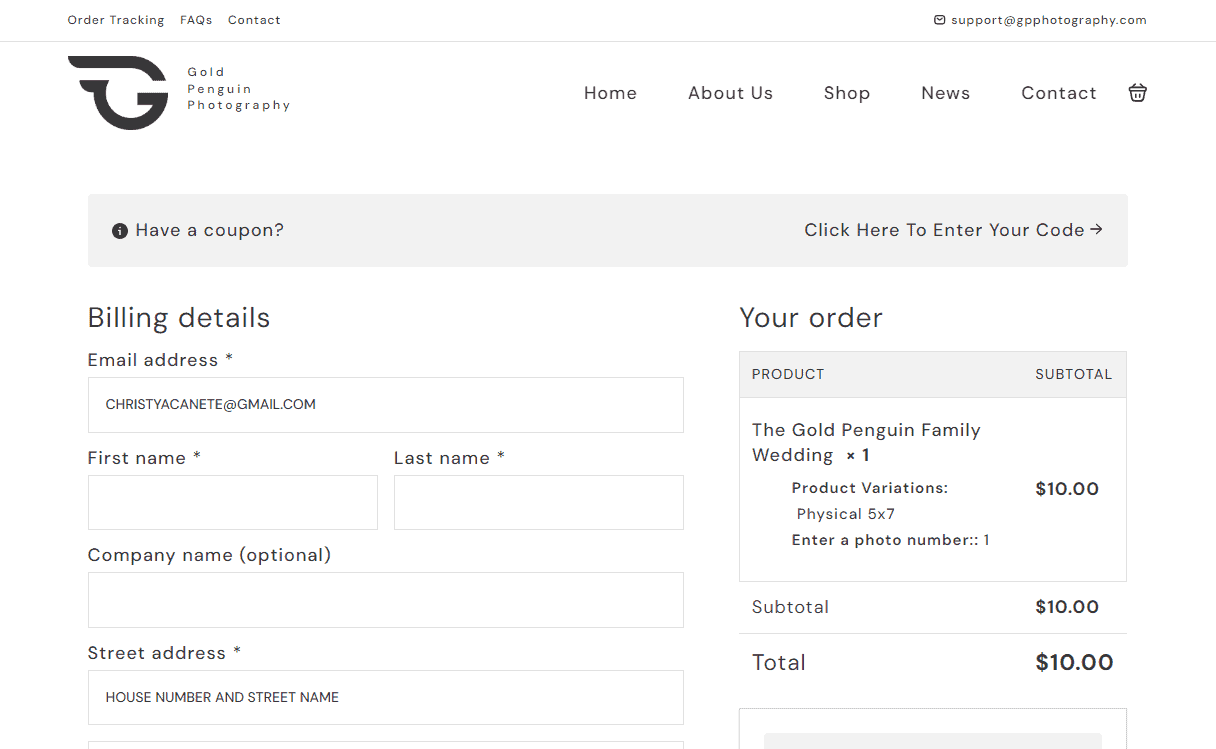
7) Test Your WooCommerce Store
Finalize your settings and save. Then, test your products page on the front-end.
Let’s say, we want to purchase a printed copy of the products. Add products to the cart and proceed to checkout.
Your checkout page should look like this.
If you’ve enabled the test payment method on your WooCommerce settings, you can order the products successfully without the need for an actual credit/debit card. The purpose of this is to validate the integration of your chosen payment method without moving real money.
So, go ahead and do that. Then, go to WooCommerce > Orders to verify the ordered items.
That’s a Wrap!
Congratulations - you’ve just created a simple online photography store using Breakdance and WooCommerce.
But your journey doesn’t end here! Discover Breakdance’s other features to elevate your store even further.
I suggest you check out these tutorials:
- Working With Custom Post Types in Breakdance
- Create a Logo Carousel With Breakdance
- Create Dynamic Testimonials in Breakdance
Looking for WooCommerce alternatives to sell digital products? We’ve got you covered. Read our tutorial on how to set up an EasyDigitalDownloads store in Breakdance.
We hope you found this tutorial helpful. If you’re stuck or missed any of the steps, just leave a comment below. We’ll try our best to help!
Want to Learn Even More?
If you enjoyed this article, subscribe to our free newsletter where we share tips & tricks on how to use tech & AI to grow and optimize your business, career, and life.