No one wants to visit a website with a long, boring form. It feels overwhelming.
And if you’re like me, you’d probably click away immediately.
You don’t want to provide the same experience to your website visitors. So instead of long forms, why not break them into smaller chunks?
Here’s where multi-step forms become crucial.
Unlike a lengthy form, a multi-step form is more user-friendly. It makes users feel they're making progress with each step. Plus, segmenting questions ensures you're collecting relevant data in an organized way.
In this guide, I’ll show you how easy it is to create a multi-step form in Breakdance. You don’t even need to install third-party plugins.
Let’s get started.
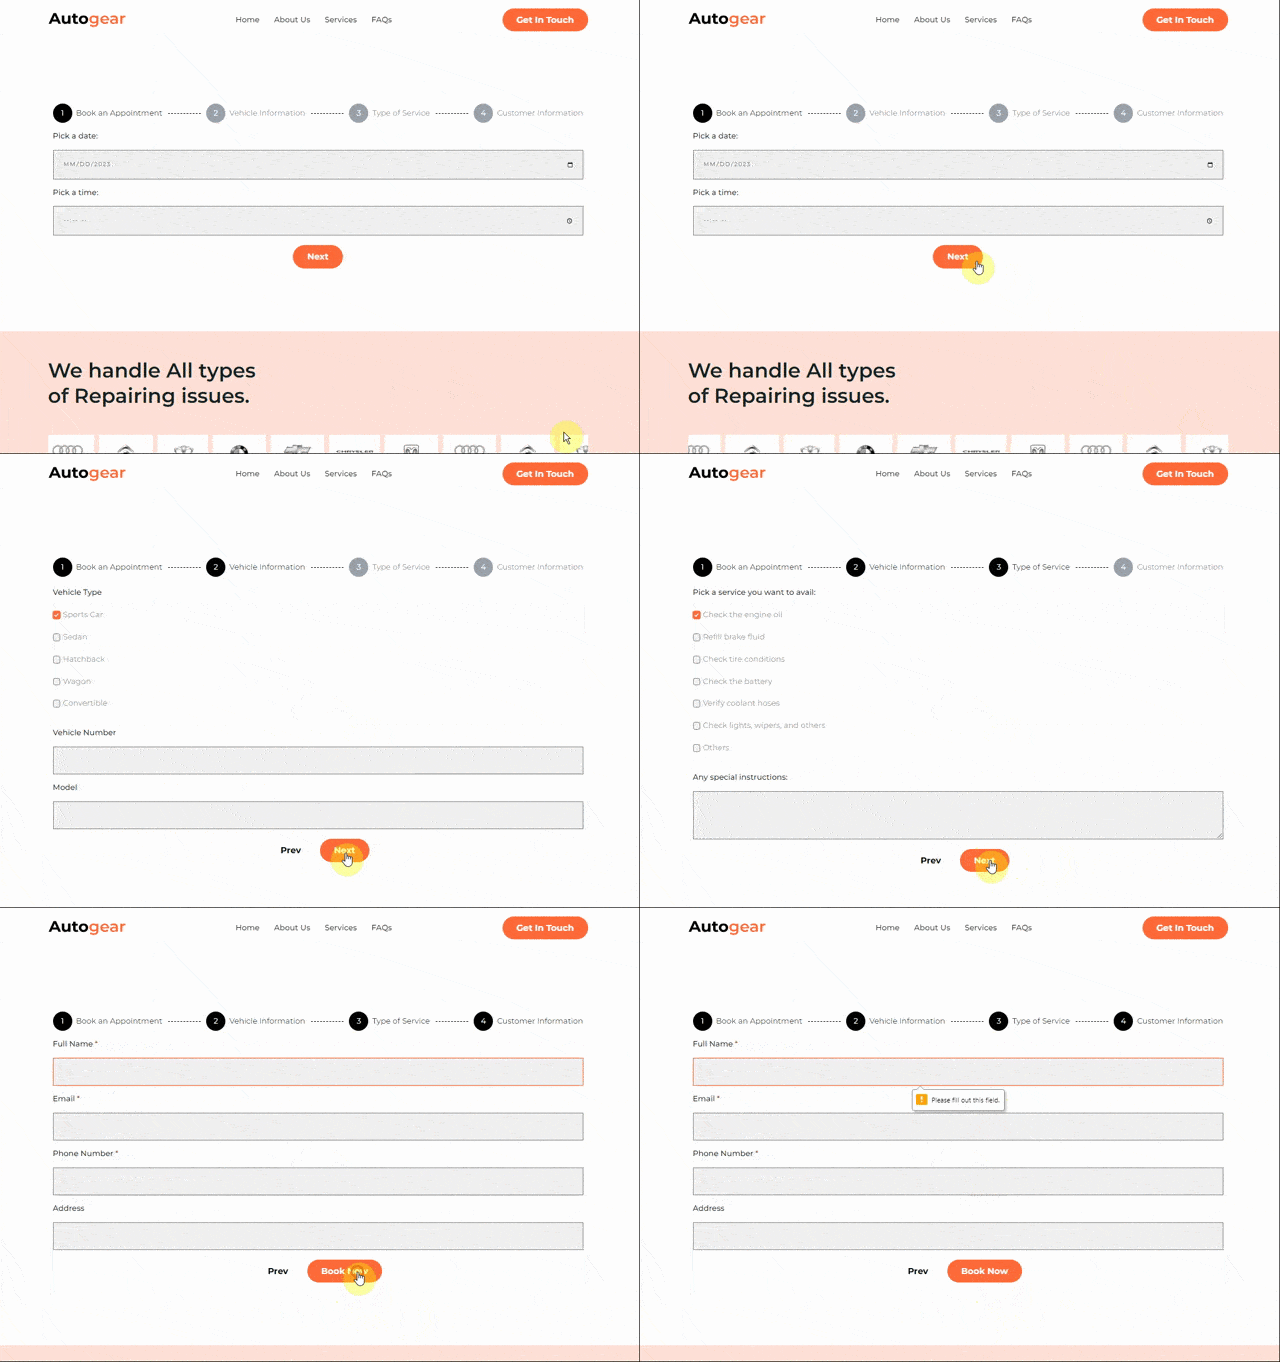
How to Create a Multi-Step Form in Breakdance
Let’s try to create a simple booking form for a vehicle repair service. Here are the steps to follow:
1) Start With a New Page
Let’s assume that you already have a single post template activated on your Breakdance theme.
On your WordPress dashboard, head over to Pages > Add New. Enter a title. For example, let’s add ‘Car Service Booking Form.’ Click publish.
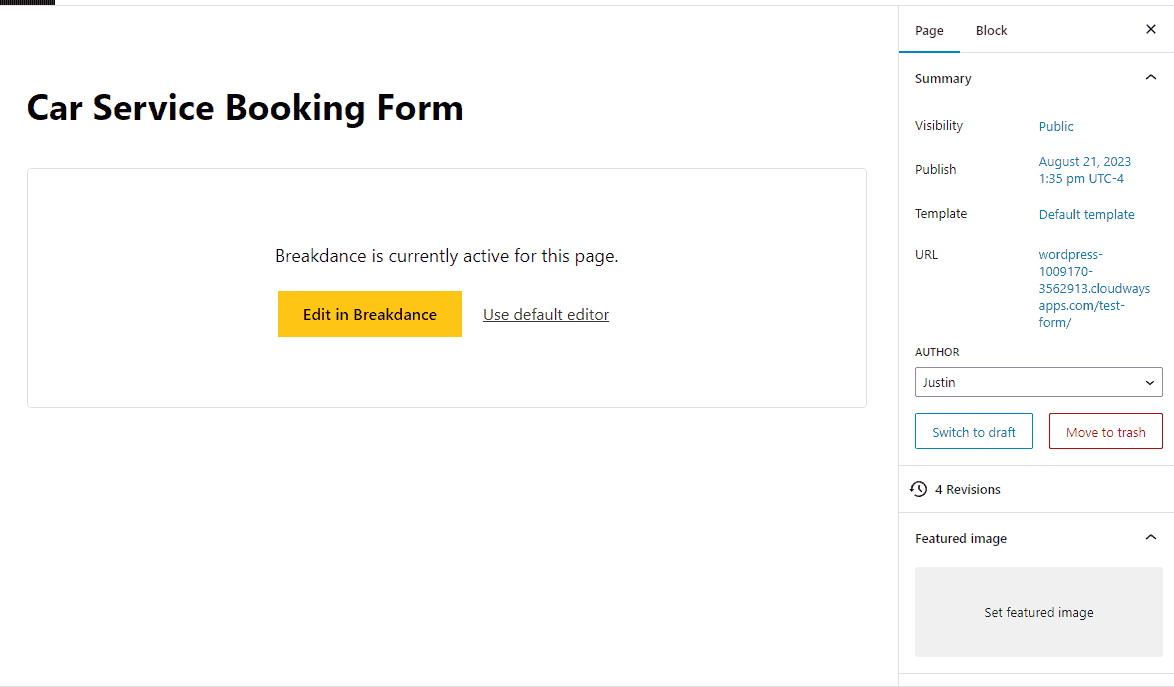
Then, edit your page on Breakdance.
2) Create a Form
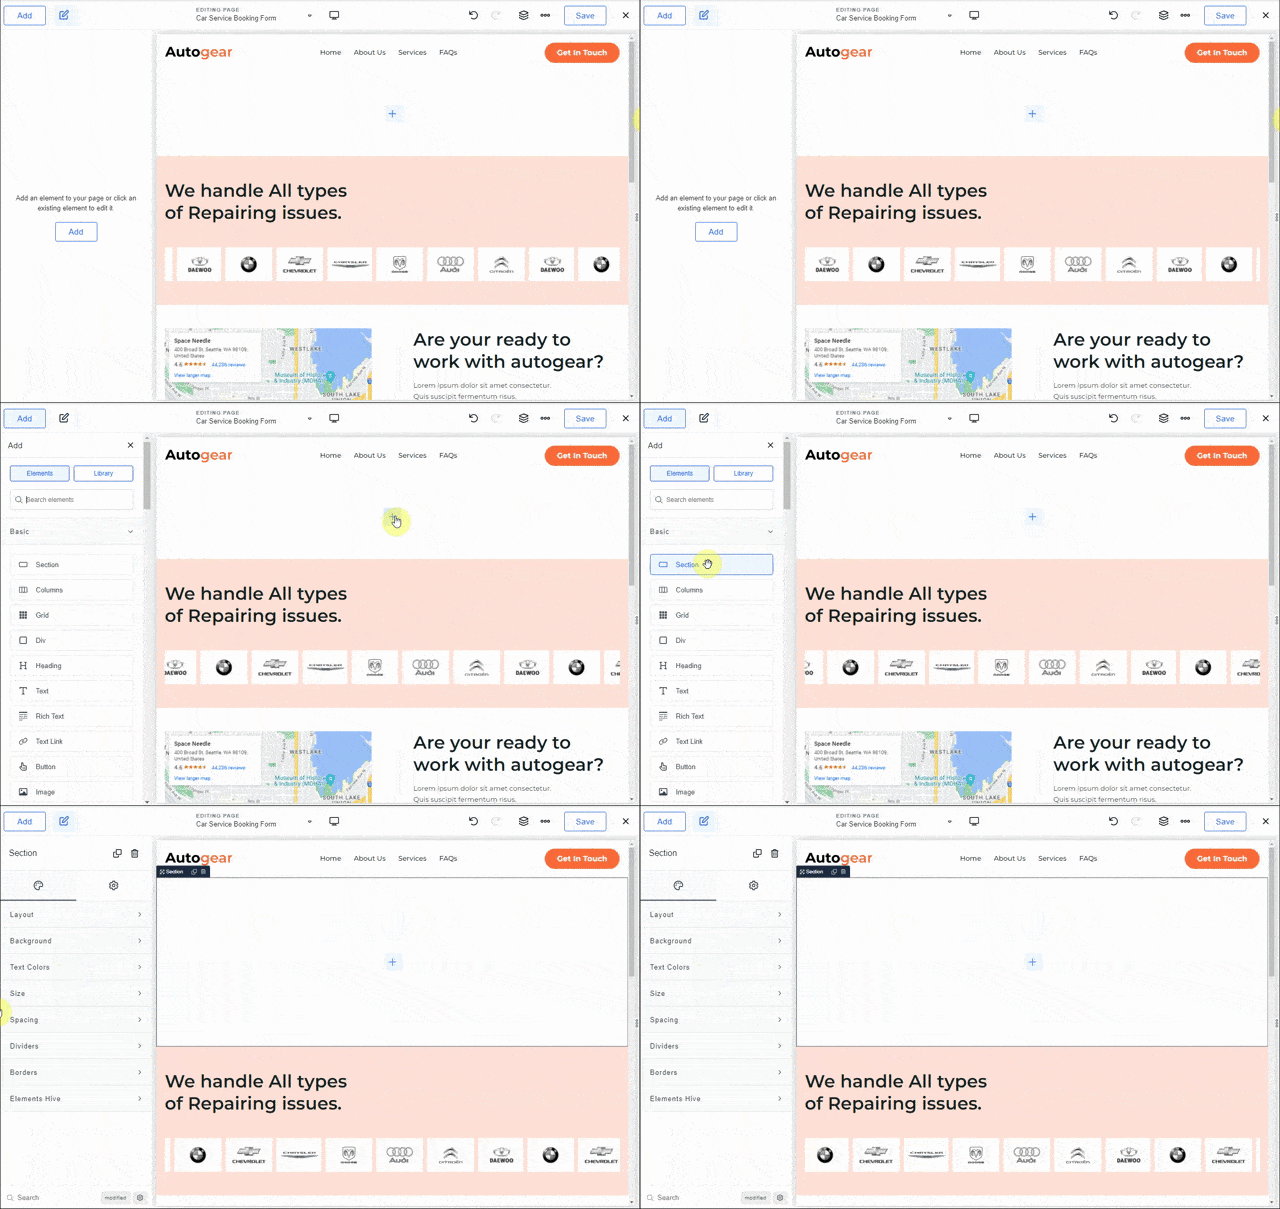
The first thing you’ll need to do is add a section. Then, search and click the ‘Form Builder’ element at the right navigation.

3) Add a ‘First Step’ Field
Notice that the form builder element comes with default fields name, email, and message. Let’s delete these for now.
Then, add a new field. Click the ‘type’ dropdown menu and choose ‘step.’
The first part of our form will require the user to select a booking date. So, let’s label this step as ‘Book an Appointment.’
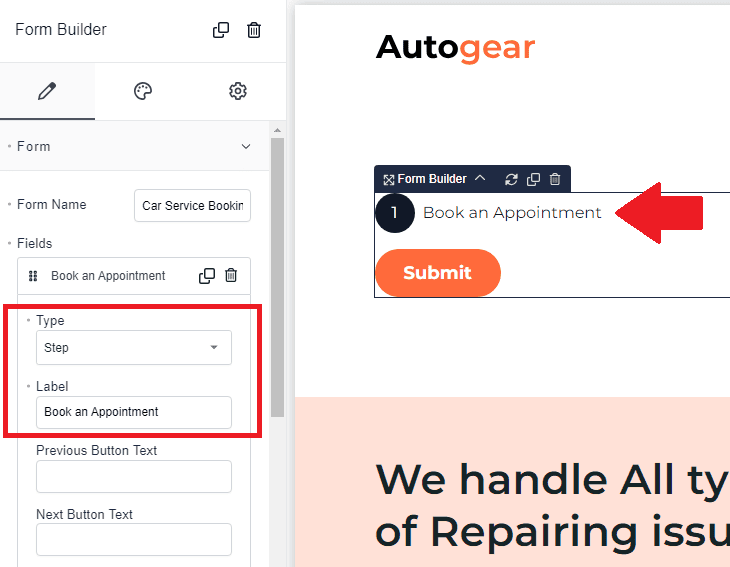
Then, continue adding more fields. Make sure that all the elements you want to include in the form fall under the ‘Step’ field. The order should never be interchanged.
Let’s add a field with type ‘Date.’ Assign a label ‘Pick a Date.’

Then, add another field with type ‘Time’ and label this as ‘Pick a time.’
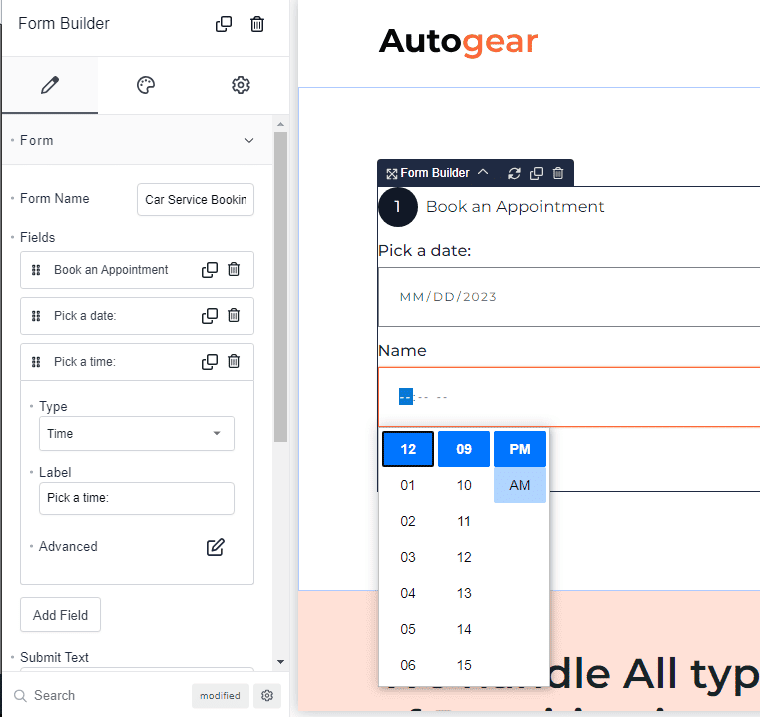
Don’t forget to save your work.
4) Add a ‘Second Step’ Field
Again, let’s add another field with type ‘Step’ and label this as ‘Vehicle Information.’
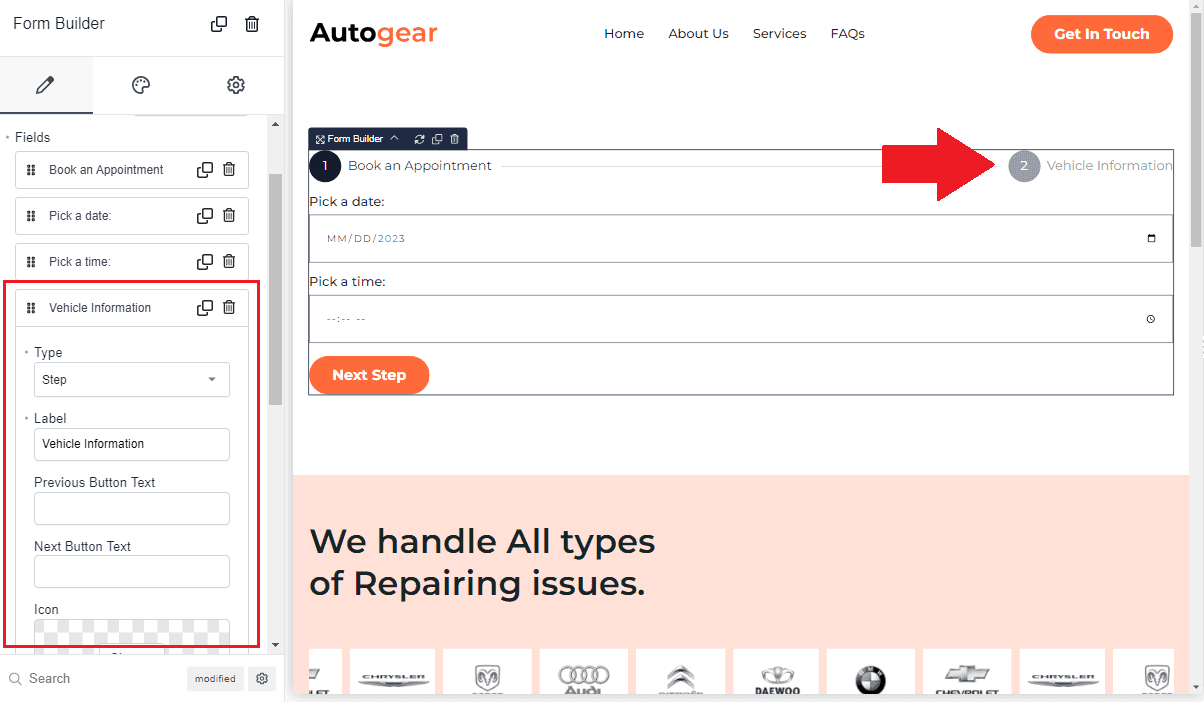
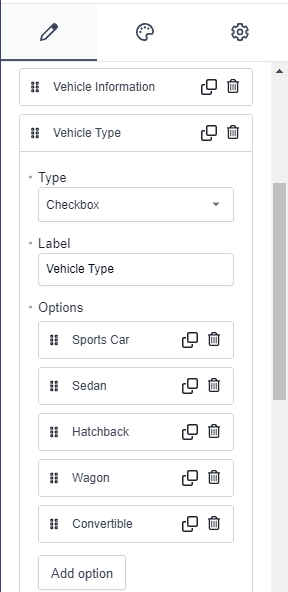
Here, we want the user to choose a vehicle type to be repaired. So, we’ll add a checkbox field with options, as shown.
Next, add two text fields and label them as ‘Vehicle Number’ and ‘Model,’ respectively.
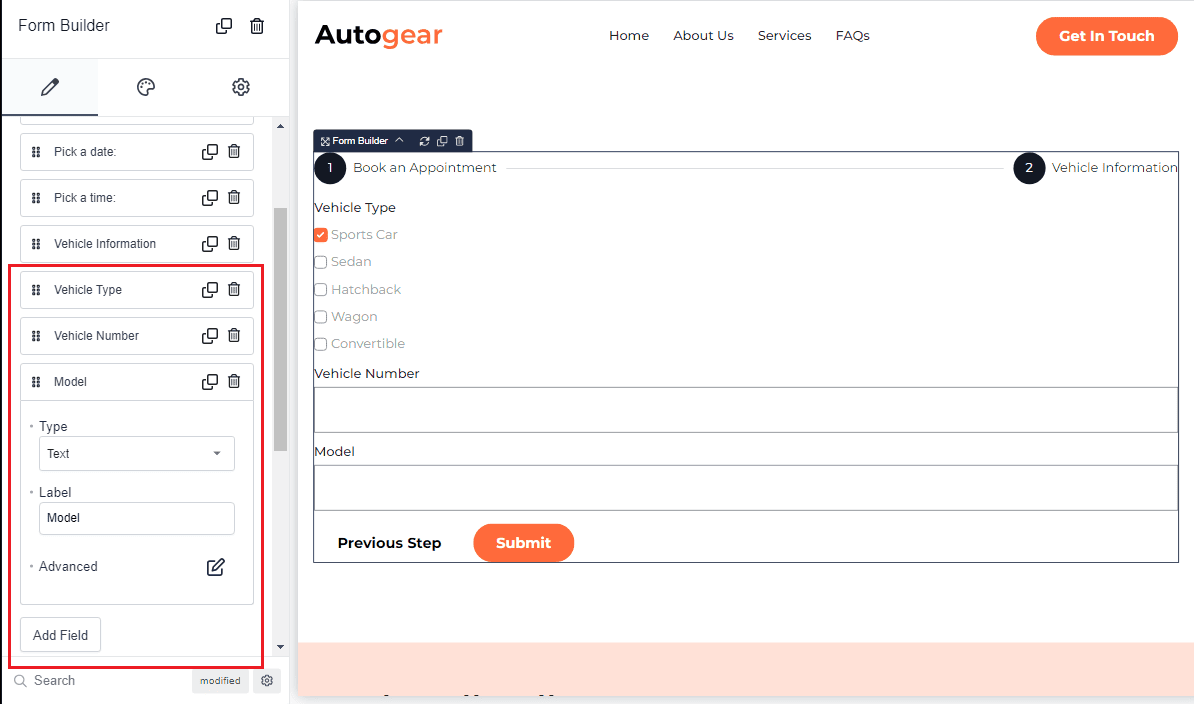
Again, make sure that all these elements fall within the ‘Vehicle Information’ field.
5) Add a ‘Third Step’ Field
In the third step, let’s say we want the user to choose a type of repair service.
Similar to the previous steps, we’ll add a new ‘step’ field. Label this as ‘Type of Service.’
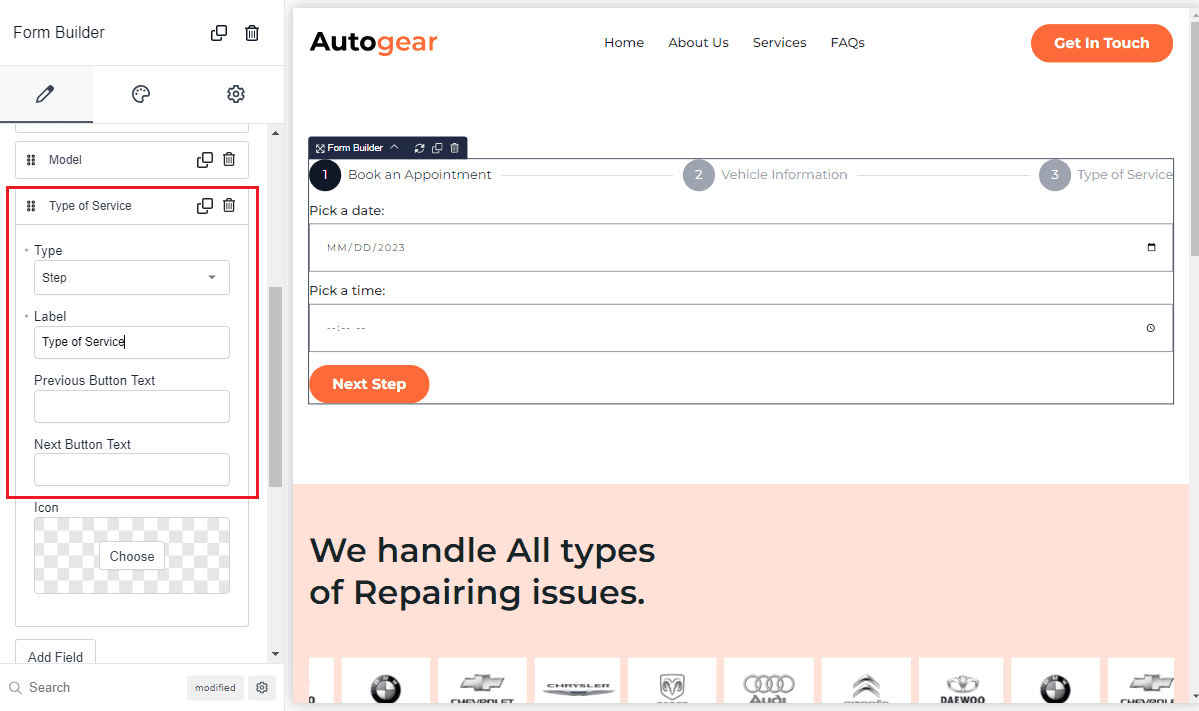
Add a checkbox option and text area, as I did below.

6) Add a ‘Fourth Step’ Field
Lastly, we’ll ask the user to enter his personal information.
Let’s add another ‘step’ field and label this as ‘Customer Information.’
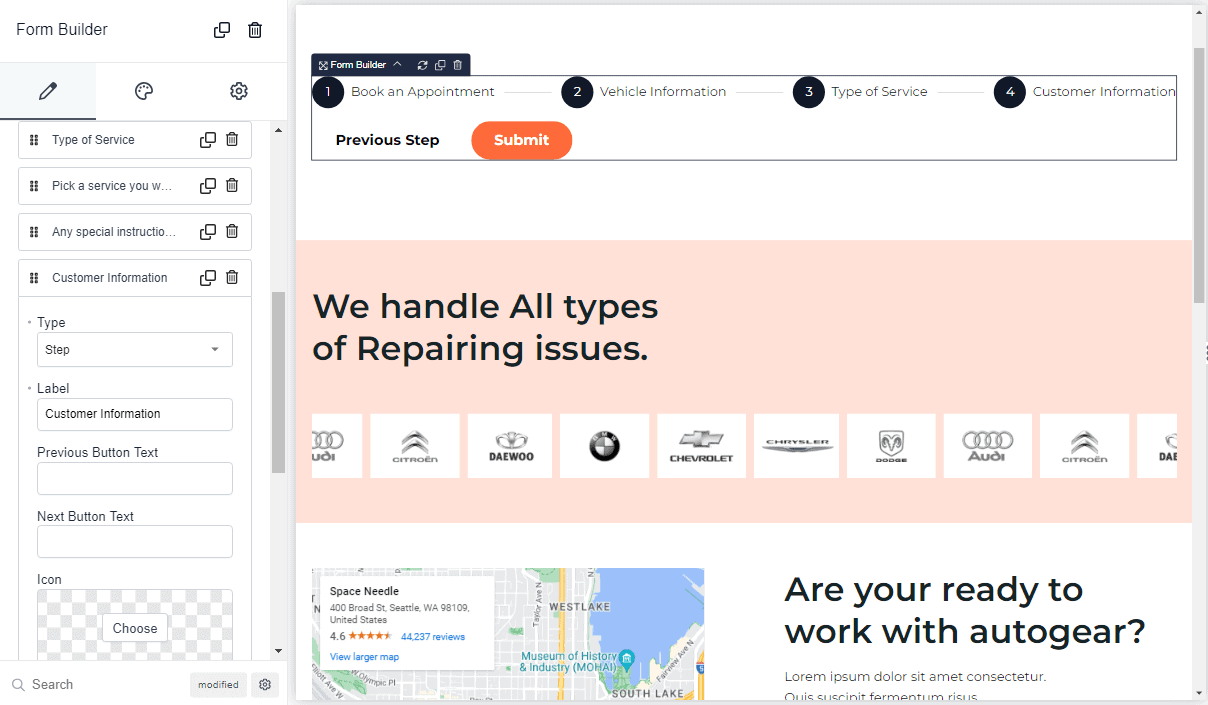
Then, add text fields for the name, email, phone number, and address.
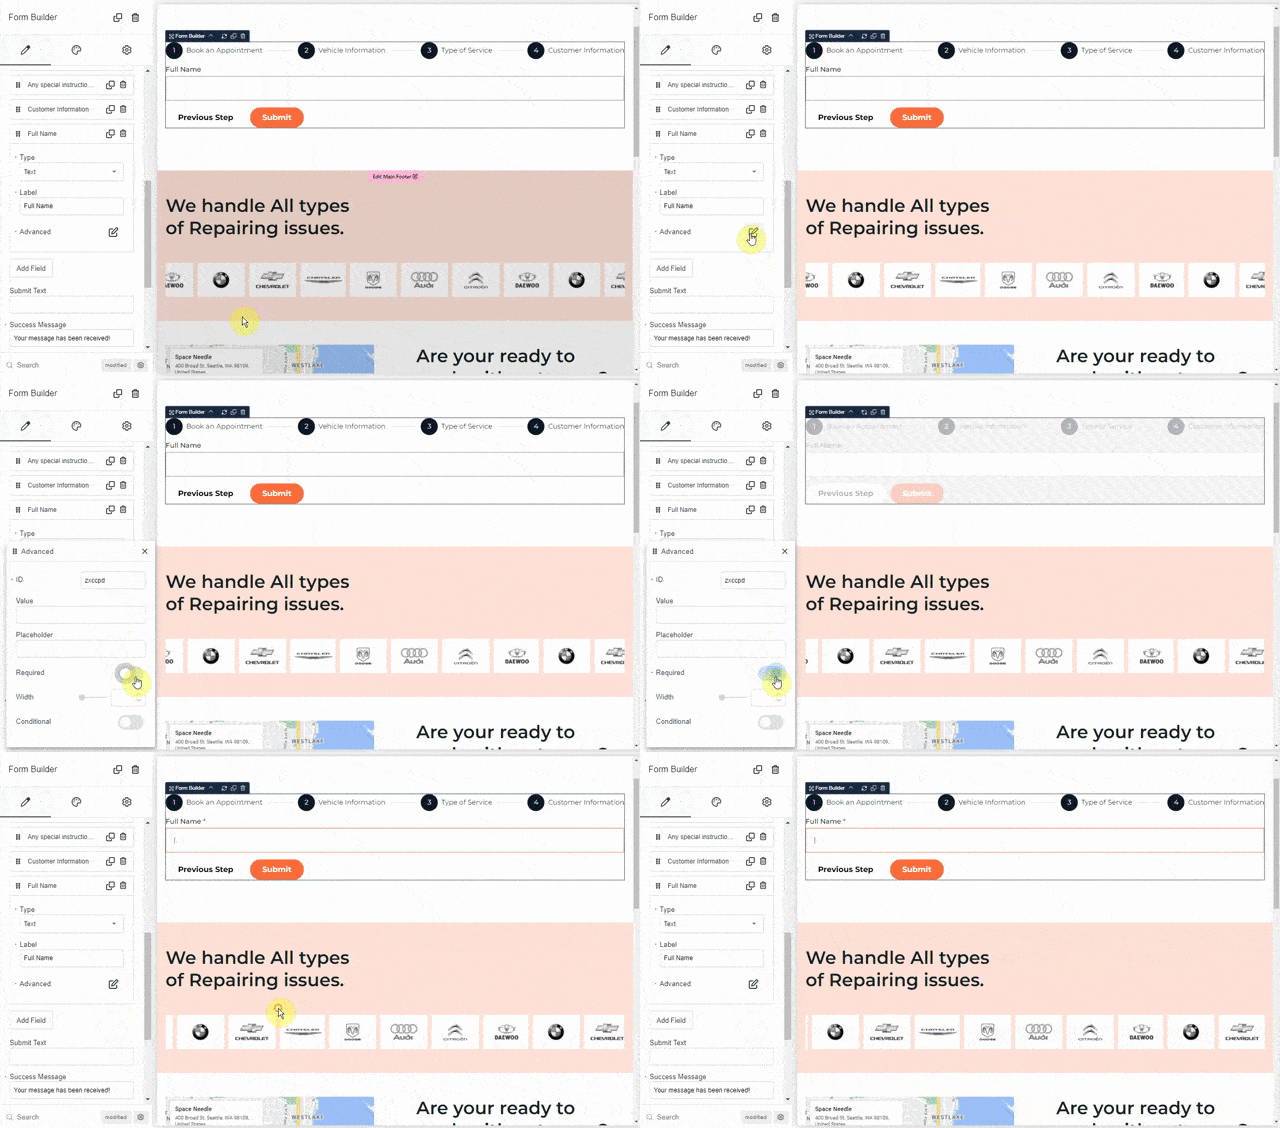
Set the Full Name, Email, and Phone Number as required fields. You can do so by choosing a field, clicking the advanced option, and toggling the required switch, as shown.
7) Modify the Style
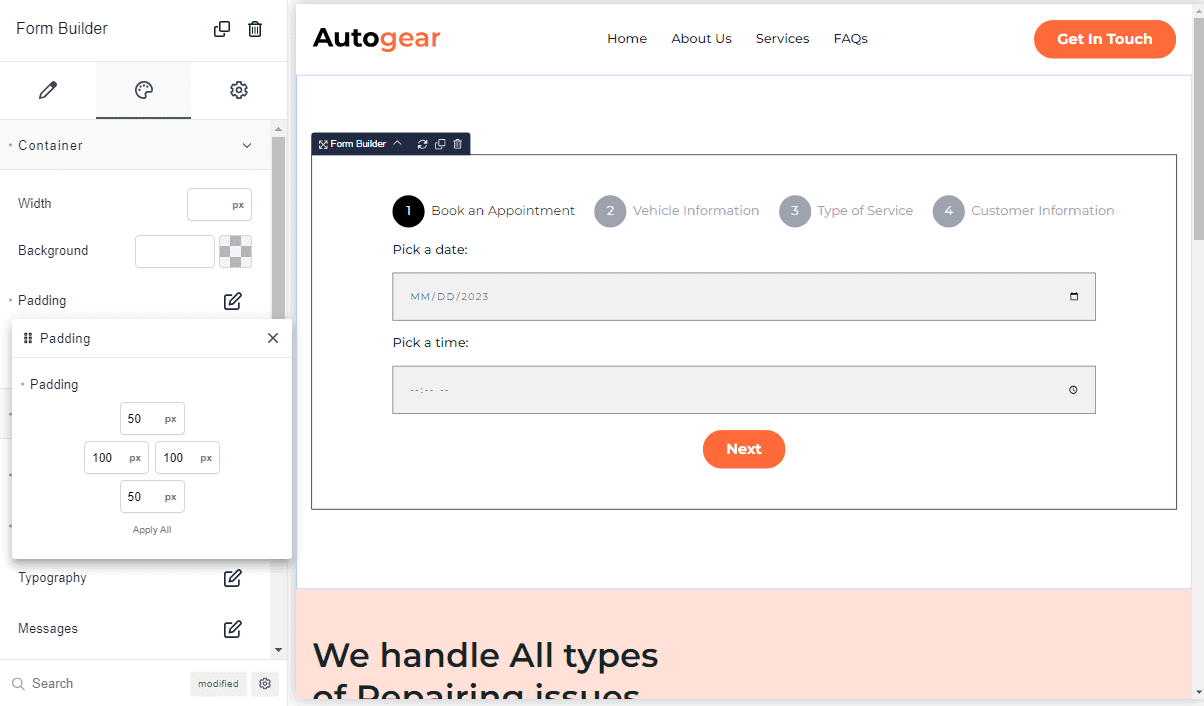
Add style to the elements by navigating to the ‘Style’ tab. Here, you can edit the background color, adjust the size of your form, or change the spacing.
For example, I’ve placed the buttons at the center and changed the padding size of the form, as shown below.
8) Final Output
Once you’re satisfied with the changes, click save. Test your multi-step form on the front-end. You should get something similar below.

And that’s it!
Now you’ve learned how to create a multi-step form in Breakdance, how about leveling it up?
I suggest you try integrating your forms with third-party apps. For example, you can have your forms automatically submitted to a bunch of other platforms:
- Send Breakdance Builder Forms to Drip
- Send Breakdance Builder Forms to MailerLite
- Send Breakdance Builder Forms to ActiveCampaign
- Send Breakdance Builder Forms to GetResponse
- Send Breakdance Builder Forms to ConvertKit
- Send Contact Forms to Discord with Breakdance Builder
- Send Contact Forms to MailChimp Using Breakdance Builder
From there, you can gather and organize user information for your email campaign.
Stay posted for more upcoming tutorials! And don’t hesitate to share your Breakdance experience in the comments. I'd love to hear from you!
