A Beginner’s Guide to Content at Scale (How To Use It Correctly)
Content at Scale is the best AI content writer and optimizer in the market, but it may scare new users because of its feature-rich environment. In this article, I'll teach you how to use Content at Scale as a beginner.
John Angelo Yap
Updated January 29, 2024

An artificial intelligence building content out of words, generated with Midjourney
Reading Time: 9 minutes
There’s been a lot of talk about AI taking over jobs, but nowhere is this phenomenon more apparent than in content writing. ChatGPT started the revolution, and since then, other AI writers have just become more capable and creative.
Case in point: Content at Scale markets itself as the “world’s most humanlike AI writer,” and I agree. Not only does their writing sound more like a person, but they’re also some of the most feature-rich applications out there for SEO — but that does come with a little drawback. We did a super in-depth review on how well it writes human-like content, but if you just want the general gist of how to use it, that's what this is for.
Some people can be too intimidated by its functionalities. But fear not, my friend, for I will teach you how to write amazing content with C@S. More on that, in this article.
What is Content At Scale?
Let’s face it: content creation, while rewarding, can be time-consuming and tedious at times, especially when trying to produce at a high volume. That's where Content at Scale enters the picture. This AI-powered platform automates long-form content generation through its advanced NLP capabilities.
Content at Scale produces high-quality, ranking blog posts and articles without any human writing or editing required for proofreading and avoiding detection. As we go along this tutorial, I’ll discuss some of its key features and use cases. For now, all you need to know is this: Content at Scale is a game-changer for content-heavy blogs and companies.
A Step-by-Step Beginner’s Guide to C@S
Learning the ropes of a new application can be overwhelming, but not Content at Scale. Here are the seven steps you need to keep in mind for your first time:
Step 1: Pick a Pricing Plan
The first step is always to choose the right plan for your needs. Are you a solo blogger or do you have a team behind you? How many posts do you need per month? Do you need advanced keyword research, content briefs, and an extensive content ideation suite? Those are some of the things you have to consider.
Content at Scale has flexible pricing plans. You can spend $39 to $1499 monthly, depending on your needs and payment options. Here’s a more detailed overview of how much their service costs:
Low Volume Plans
- Generative AI: $49 per month ($39 if you pay annually) for one person. $129 per month for three user seats ($105 if you pay annually). This plan includes a personalized AI assistant, 25,000 AI bypass words, AI detection, and a large prompt library.
- Content Production Bundle: Add $199 to your original plan. This includes the RankWell Content Intelligence Suite (keyword research, topic clusters and reports, SEO scoring, etc.) and the Content Producer Suite (premium posts, brand projects, content planner and schedulers, integrations, API access, and more)
High Volume Plans
- Starter: $499 per month ($399 if you pay annually). This includes 3 user seats, 12 premium posts, 5 brand projects, bulk keyword upload, 50 content research and briefs, 50 optimization audits, agency certification, and everything in the Content Production Bundle.
- Standard: $999 per month ($799 if you pay annually). This increases the features to 5 user seats, 30 premium posts, 15 brand projects, 100 content research and briefs, 100 optimization audits, and white-label content.
- Scaling: $1499 per month ($1199 if you pay annually). This increases the features to 10 user seats, 60 premium posts, 30 brand projects, 250 content briefs, and 250 optimization audits.
Step 2: Create a Project
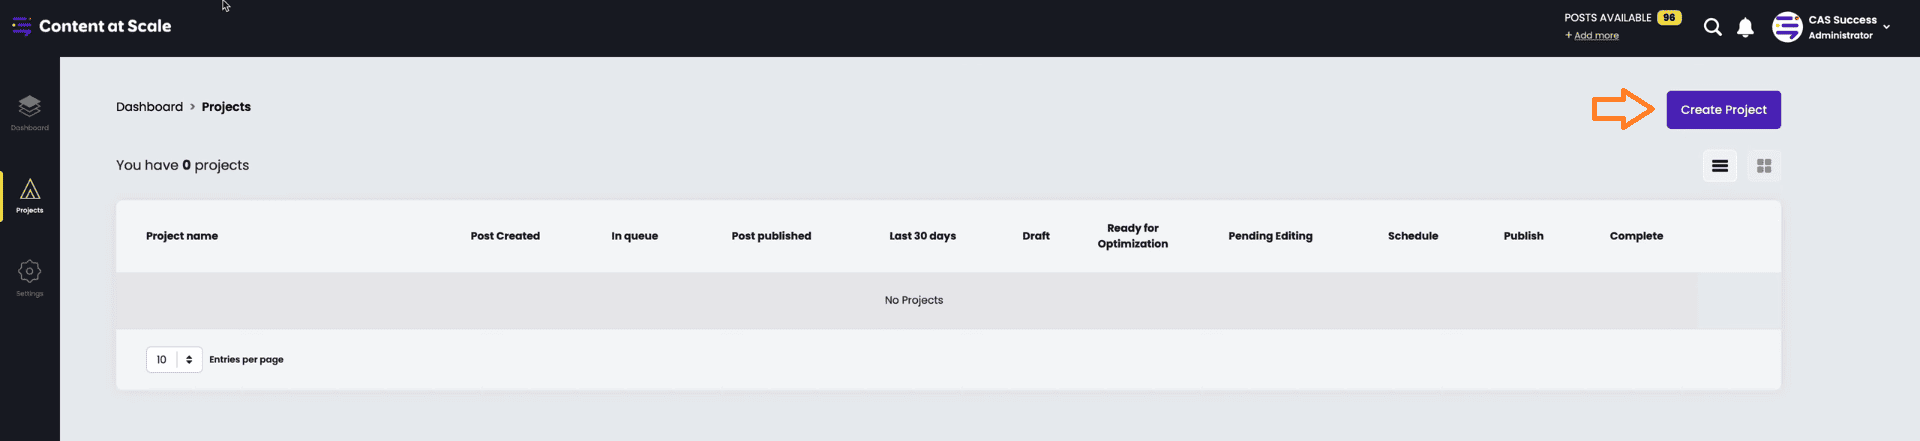
Now that you’ve subscribed to their service, it’s time to log into your account and start your project. To do this, go to your dashboard and press the “Create Project” button on the upper right side of your screen.
Afterward, you’ll be prompted to input several project information so the AI knows how to make the content better suited for your website. This includes:
- Project Name: Your website’s name.
- Project URL: Your website’s URL.
- Project Context: Explain what type of content you’re planning to make.
- Monthly Posts: Content volume.
- Target Audience: Who is your target demographic?
- Tone of Voice: A select box which includes tones like informative, authoritative, casual, etc. You can also input your own tone descriptor and add more than one tone.
- Word Count Range: What’s your target words per post.

Once you’ve hit “Create Project” again, you’ll be redirected to the project’s dashboard.
Step 3: Edit Project Settings
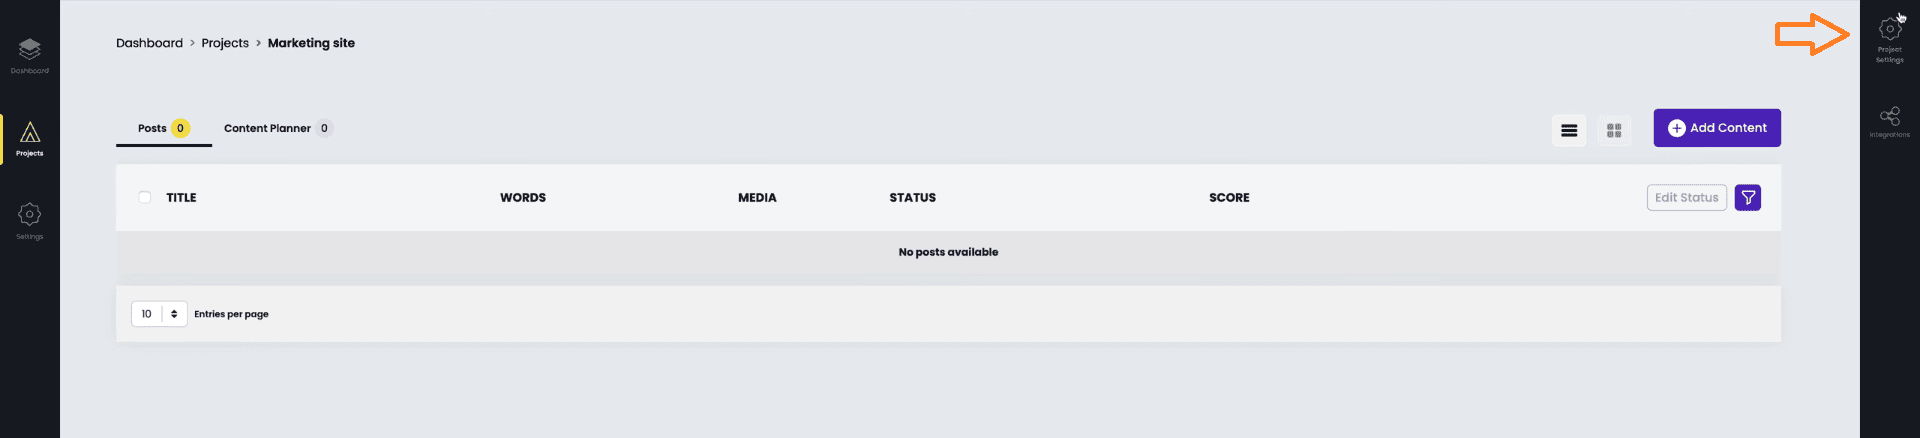
Before working on your content, Content at Scale highly recommends double-checking and configuring your project settings first. You can access these by hovering your cursor on the left side of the screen and clicking the gear icon that’s labeled “Project Settings.”
You can explore these by yourself, but these are the most important bits that you can edit:
- Favicon: An icon for your website or project.
- Takeaways: You can either enable or disable a takeaways section and choose the proper section header.
- Social Media: Links to your other social media accounts and websites.
- Colors: Allows you to edit your posts’ background and font colors.
- FAQs: Enables or disables the FAQs section.
- CTA: Lets you edit the intro and end CTA of every post in your project.
Step 4: Add Content
Now, return to your dashboard and select your project. Once inside, press the “Add Content” button in the upper right corner. Content at Scale gives you five information sources to choose from as a baseline for your project. These are:
- Keywords.
- YouTube Videos.
- Existing Blog Posts.
- Podcast Episodes (Note: You can only use Apple Podcasts)
- Custom Audio Files.
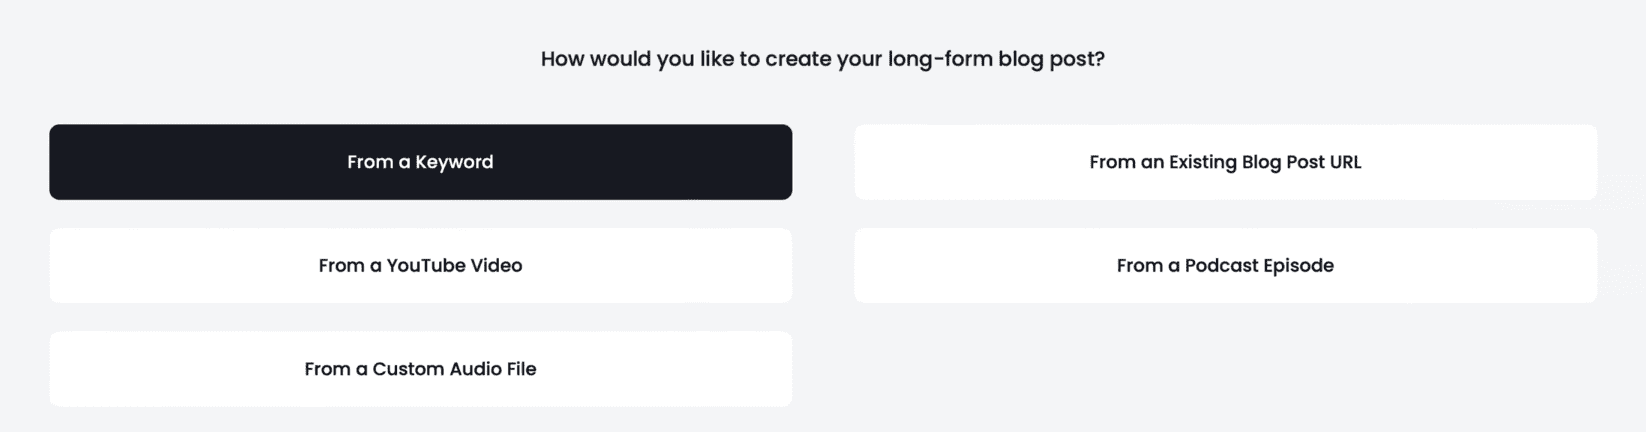
Say, for example, let’s choose keywords. Once you’ve selected that, you’ll be prompted to input keywords, select the optimal word count, and provide additional context. If you’re creating content using more than one keyword, make sure you upload a CSV file instead of writing them down or else Content at Scale won’t recognize them as separate keywords.
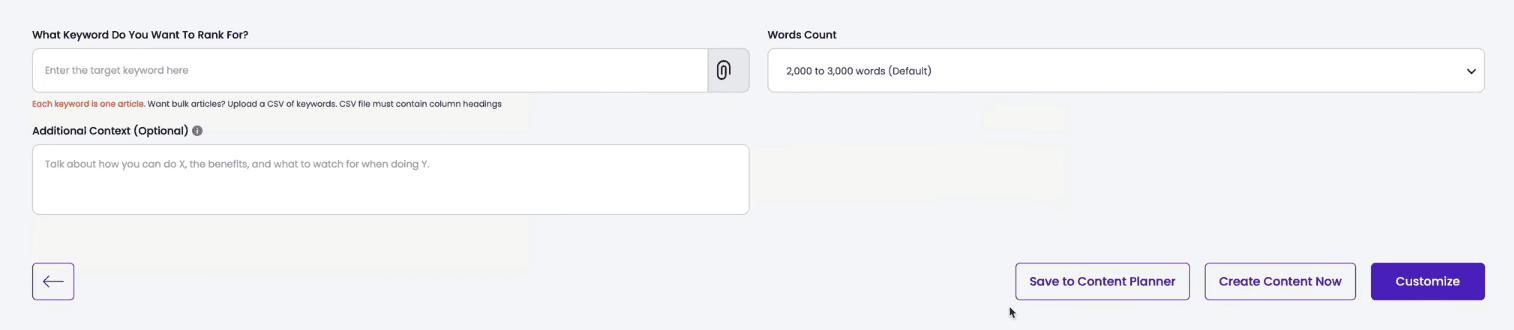
And now, you’ll have two options: Save to Content Planner or Create Content Now. If you need to make this single blog post ASAP, choosing the latter will process the information immediately, and you’ll have your content in just a few minutes. However, if you’re planning ahead, pick the former to save them to your dashboard.
Step 5: Process Your Content
Head back to your dashboard, and you should see a list of your pending blog posts in a list. All you need to do now is select the “Create XX [number of saved items in the content planner] Post/s” and Content at Scale will process each of them.
Step 6: Manually Optimize Your Content
At this point, you might think: “Wow, that’s really fast. I should post these posts immediately to my blog.”
You can, but I highly advise against it.
Remember: No matter how capable an AI model is, there’s no escaping hallucinations. You always need to go inside every post and edit them manually to optimize your content. Fortunately, Content at Scale provides every tool you need to ensure that this process is as painless as possible.
So, go to your dashboard again and press the Edit (Pencil Icon) button on the right side of any post. You should be redirected to an editor that looks like this:
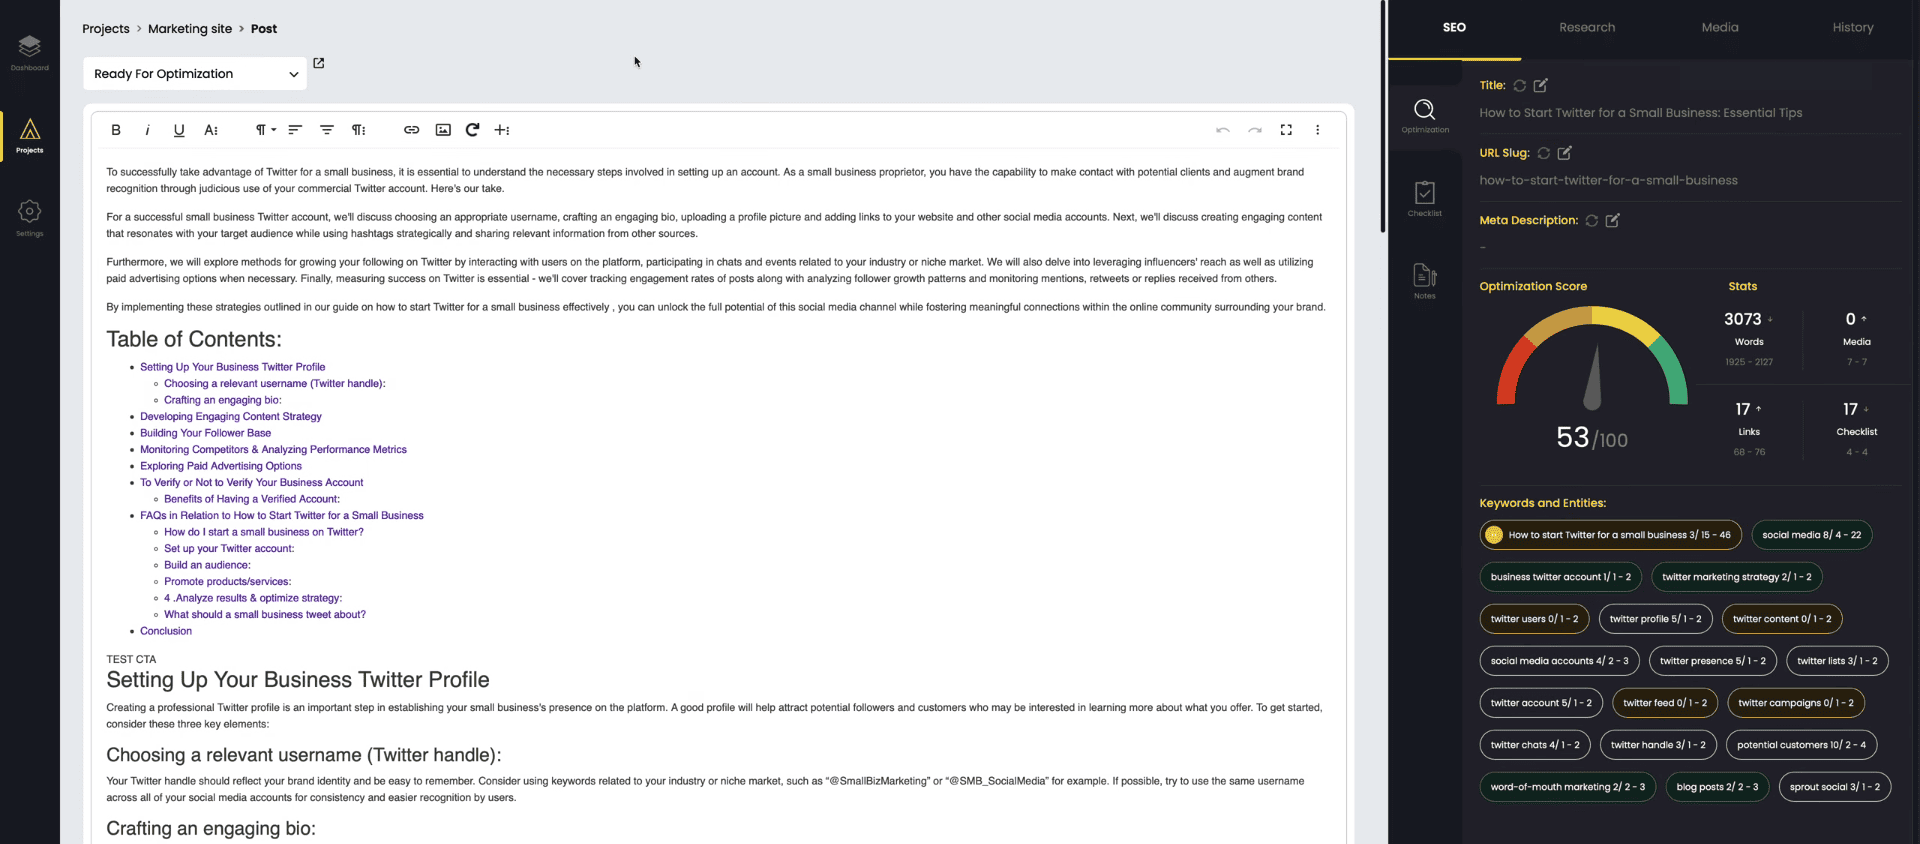
On the right side, you have access to four windows:
- SEO: Tells you the likelihood of your content ranking. It includes the common SEO elements like the URL slug and keywords, as well as an optimization score.
- Research: This window shows you the other ranking articles with similar topics. It also has a plagiarism and AI likelihood score.
- Media: Allows you to add or remove media content like videos, images, and Tweets.
- History: A timeline of changes to your article.
Under Research, if you pick plagiarism or AI likelihood, Content at Scale highlights the at-risk parts of your blog post. You can change these yourself manually or let AI do its magic by highlighting the text, pressing the right click button, and selecting the rewrite button on the toolbar.
Once you’re satisfied with the SEO score, you’re ready to publish the content.
Step 7: Publish Your Content
You have multiple options here. You can copy and paste the AI-generated content to your CMS, or export it to a .doc file or Google Docs. However, if you’re using WordPress, I highly suggest connecting your Content at Scale dashboard to WordPress.
To do this, head back to the Project Settings (revisit Step 3 if you can’t find it). Next, press Integrations, which should open up this window:

Select Download under WordPress, then install the downloaded file to your WordPress site as a plugin. Once you’re done, you’ll be asked for an API key, which you can access by pressing the Gear icon on the upper right side of the WordPress Plugin download.
And you’re done! If you’ve made it to this point, you’ve successfully created high-volume content with C@S.
What’s Next?
With Content at Scale, you don’t have to burn the midnight oil to create high-ranking articles for your blog, especially when you’re just starting. You can easily (and I mean that sincerely) create long-form content with little to no knowledge in SEO and blog writing. That’s the opportunity that C@S brings to the table.
However, I still recommend editing their articles to reflect who you are as a person. Put your own twist, rewrite some words, and share what you know. AI is a great assistant, but it hardly beats a person who’s passionate about what they’re doing.
And there you have it. You’ve completed the Content at Scale tutorial. If you want to learn more about this amazing software, you can read our full review here or any of our other articles.
Want to Learn Even More?
If you enjoyed this article, subscribe to our free newsletter where we share tips & tricks on how to use tech & AI to grow and optimize your business, career, and life.